

React Native Navigation (V2) by Wix — Getting Started. Part 1 — Creating end-to-end navigation & authentication flow with dummy authorization for use with any Auth provider.

Part 2 — Replacing dummy authentication with real authentication using Amazon Cognito. React Native. Développez une application mobile React Native. Native Directory. Persisting data in React Native. A basic understanding of JavaScript and familiarity with React/React Native will be required to understand how to use libraries and configure your React Native application to persist data.
When building React Native applications, there are several ways to persist data, with each having its own strong advantage. In this piece, we shall discuss the most popular ways to persist data in our React Native application. React Native lets you build mobile apps using only JavaScript. It uses the same design as React, which allows you to build the mobile UIs as components. Prerequisites. Easing Functions Cheat Sheet. Redux Tutorial by Dan Abramov on egghead.io. In this comprehensive tutorial, Dan Abramov - the creator of Redux - will teach you how to manage state in your React application with Redux.
State management is absolutely critical in providing users with a well-crafted experience with minimal bugs. It's also one of the hardest aspects of a modern front-end application to get right. Redux provides a solid, stable and mature solution to managing state in your React application. Through a handful of small, useful patterns, Redux can transform your application from a total mess of confusing and scattered state, into a delightfully organized, easy to understand modern JavaScript powerhouse.
The principles of Redux aren't new, but they are packaged and presented for you in an easy to use library that not only elevates your applications, but also improves your general understanding of building JavaScript UIs. In this course, Dan Abramov will show you the fundamentals of Redux, so that you can start using it to simplify your applications. Vhpoet/react-native-styling-cheat-sheet: Most of the React Native styling material in one page. Building a Mobile App in 10 Days with React Native – Austin Hale.
Note: This is an ongoing series of blog posts detailing how we made an iOS & Android mobile app in 10 days.
Feel free to follow me here or on Twitter to get updated when the other articles are published. The not quite finalized list: Building a Mobile App in 10 Days with React NativeBuilding a Node API with Express & Google Cloud SQLEasy React Native Authentication: Auth0React Native: Barcode Scanning & AutocompleteUsing AirBnB’s Lottie Animations with React NativeDeploying a React Native App to the App Store & Google Play Summary My friend Connor Maddox and I built this app together.
We *actually* built the app in 10 days. You can find the app here for iOS and here for Android. This is what the app looked like when we launched it at 10 days: Getting Started I wish we could say that we started formally and had Sketch designs of where we wanted to end up, but honestly the project sort of evolved from one night of messing around. Install React A. B. Folder Structure Screens. Usage - Package Control. Docs Basic Functionality Package Control is driven by the Command Palette.
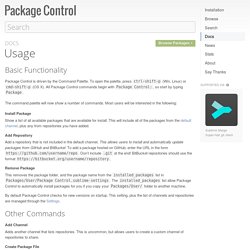
To open the palette, press ctrl+shift+p (Win, Linux) or cmd+shift+p (OS X). All Package Control commands begin with Package Control:, so start by typing Package. The command palette will now show a number of commands. Install Package Show a list of all available packages that are available for install. Add Repository Add a repository that is not included in the default channel. Remove Package This removes the package folder, and the package name from the installed_packages list in Packages/User/Package Control.sublime-settings. By default Package Control checks for new versions on startup. Other Commands Add Channel Adds another channel that lists repositories.
Create Package File For package developers. Setting Up Sublime Text 3 for ReactJS – Adrian Li. I recently upgraded to Sublime Text 3 and rather than copy over my old packages, I decided to start fresh.
I’m assuming that you already have the Package Control Package Manager installed and you know how to use it. If not, go here: JSX/Babel Syntax Highlighting First thing I did was install the Babel package. This is pretty straight forward, just look for Babel in the list of available packages and install it. AutoComplete ReactJS: Babel Snippets Then install the Babel Snippets package. AutoComplete JSX/HTML: Emmet Another frustrating part of writing code in React is the use of JSX or HTML-like tags. In order to get Emmet to work in JSX files, you’ll need to add the following to your Key Bindings — User file (you can access it under Preferences): A Linter: SublimeLinter A linter is helpful for many reasons, but mostly it’s good for reducing bugs and maintaining good practices in your code. The plugin you want is: SublimeLinter-contrib-eslint That’s It!