

How to Enable TRIM For All SSDs in OS X Mavericks. Ever since the release of OS X 10.6.8, Apple has been selectively enabling the TRIM command for SSDs in OS X.
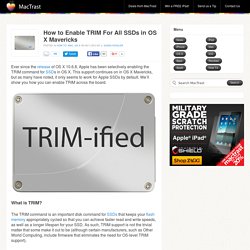
This support continues on in OS X Mavericks, but as many have noted, it only seems to work for Apple SSDs by default. We’ll show you how you can enable TRIM across the board. What is TRIM? Using OS X with an SSD plus HDD setup. Solid-state drives (SSDs) are becoming commonplace, and the first time you use one as a boot drive, you realise why – they’re faster than hard drives to a ridiculous degree.
The downside is they’re currently still very expensive compared to hard drives, such that only smaller capacities are currently affordable. Optimizing MacOS X Lion for SSD » Martin's Weekend Coding. Approx. 18 months back I bought my first SSD (120GB OCZ Vertex 2) for my (then) new iMac.
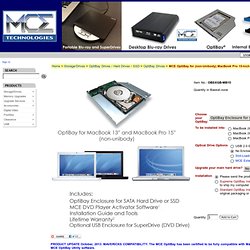
I am using it as the primary disk, while I kept the original 1TB HDD as the secondary one. So far I’ve been very happy with it and thanks to applying some tweaks the drive seems still healthy as new. Recently I bought another SSD – this time a 240GB Vertext 3 for my MacBook – that one I am using as the only drive in the laptop. And as I found out, with the new features in Lion, some additional tweaks need to be applied – especially in case of a laptop. MCE OptiBay for (non-Unibody) MacBook Pro 15-inch and (non-Unibody) MacBook 13-inch (White/Black): MCE Technologies Online Store. PRODUCT UPDATE October, 2013: MAVERICKS COMPATIBILITY: The MCE OptiBay has been certified to be fully compatible with Mac OS 10.9 (Mavericks) and earlier, and includes our, Mavericks compatible, MCE OptiBay Utility software.
Crucial M500 SSD. OWC SSD7E3G240 240GB Mercury Electra 3G SSD 2.5" For High Speed Personal Computing, Home/Office, Gaming, and Personal Photography.3 Year OWC SSD Limited Warranty When only the fastest and most reliable Solid State Drive on the market today will suffice for your data storage and backup, look no further than the OWC 240GB Mercury Electra 3G SSD.
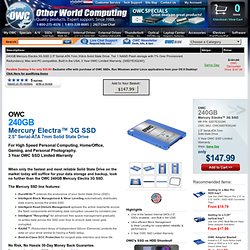
The Mercury SSD line features: DuraWrite™ extends the endurance of your Solid State Drive (SSD).Intelligent Block Management & Wear Leveling automatically distributes data evenly across the entire SSD.Intelligent Read Disturb Management spreads the active read/write across the flash components eliminating data corruption caused by constant use.Intelligent "Recycling" for advanced free space management gradually re-writes data across the SSD over time to ensure data never gets corrupted.RAISE™ (Redundant Array of Independent Silicon Elements) protects the data on your drive similar to having a RAID setup.Best-in-Class ECC Protection for longest data retention and drive life.
Highlights. How to Replace Your MacBook’s Optical Drive With an SSD. Just before the latest MacBook Pro updates were released, rumors swirled that the new models would adopt solid-state drives (SSD) in addition to hard disk drives (HDD) and drop internal optical DVD drives across the line.
That sounded perfect to me. As I dove for the couch cushions in search of spare change to add to my computer upgrade fund, I considered that I didn’t really need a new computer. What I wanted was SSD. But SSD tech is expensive — really expensive if I wanted the same amount of storage offered by my MacBook Pro’s HDD. Luckily, there’s a way to have both. Advantages of Paired Storage I love this setup. You can install an alternate system on the HDD. 9.5 mm PATA Optical Bay SATA Hard Drive Enclosure. My Problem Back in 2010, I bought a used 2008 Penryn Black Macbook as an upgrade from an old Mac Mini that i'd just sold.
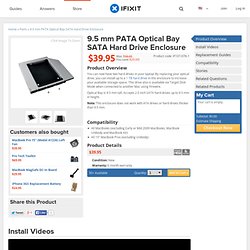
I didn't want to splurge on a new MBP because I was waiting for the MBP to be redesigned (which ended up being the 2012 Retina MBP) so I thought this computer would suit me fine. Well it survived being in Okinawa, Japan and a deployment to Afghanistan and back while still kicking. When I got back to the States, I decided to buy a ridiculous HP laptop to play a Star Wars MMO that no one plays now. It was the worst decision ever. My Fix I was a bit frustrated at first because the enclosure I got from Amazon ended up not having the PATA connector, which meant that it was useless. The Golden Age of Mac Upgrades is (Once Again) Upon Us.
Years ago we Mac users enjoyed the ability to spend a little bit of money to upgrade our admittedly-expensive computers.
It may seem like those days are behind us, but the reality is that we're truly in the thick of a new golden age of upgrades. Back in the day, sites like Low End Mac flourished with daily advice telling us which machines to upgrade and how to do so. TMO was born during this time, and what a great time it was. We upgraded our processors, we upgraded our RAM, we put in faster-spinning (and larger) hard drives; it was an awesome time to be a Mac user with an eye on easy-and-affordable upgrades. Then June 6, 2005 happened. Sure you could (and still can) run older versions of Mac OS X on those PowerPC Macs, but the concept of upgrading them suddenly lost its appeal because it was based on all the wrong architecture.