

Setting Global Environment Variables in CentOS. April 16, 2009 – 6:52 pm The easiest way to set an environment variable in CentOS is to use export as in $> export JAVA_HOME=/usr/java/jdk.1.5.0_12$> export PATH=$PATH:$JAVA_HOME However, variables set in such a manner are transient i.e. they will disappear the moment you exit the shell.

How to install Python 2.7 and Python 3.3 on CentOS 6. In this guide I will show you how to install Python 2.7 and 3.3 on CentOS 6.
The examples below are for Python 2.7.6 and Python 3.3.5, but the procedure is the same for any modern version of Python including the upcoming Python 3.4.0. I make regular updates to this guide to track new versions. Please see the end of the document for a changelog. CentOS 6 ships with Python 2.6.6 and several critical system utilities, for example yum, will break if the default Python interpreter is upgraded.
The trick is to install new versions of Python in /usr/local (or some other non-standard location) so that they can live side-by-side with the system version. This guide should work for all versions of CentOS 6, but I have only verified it on CentOS 6.5 64 bit. Execute all the commands below as root either by logging in as root or by using sudo. Preparations – install prerequisites In order to compile Python you must first install the development tools and a few extra libs. Things to consider Unicode. Install Apache2, PHP5 And MySQL Support On CentOS 6.5 (LAMP)
Version 1.0 Authors: Till Brehm <t [dot] brehm [at] howtoforge [dot] com>, Falko Timme <ft [at] falkotimme [dot] com> Follow Howtoforge on TwitterLast edited 04/03/2014 There is a new version of this tutorial available for CentOS 7.

LAMP is short for Linux, Apache, MySQL, PHP. This tutorial shows how you can install an Apache2 webserver on a CentOS 6.4 server with PHP5 support (mod_php) and MySQL support. I do not issue any guarantee that this will work for you! 1 Preliminary Note In this tutorial I use the hostname server1.example.com with the IP address 192.168.0.100. 2 Installing MySQL 5 To install MySQL, we do this: yum -y install mysql mysql-server Then we create the system startup links for MySQL (so that MySQL starts automatically whenever the system boots) and start the MySQL server: chkconfig --levels 235 mysqld on/etc/init.d/mysqld start Set passwords for the MySQL root account: mysql_secure_installation [root@server1 ~]# mysql_secure_installation Set root password?
Cleaning up... 8 Links. Installing RHEL EPEL Repo on Centos 5.x or 6.x. The following article will describe how to configure a CentOS 5.x-based or Centos 6.x-based system to use Fedora Epel repos and third party remi package repos.
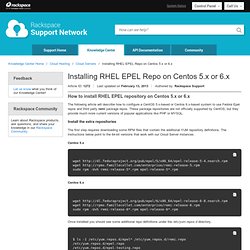
These package repositories are not officially supported by CentOS, but they provide much more current versions of popular applications like PHP or MYSQL. Install the extra repositories. Installer et configurer un relai SMTP sous CentOS 7 - Documentation - Wiki - Linuxtricks. Cet article explique, comment en 5 minutes, il est possible de monter un serveur relais SMTP.
Ainsi, les applications installées sur ce serveur pourront envoyer des mails en les relayant vers le SMTP du fournisseur d'accès. Pour cela, il faut installer postfix (est l'agent de transfert de courriel appelé parfois MTA) mais aussi mailx (heirloom-mailx) qui fournit la commande d'envoi de mail (pour tester) Code BASH : yum install postfix mailx On active ensuite le service postfix au démarrage : How To Install Postfix on CentOS 6.
About Postfix Postfix is free open source Mail Transfer Agent which works to route and deliver email.
Cyrus is a server that helps organize the mail itself. Step One —Install Postfix and Cyrus The first thing to do is install postfix and Cyrus on your virtual private server and the easiest way to do this is through the yum installer. sudo yum install postfix. How To Upgrade CentOS 6 to CentOS 7 - Vultr.com. At the time of writing, CentOS 7 is the latest release of the CentOS operating system.

This guide explains how to upgrade a server running CentOS 6 to CentOS 7. Step 1: Creating a backup Before continuing with the upgrade process, please have a backup. Having a backup is very important because if anything goes wrong, you can restore from it and have your server working again. Vultr is able to provide both snapshots and backups. You can enable backups in one of two ways. Step 2: Installing prerequisites First, add the yum repository for developer software by creating the file /etc/yum.repos.d/upgrade.repo. [upgrade] name=upgrade baseurl= enabled=1 gpgcheck=0 You can now install the required packages, preupgrade-assistant-contents, redhat-upgrade-too, and preupgrade-assistant: Update: Some readers have pointed out that openscap must be removed/re-installed before this will work.