

Ana
DIY: Paint Chip Ombre Earrings. I like candy corn - but I would not dare wear candy corn-colored earrings.
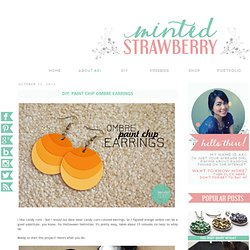
So I figured orange ombre can be a good substitute, you know, for Halloween festivities. It's pretty easy, takes about 15 minutes (or less) to whip up. Ready to start this project? Here's what you do: No need to explain, right? DIY Paperclip Earrings - Morning Creativity. Make earrings out of paperclips easy!
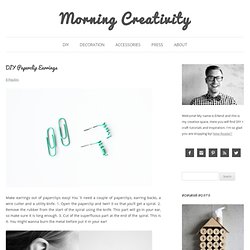
You´ll need a couple of paperclips, earring backs, a wire cutter and a utility knife. 1. Open the paperclip and twirl it so that you’ll get a spiral. 2. Remove the rubber from the start of the spiral using the knife. This part will go in your ear, so make sure it is long enough. 3. Cut of the superfluous part at the end of the spiral. Gold as Gold Faux Metal Earrings. We're loving all things gold and glittery to kick off the new year!

Here's a super easy way to get the look of hammered/forged metal using the Tulip Fashion Glitter Holographic Transfer Sheets and vinyl fabric compliments of our fab in-house designer Lauri Eaton. There's actually 2 pieces that are a shiny silver and gold metallic that we will be using for this project inside the pack! You only need these sheets plus a few basic jewelrymaking supplies to create these stunners. What you'll need for this project: – hoop earring components Open up your package and pull out your shimmer sheet in your choice of silver or gold. Heat dry iron to suitable setting for fabric, iron design in place, pressing firmly for 40 seconds. Cut off excess vinyl around the iron-on sheet. Cut out a small rectangle of the vinyl approximately 2 inches long by 3/18th of an inch.
Glitter Earring Posts. Doesn't everything look so much better covered in glitter?
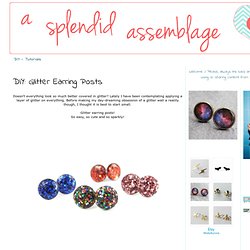
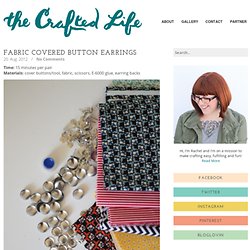
Lately I have been contemplating applying a layer of glitter on everything. Before making my day-dreaming obsession of a glitter wall a reality though, I thought it is best to start small. Glitter earring posts! So easy, so cute and so sparkly! Fabric Covered Button Earrings - 52 Weeks Project. Time: 15 minutes per pair Materials: cover buttons/tool, fabric, scissors, E-6000 glue, earring backs.
Paperclip Earrings « Crafting and Cooking. Autumn’s on the way. Tiny Whisk Earrings and Pendant. Whisk shaped jewelry is the perfect handmade gift for someone who loves to cook or bake.

This project is very easy and requires minimal jewelry making skills! Googly eye earrings. The first I myself saw of it was from Amanda the Great, who started sticking them amusingly onto Magic the Gathering playing cards for her Tumblr, Magic Cards With Googly Eyes.

Shortly after that, while cruising the internet for craft ideas and such, I encountered several blogs and online groups devoted to eyebombing. Then I saw Anne Wheaton and Bonnie Burton tweeting their own eyebombing adventures, with the now-widespread hashtag #vandaleyes. How to Use Sealant With Your Paper Quilling. DIY Button Earrings - Morning Creativity. Making button earrings is very easy!
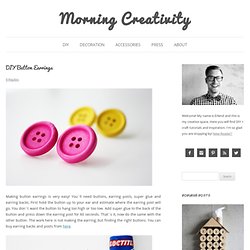
You´ll need buttons, earring posts, super glue and earring backs. First hold the button up to your ear and estimate where the earring post will go. You don´t want the button to hang too high or too low. Add super glue to the back of the button and press down the earring post for 60 seconds. That´s it, now do the same with the other button. Lovely Wire Knot Ring Tutorial. You can make this lovely ring (or a version of this design) yourself, using just some basic tools, wire and a lip balm! Yes, in this tutorial I am going to demonstrate that just basic beginner tools and a wire from Michael’s can go a long way! Beyond Beyond ™ – UK Wedding Blog // International Wedding Blog // Hello Lovers, just to reiterate I’ve closed comments on this for the two reasons: 1.
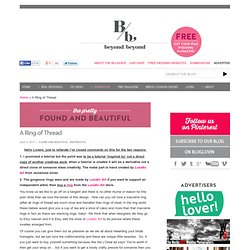
I promised a tutorial but the point was to be a tutorial ‘inspired by’ not a direct copy of another creatives work, when a tutorial is created it will be a derivative not a direct clone of someone elses creativity. The metal part is hand created by Lunatic Art from reclaimed silver. 2. The gorgeous rings were and are made by Lunatic Art if you want to support an independent artist, then buy a ring from the Lunatic Art store. You know us we like to go off on a tangent and there is no other rhyme or reason for this post other than we love the bones of this design. Of course you can give them out as pressies as we are all about rewarding your bridal homegirls, but we just love the craftsmanship and these are unique little beauties. About the author I'm the big kahuna with the whole shebang.
How to make a Wire Heart Finger Ring. Howdy!
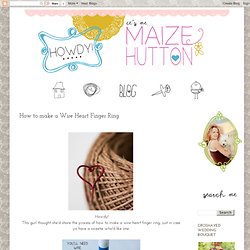
This gurl thought she'd share the process of how to make a wire heart finger ring, just in case ya have a sweetie who'd like one. You'll need wire (I used 20 gauge), round nose and cutting pliers and a glue stick or lip balm in order to shape the ring to fit your finger. You can always use your finger too! It may take you a few times to master this, so I suggest using scrap wire if you don't want to use up your red colored wire or precious metal wire. Cut a piece of wire apprx. 5 inches. Shape the wire on the glue stick or lip balm. ☩DIY☩ Pearl Ear Hook/Ear Wrap. Peacock Feather Earrings. I posted some pictures of peacock feather earrings I made a while back. I thought I would do a tutorial for how to make them so if any of you are up for a fun summer jewelry project.
I saw these a while back at Anthropologie for 40.00 or so. They only cost a couple of dollars to make which is more in my price range. Materials Needed: DIY Tassel Earrings. Sometimes all you need is one outstanding accessory. These DIY Tassel Earrings are bold enough to be worn alone, no necklace required. They have a little bit of sparkle and a lot of tassel to give a minimal outfit a bit of boho chic. These DIY Tassel Earrings are bold enough to be worn alone, no necklace required. 2 Upholstery tassels5 inches of rhinestone trim2 Earring hooks2 Jump ringsAileens Jewel-it glueNeedle and ThreadSharpie Step 1 Measure your rhinestone trim by wrapping it around the top of your tassels and cut 2 pieces. Step 2 Take your tassels and your Aileens Jewel-it glue and put the glue all the way around the top of the tassel, where you will be attaching your rhinestone trim.
Step 3 Place your rhinestone trim around the top of your tassels pressing it into the glue and hold it in place with your fingers. Button Rings DIY. My supplies of buttons just doesn't seem to get any smaller. After making the Bow button shirt, I still had loads left. Necklace + Bracelet Projects. Rhinestone Friendship Bracelet. Moño de bolitas. Boutique minimalist. Hello lovelies, how are you doing? We are racing towards the weekend, aren’t we? Metal Necklace de triángulos. Try This: Leather + Cut Metal Necklace. ☩DIY☩ Ten Minute Earrings.