

Digital Tutorials. How a recording-studio mishap shaped '80s music. Make It! - POE Chaos Orb. How To Make A Blockbuster Movie Trailer. Guide to Image Sharpening. Image sharpening is a powerful tool for emphasizing texture and drawing viewer focus.
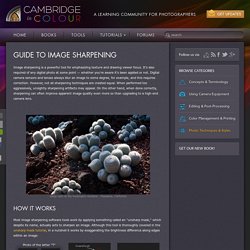
It's also required of any digital photo at some point — whether you're aware it's been applied or not. Digital camera sensors and lenses always blur an image to some degree, for example, and this requires correction. However, not all sharpening techniques are created equal. When performed too aggressively, unsightly sharpening artifacts may appear. On the other hand, when done correctly, sharpening can often improve apparent image quality even more so than upgrading to a high-end camera lens. sharp cacti at the Huntington Gardens - Pasadena, California Most image sharpening software tools work by applying something called an "unsharp mask," which despite its name, actually acts to sharpen an image.
Photo of the letter "T" Original. Best Camera Trick Ever! Camera Exposure: Aperture, ISO & Shutter Speed. A photograph's exposure determines how light or dark an image will appear when it's been captured by your camera.
Believe it or not, this is determined by just three camera settings: aperture, ISO and shutter speed (the "exposure triangle"). Mastering their use is an essential part of developing an intuition for photography. Achieving the correct exposure is a lot like collecting rain in a bucket. While the rate of rainfall is uncontrollable, three factors remain under your control: the bucket's width, the duration you leave it in the rain, and the quantity of rain you want to collect.
You just need to ensure you don't collect too little ("underexposed"), but that you also don't collect too much ("overexposed"). In photography, the exposure settings of aperture, shutter speed and ISO speed are analogous to the width, time and quantity discussed above. Goxel. An introduction to Negative Drawing with Mike Sibley. The tools you will require are simple: Paper – preferably plate finish or at least smoothPencils – 6B, 2B, HB, H, and 2H (I use 2mm clutch pencils but any will do)Kneaded eraser or Blu-Tack (preferably the latter) Negative Drawing I often hear the phrases ‘negative drawing’ and ‘negative space’ used as if they are synonymous.
They aren’t. Positive and Negative Drawings - devicemanlessons. Positive Drawing: Using sumi ink and a brush draw the positive parts of an object.
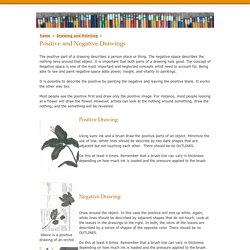
MInimize the use of line. White lines should be describe by two dark shapes that are adjacent but not touching each other. There should be no OUTLINES. Do this at least 4 times. Negative Drawing: Draw around the object. HOW TO BE A JOURNALIST AND GET THE BEST COVFEFE. How 3D Printing Is Revolutionizing Stop Motion Animation. 1 Year of Research. Making The Great Deku Tree. What's The Point of Clapperboards? Long Exposure Photography. Long exposure photography is one of the coolest ways of taking pictures.
It requires a longer shutter speed, anywhere from 1/2 sec up to several minutes or even a hour. The ability to take long exposures requires a user to use a tripod for optimum results (of course, some people prefer the hand shake look). The use of a tripod is essential because the inability for the human hand to stay still is truly remarkable. How to Create Art with Microsoft Excel. You don’t have to very creative for drawin paintings in Excel – it just requires patience and some time.

For this example, we’ll paint a Google Logo in Microsoft Excel by tracing an existing JPG image. Here’s how the final artwork will look like inside Excel.
Photoshop tutorials. Block Posters - for browser. Papercraft 3D Self Portrait. DIY Black Light. 3D font cutouts. InkScape - graphics designer. Inkscape is an open-source vector graphics editor similar to Adobe Illustrator, Corel Draw, Freehand, or Xara X.
What sets Inkscape apart is its use of Scalable Vector Graphics (SVG), an open XML-based W3C standard, as the native format. For Designers of all Kinds The design process may begin by doodles on a napkin, a sketched mindmap, a photo of a memorable object, or a mockup in software which really wouldn't work to complete the project. Inkscape can take you from this stage to a final, professional-grade design format which is ready for publication on the web or in physical form. If you are new to the process of creating vector graphics it may feel different, but you will quickly be pleased by the flexibility, and power Inkscape offers.
There are many learning resources available, take advantage of them! Professional Publishing. Take Double Exposures With a 35mm Film SLR. Image / Photo transfer. DIY Rainbow Coloring Pen. DIY Scratch-Off Polaroid Cards. Sugar Bowls. How to make noise. How To Ebonize Wood Fast. Water Marble Tutorial. Supplies: orange stick or... Water Marble Tutorial.

Supplies: orange stick or toothpick, shot glass or cup (the smaller the circumference, the less polish you end up wasting), room temp. water, nail polish, tape (optional, but it helps with the clean up) I like to begin by prepping my nails with base coat and one coat of polish. Here I used China Glaze Innocence for a nice neutral base. Steps: 1. 2. 3. 4. Would YOU drink this? DIY Skittles Science Experiment For Kids. The Merricam - No-Cost "Steadicam" DIY. DarkTable - photography tool. Colourising black & white photos.
LMMS - music composer. MilkyTracker - old-style composer. MilkyTracker is an open source, multi-platform music application for creating .MOD and .XM module files.
It attempts to recreate the module replay and user experience of the popular DOS program Fasttracker II, with special playback modes available for improved Amiga ProTracker 2/3 compatibility. MilkyTracker’s key features: A couple of facts: MilkyTracker is not based on any common module replay. Its core MilkyPlay has been in development since the mid-90s, originally as a Digitrakker .MDL player. Guide to Image Sharpening. GIMP - image manipulator. Digital Juice - buy / sell effects. Hex Color Codes - for browser. Get Colors from Image - for browser.
With the magic of HTML5 you can get colors from any image with this simple online tool.
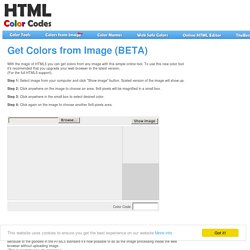
To use this new color tool it's recomended that you upgrade your web browser to the latest version. (For the full HTML5 support). Step 1: Select image from your computer and click "Show image" button. Scaled version of the image will show up. Step 2: Click anywhere on the image to choose an area. 9x9 pixels will be magnified in a small box. Step 3: Click anywhere in the small box to select desired color.
Step 4: Click again on the image to choose another 9x9 pixels area.