
The Hobo Sack. Whether you’re on the road or hanging at home, every hobo needs a bag for his (or her) treasures.

So load it up, hit the road, and sit back on the tracks to enjoy a break. The hobo sack is one of the easiest things to make. It’s a great project for the beginner sewer and even the advanced! So here’s what we’re making: Easy? NOTE: Info for adding a Liner and/or a Ruffle to your bag is at the end of the tutorial.Skill Level: BeginnerNeeded: * 1/2 yard or less of Cotton (light-weight, twill, corduroy, seer sucker, etc. Here is the pattern. Just lay it on your fabric and cut two: Decide what you’d like to use for straps. A Tutorial - How to Draft a Pattern and Make a Zippered Purse with a Flat Bottom. Drago[knit]fly: Box Bag Tutorial. A couple of you inquired whether I made this pouch based on a tutorial or pattern and if not, if I could provide one.
Ask and you shall receive! I've learned so much from tutorials out on the internets, I'm happy I can give back for once. Bear with me, though. This is my first tutorial and creating one is much tougher than I imagined. I give anyone who's created a tutorial tons of credit! Because of the versatility of this pattern, my instructions can be used more as guidelines. Note: This pattern can be tweaked to create a bag of any dimension you want. You'll need:1/4 yard exterior fabric1/4 yard lining fabric (I used blue for Project Spectrum)1/4 yard interfacing (weight of your choice.
Cut a 16" x 12" (updated dimensions) rectangle of exterior fabric, lining, and interfacing. 2. Remove pins, turn pouch rightside out, and topstitch along zipper. This will be somewhat awkward and you will need to stop midway through sewing to open zipper. Turn pouch to right side. 4. Inside out view 5. Javajem's: Wristlet Tutorial. Happy Leap Day everyone!

In honor of this day - I decided to post another sewing tutorial. This time it's for my Wristlet pattern. Remember these? Well, now you can make one too! Materials: - Less than a quarter yard of linen, - Scraps of quilting cotton in two patterns (one for the lining and one for the outside accent fabric) - Less than a quarter yard of medium weight fusible interfacing - Thread to match - Cutting mat, ruler and rotary cutter - Zipper (7 inches or larger) - Pins and other sewing tools Directions: Step 1: Select and cut your fabric. Step 2: Iron the interfacing to the inside lining pieces. Step 3: Cut one of the inside lining pieces, the outside accent fabric and one of the linen pieces to create the opening for the zipper.
Step 4: Pin fabrics to zipper. Starting with the pieces that will end up below the zipper, pin the inside lining and outside accent fabric pieces to zipper. A Tutorial AND a Giveaway!!!! Let me just say that writing up a sewing tutorial is quite the process!
I've been at it since last night. This is my first time so maybe it gets easier. It's not formatted exactly as I would like but decided to leave it as is for the time being. Please let me know if something doesn't make sense or if you have suggestions as to how I can improve the tutorial. Pmthreads - Simple Coin Pouch Tutorial. I wanted to get together a few photos of items made with my fabrics, and coin pouches seemed like the perfect way to use up those little scraps I was starting to accumulate.
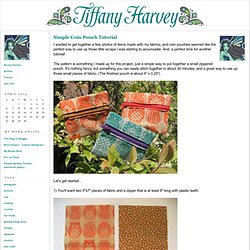
And, a perfect time for another tutorial! The pattern is something I made up for this project, just a simple way to put together a small zippered pouch. It's nothing fancy, but something you can easily stitch together in about 30 minutes, and a great way to use up those small pieces of fabric. (The finished pouch is about 4" x 3.25") Let's get started... 1) You'll want two 5"x7" pieces of fabric and a zipper that is at least 9" long with plastic teeth. 2) Sew the two pieces of fabric together, with right sides facing one another. 3) Flip the fabric right-side-out and use a chopstick or pencil to poke the corners outward. 4) Pin one of the narrow ends of the fabric to the zipper, with the fabric you are using for the outside of the pouch facing the front. 5) Wrap the fabric around the zipper and line up the other end.
Perfect Box Pouch Tutorial « Make it Modern. How insanely fabulous is this pouch?

I can’t decide if I love it so much because a) it is made from glittery elephant fabric, b) of it’s small but perfectly proportioned size, c) it holds my on the go quilting supplies or d) all of the above. If you’d like to make your own see how below. You will need: 2 pieces of exterior fabric measuring 8 inches by 6 inches. (The longer side will be the top of your pouch, keep this in mind when cutting directional fabric)2 pieces of interior fabric measuring 8 inches by 6 inches2 pieces of mid-weight woven non-fusible interfacing (This helps add body to your bag, because without it it wouldn’t be very “boxy””1 12 inch zipperCoordinating thread (this will be visible on the outside of the bag) Things that will come in handy: rotary cuttercutting matshearscraft scissorsclear ruler.