

How to Create Parabolic Curves Using Straight Lines. How to Create Parabolic Curves Using Straight Lines Curve stitching is a form of string art where smooth curves are created through the use of straight lines.
It is taught in many Junior High and High School art classes. I discovered it when my math students started showing me the geometric art they had created. The process of curve stitching can be done with a piece of paper and a ruler, or anything you can make a straight line with. It is common to do these with strings as the lines. Here's an interesting one of an Isometric Cube by Lionel Deimel (who has more awesome designs on his curve stitching page). Here's one by Eli Hess using ropes and trees. One of the easiest curves to create using curve stitching is a parabola. Materials and Tools PaperRulerPencil or Pen Create a Parabola from Lines and a Right Angle Draw a right angle and mark two lines of equal length at equal intervals. Now connect the 2nd farthest mark to the 2nd closest mark. Miss Haberdash: October 2011.
On a recent visit to the Lost and Found Market in Collingwood Miss Haberdash was much amused by the 70s string art on display.
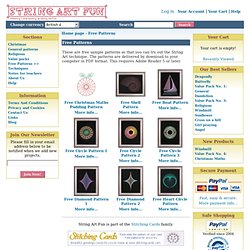
On second thoughts, the geometry and clean abstract shapes looked so right now. Intrigued I went home to Wikipedia and discovered that string art has its origins in the curve stitch work of Mary Everest Boole (1832-1916). At the end of the 19th century she introduced string art to children as a means of making mathematical ideas more accessible. At the same time I came accross the work of Jane Blease a Manchester designer who uses wood and string to great effect in her lampshades, pictures and jewellery. Once you start looking string art is everywhere, from contemporary furniture to architecture and even installations created for dance parties, where neon string glows fluorescent in the dark, spectacular. Free Patterns at String Art Fun. String Art Fun is part of the Stitching Cards family. 10% of all sales from this web site will be donated to EveryChild, the international children's charity. 10% of your purchase payment will help children like: Madhuri in India.
Inna in Ukraine. Pagna in Cambodia. Click here for EveryChild information. String Art Fun, PO Box 795 St. Our email address: info@stringartfun.com Website Copyright © 2007 - 2014 String Art Fun. Stitches for prick and stitch cards. When you are sewing the design on your paper embroidery greetings card the instructions may call for backstitch and stem stitch.
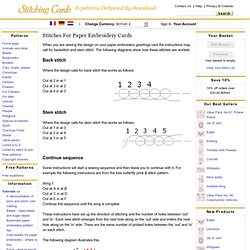
The following diagrams show how these stitches are worked. Back stitch Where the design calls for back stitch this works as follows: Out at 2 in at 1Out at 3 in at 2Out at 4 in at 3 Stem stitch Where the design calls for stem stitch this works as follows: Making Maths: Curve Stitching. Challenge Level: If you think that sewing isn't for you, think again.
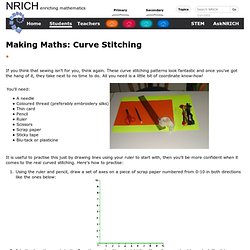
These curve stitching patterns look fantastic and once you've got the hang of it, they take next to no time to do. All you need is a little bit of coordinate know-how! It is useful to practise this just by drawing lines using your ruler to start with, then you'll be more confident when it comes to the real curved stitching. Here's how to practise: Using the ruler and pencil, draw a set of axes on a piece of scrap paper numbered from 0-10 in both directions like the ones below: Join the 1 on the x-axis to the 9 on the y-axis with a straight line. Now that you've had a go on paper, you're ready to stitch! There are lots of variations on this curve stitching idea. Use binca (which you can buy from craft shops or on the web) Use your curved stitching patterns as part of a larger pictureTry overlapping several curves to make interesting shapes. Curve stitching templates.
Curve stitching was created by Mary Boole as a method to teach children visually how angles and spaces worked in geometry.
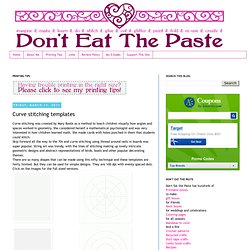
She considered herself a mathematical psychologist and was very interested in how children learned math. She made cards with holes punched in them that students could stitch. Skip forward all the way to the 70s and curve stitching using thread around nails in boards was super popular. String art was trendy, with the lines of stitching making up lovely intricate geometric designs and abstract representations of birds, boats and other popular decorating themes. There are so many shapes that can be made using this nifty technique and these templates are fairly limited.
Using these is fairly easy. Using the square grids, you can do corners, diamonds and other shapes on a right angle. As you can see, with this one the inner star is spaced so it's every 4th dot marked and the lines are made so they intersect fairly close to the middle to make a star shape.