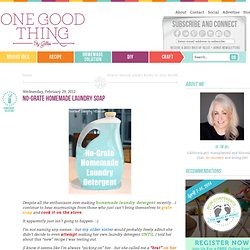

Laundry Soap. Despite all the enthusiasm over making homemade laundry detergent recently…I continue to hear murmurings from those who just can’t bring themselves to grate soap and cook it on the stove.

It apparently just isn’t going to happen. :-) I’m not naming any names…but my older sister would probably freely admit she didn’t decide to even attempt making her own laundry detergent UNTIL I told her about this “new” recipe I was testing out. (I know it seems like I’m always “picking on” her…but she called me a “brat” on her blog recently…so she pretty much deserves it. lol).
Once again I have to credit the incredible readers of this blog for my inspiration. Tiffanie posted this on February 4th….A close friend of mine has been making laundry soap like this one for years, until just recently she found an easier one to make and passed it on to us. 3 Tablespoons Borax3 Tablespoons Washing Soda2 Tablespoons Dawn Dish soap Put these ingredients in a one gallon jug. February 4, 2012 8:59 PM. Suspended Gardens. I just might attempt to create this.

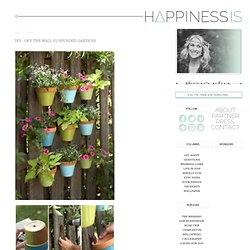
Looks simple enough, right? A couple of 9" terra-cotta pots, spray paint, flower pot hangers and some wood screws...boom, a suspended garden. Isn't it a lovely look? P.S. If you fear DIY, you can always buy off the wall planters instead. {Images via DIY Ideas} Woodgrain Rug. Hi y'all. i am super excited to share this fun little project with you. it's a do-it-yourself faux bois rug. i purchased all the supplies for this project for under $10 (YAY!)

And it took me about 2 hours to complete. this is one of those ideas that was sitting in my journal for WELL over a year, glad to finally make it happen! What you'll need: a tan rug (any plain & simple rug is cool. i purchased mine for $5 at Target.), 3 pieces of poster board, brown spray paint, a warm (& not too windy) afternoon. step 1: draw a woodgrain pattern on one piece of poster board (although, if i were doing this over i would use contact paper instead of poster board for better adhesion!). Drawing a woodgrain pattern is surprisingly easy, the trick is the include lots of 'knots' in your wood so that it doesn't look like zebra stripes. next up, spray painting. take your time and get a nice even coat all over the rug. examine it closely and make sure you don't have spots before you pull your mask up.
Vintage Shelves. Sprout a Couch. Do-it-yourself decorating allows you to customize your home, apartment, condo, or room with DIY accents that transform your space on a budget without completing a full-scale remodel.

Whether you're a beginner or an expert, we guide you with instructions, tutorials, and step-by-step photos for indoor and outdoor projects and room makeovers. We have tips, techniques, and tools to get you started on paint projects, the easiest way to freshen up a space or decor item. But it doesn't stop there! We'll demonstrate how to make over furniture with paint, reupholster cushions with fabric, update garage sale items with wallet-friendly crafts tutorials using fabric and paper, and create DIY wall art for any space using a variety of materials and techniques. If you want to tackle bigger DIY projects, rethink your kitchen with remodeling ideas you can complete yourself (such as tiling a backsplash and creating a kitchen island) and browse our best bathroom makeovers. Chalkboard Paint. We love using chalkboards as backdrops for displays and parties (like this one here!).

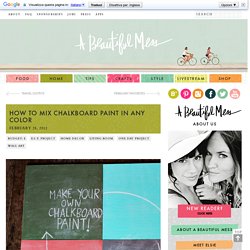
So we were super excited to learn that you can create your own custom colors-and it's really easy! We first learned how from Martha Stewart whose tutorial you can read here. She recommends that you use latex paint, but we tried it out with acrylic paints with much success. Here's how you too can create your own chalkboard paint... Supplies: 1/2 cup acrylic paint (choose any color you like, or mix colors together to make the perfect shade!) 1. 2. Once your chalkboard has fully dried be sure to slate the surface before using it for the first time. Have fun creating any color combination you like!! Tree Stump Coaster. This next super cute D.I.Y. was Kinsey's idea!

We stitched them up together on a sunny afternoon. If you choose to hand stitch each coaster takes about an hour. Machine stitching would be much quicker, and both versions are cute-as-can-be! Here's how we made this woodsy coaster set... 1. This project is a little time consuming, but also incredibly relaxing to create! Check out our b-e-a-utiful mess in my living room making D.I.Y. projects together!