

94279b8e14ddb0bb7154c12bfbf12414.jpg (JPEG Image, 720 × 960 pixels) 31aa15314772e3dadb066d9f0e186058.jpg (JPEG Image, 2560 × 1920 pixels) - Scaled (40%) Working with Foamboard. In the last tutorial I covered some basic foamboard principles.

Namely how to mark and cut your board. As a quick addition to that, there are a number of potentially useful tools which can help you to cut clean straight lines and avoid mis-angled cuts... I have not used these tools before so will be doing some more research before providing you with more information. In the mean time though, I thought that it would be good for me to talk a little bit about ways that you can join pieces of foamboard. If you're familiar with woodwork joinery techniques then you'll probably spot some similarities here! Gluing Whilst it is possible to create cuts to allow boards to be joined without needing glue, Foamboard (AKA Foam core) can normally be easily glued together. Superglues can actually melt away the foam and so should be avoided. So what's the answer? Craft Caddy. Foamcore Boxes. By admin, on January 11th, 2012 If you’re joining us from Julie Fei-Fan Balzer’s Organization Week…Welcome to Art Camp for Women!
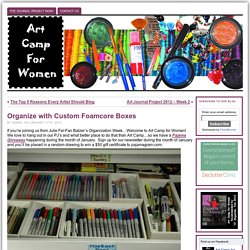
We love to hang out in our PJ’s and what better place to do that than Art Camp…so we have a Pajama Giveaway happening during the month of January. Sign up for our newsletter during the month of January and you’ll be placed in a random drawing to win a $50 gift certificate to pajamagram.com. Read on to learn how to make your very own foamcore box (designed by Lorri F) so you can start organizing your stuff! Custom sized boxes for beads, thread and markers These nifty custom made boxes are super easy to make, sturdy and inexpensive! Cutting mat, white duct tape, Foam Board, kraft knife, extra-fine black Sharpie, ruler Supplies Needed: Markers snuggled in their customized foamcore box Let’s start by making a shallow box to hold Sharpie Markers. Finished height of box sides = 2″ Finished short side = 6 1/2″ Finished long side = 10″ Now, onto the fun part…let’s make a box!
Copic foam. After my recent post showing the Copic Storage Unit that I made using Foam Core Board, I had several requests for the instructions and this is what I came up with.
I hope it is clear enough to understand. Having it clear in your head and putting it on paper is not as easy as it seems. Anyhoo...this is it..... Assemble the outside of the unit using glue gun or epoxy glue. Once assembled, divide each shelf by the number of pigeon holes you require (don't forget to take into account the thickness of the upright dividers when calculating). Once you have made the calculations, mark the board at the measured requirements with pencil. The mark should be 1/4" or 5mm wide and be half the depth of the shelf. Foam Core Shelves. In this tutorial Naomi shares her creative idea for storing and displaying your craft supplies using custom built foam core shelves.
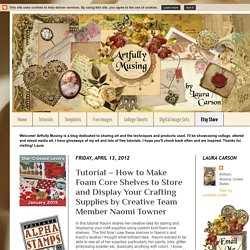
The first time I saw these shelves in Naomi’s and Karol’s studios I thought what brilliant idea. Naomi wanted to be able to see all of her supplies; particularly her paints, inks, glitter, embossing powder etc. (basically anything with color). I know I’ve been frustrated in the past because I used one product and I could have used another, which was a better color match or maybe I forgot what I had. Unfortunately most of my supplies are in drawers. Foam Core product shelves are not complicated to make and a few simple tools are all that are required. What You’ll Need 1. 2. 3. 7. Measure the Available Space Measure the inside width, depth and height of your available shelf space. Foam wire shelf. Desk-side shelves!
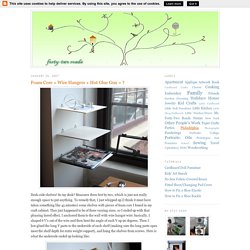
So my desk? Measures three feet by two, which is just not really enough space to put anything. Ink Pad storage from Foam Core Board – Part 2. Ink pad storage from Foam Core Board My critical eye sees this completed storage piece as crooked, some of the slots are more narrow than others, and I see all the flaws.
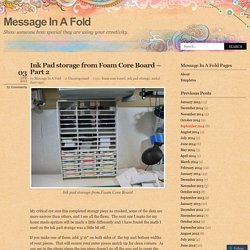
The next one I make for my home made spritzes will be made a little differently and I have found the math I used on the ink pad storage was a little bit off. The Original Steven H: Custom Made Desk Organizer. In my pursuit of my hobbies in the realm of pens, papers, and inks, I have acquired a mass of papers and inks to which I have run out of space.

Living in a small apartment I find that just putting them anywhere was unacceptable. I used to put my notebooks on my computers, by my feet, on the dressers, or in the closet. A desk organizer from say Staples cost upwards of $50 and is bulky and distasteful. Hand made wood organizers are great, they are attractive and highly functional to be custom built to suite your needs... I however do not have the tools at my disposal or the space. Shortly afterwords I found a video slightly different than the attended subject.