

How to Create to Mailbox Alert Icon in Adobe Illustrator. In the following tutorial you will learn how to create a simple mail icon.
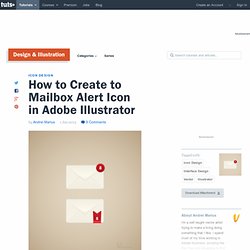
We'll work from basic shapes and use the Pathfinder panel and Gradients to create a stylish icon in Adobe Illustrator. Step 1 Open Illustrator and hit Command + N to create a new document. Enter 600 in the width and height boxes then click on the Advanced button. Select RGB, Screen (72ppi) and make sure that the "Align New Objects to Pixel Grid" box is unchecked before your click OK. Next, you'll need a grid every 5px. Step 2 Using the Rectangle Tool (M), create a 200 by 125px shape, fill it with the linear gradient shown in the following image and go to Effect > Stylize > Rounded Corners.
Step 3 Reselect the shape made in the previous step and make a copy in front (Control + C > Control + F). Step 4 Disable the Snap to Grid (View > Snap to Grid) then go to Edit > Preferences > General and make sure that the Keyboard Increment is set at 1px. Step 5 Select the green shape and go to Object > Path > Offset Path. Step 6. Cosmos: A Space-Time Odyssey 1x05 Online Sub Español Gratis. Cubic Bezier Curves - Under the Hood. Create a Cute Adipose From Doctor Who in Adobe Illustrator - Tuts+ Design & Illustration Tutorial. With the 50th anniversary of Doctor Who there's no better way to celebrate than with some fantastic fan art.
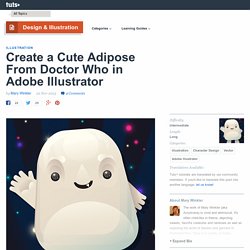
In this tutorial, you'll learn how to create a sweet little Adipose (one of those fat monsters from series four) with basic shapes. Kick it up a notch and head over to the craft section of Tuts+, to render this little cutie in plush form, with Amanda Tepie. Create an Easy, Valentine's Day Bunny in Adobe Illustrator - Tuts+ Design & Illustration Tutorial. How to Illustrate a Cute Basketball Player With Simple Shapes - Tuts+ Design & Illustration Tutorial. Hello everyone!
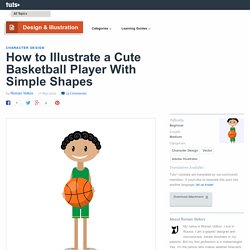
If you have discovered the wonderful program of Adobe Illustrator recently, then this tutorial is good for you. It is very hard to use Pen Tool to draw beautiful and harmonious lines for perfect illustrations if you are beginner. I remember from my previous experiences. Skill comes with time. But you can draw cute illustrations without complicated shapes and intricate technique. Take the Ellipse Tool (L) and draw an ellipse as shown in the image below. Next draw another ellipse for an eye over the first one. Add two more ellipses like the eye from the previous step, but make them smaller and white.
Now just make a copy of this eye. Draw two more small ellipses for a nose as shown in the image below. The shape of the ellipse is perfect for the ears too. Then right click your mouse to select Arrange > Send to Back (Shift + Command+ Left Square Bracket ). Draw a few more ellipses. Take the Shape Builder Tool (Shift + M) and drag on parts that need to be removed. Create a Simple School Teddy Bear in Adobe Illustrator - Tuts+ Design & Illustration Tutorial. In this tutorial we will learn how to create a cute Teddy Bear and some school themed items.
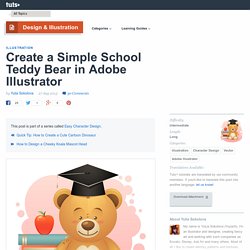
We'll be using basic shapes and the Pathfinder panel, so you don't need a graphic tablet or advanced drawing skills for making up such character. Let's dig in! Create a New document of 700 x 700px size and Color Mode - RGB. We'll start with the Teddy's head. Grab the Ellipse Tool (L) and make a circle. Go on and add a second circle in the muzzle area of the Bear's head.
Add a smaller squashed ellipse for the nose and fill it with another radial gradient of lighter (R=150, G=92, B=43) and darker (R=106, G=69, B=40) shades of brown color. How to Draw a Simple, Super Kawaii Pineapple in Adobe Illustrator - Tuts+ Design & Illustration Tutorial. Bring on the cute, bring on the funk!
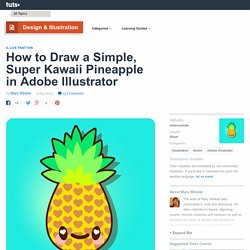
This tutorial highlights how easy it is to create a cute little pineapple with some basic shapes and simple gradients in Adobe Illustrator. Once you've made your little cutie, push it further with more details and stand back and admire your happy new friend. I drew this little cutie with my Wacom tablet in Adobe Photoshop CS5. You can draw out something similar in the drawing program of your choice, get a bit old-fashioned and use traditional media and scan it in, or follow the tutorial and create your pineapple friend on the fly. It's your call, dear reader. How to Create a Retro Fox Illustration in Adobe Illustrator.
By following this tutorial you'll learn how to create a cute fox illustration in Adobe Illustrator.
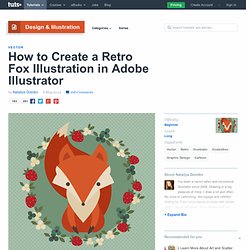
Using basic shapes, stylish colors and the Warp Effect tool, you can create a charming cartoon character in a retro style. This is a great project for beginners! Let's get started. First we are going to create the head. Take the Polygon Tool and click on your workspace. Copy the triangle and paste it on the back (Control-C, Control-B), then change the color to R=233, G=218, B=194. You should have the following base shape for the head: Keep the same fill color. Place the shape you've just created behind (Control-X, Control-B) the shape created in Step 3. Now, we will create the eyes and the nose. Now, the ears.
Create a copy of this triangle with the same Warp options. Now, the left ear. The smaller part of the left ear: Algunos consejos para dibujar con trazados bézier. Algunos consejos para dibujar con trazados bézier Otro ejemplo —sin duda exagerado— de lo que no debe hacerse.
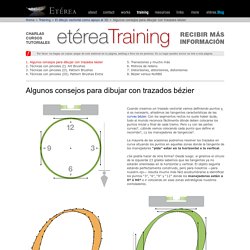
En programas de CAD que manejan NURBS —un tipo de splines algo más complejos que las bézier— existen herramientas de análisis que permiten identificar en que áreas estamos introduciendo errores de curvatura. Estas herramientas son extremadamente útiles para crear superficies con una perfecta continuidad geométrica, algo imprescidible en la industria de la automoción, aeronáutica o naval.
Pero en un programa como Illustrator la mejor —y la única— herramienta para comprobar la continuidad de nuestra curvatura es nuestro ojo. Ejercicio Adobe Illustrator // Aprende a utilizar la pluma.