
Cómo hacer una fuente de Herón casera, la fuente de agua perpetua. Hardware - projects - mitxela.com. A4 Pen Plotter by JuanGg. Custom Macro Mechanical Keypad. Starting with programming the OLED, you will need to have basic setup code. This basically tells the computer where your OLED is located, the size of it, and how it is programmed. Once you have the setup code for the OLED, assuming you're only displaying text, it should be pretty simple to program. First include the Wire and SSD1306 libraries. Define the OLED_RESET as 4, and include the SSD1306 library in your code. Put Adafruit_SSD1306 display(OLED_RESET); in your code to begin the use of the Adafruit SSD1306 library. Start with Serial.begin(9600); then display.begin(SSD1306_SWITCHCAPVCC, 0x3C); to initialize the i2C display with the address of 0x3C (unless it changed in step 5). Before you program the display, you should make sure you use display.clearDisplay.
Even though our display is monochrome, we need to set the text colour, so we program it like display.setTextColor(WHITE); Now that you have your library imported and your display object, you can start to program it. Battery Cases for Electronic Kits.: 10 Steps. Make PVC Look Like Wood: 5 Steps (with Pictures) Wii Nunchuck Full Functionality: 5 Steps (with Pictures) To eliminate the need to download and install a new library, I have essentially unpacked Tod Kurt's library and placed it directly into the code.
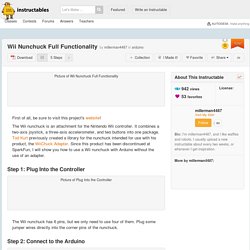
However, if you want still to install it to reduce clutter you can look in step 5. After uploading this code, try pressing the Z button on the controller to make the Arduino's onboard led blink.
How to Make a Touch Switch Using One Mosfet: 4 Steps (with Pictures) Hackster. SELF-SUFFICIENT DOME: 19 Steps (with Pictures) The whole project cost me around 3.000DKK (400€ / 475$), but it has to be taken in to consideration that i had all the wood for free from my grandfather, whom separated all of it from 4 meter long pallets and removed all of the nails from it and bought or was given other thing.
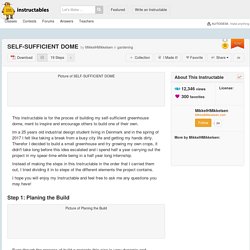
At the same time I bough rather a lot of unneeded electronic parts etc. since this whole project was an experiment and dynamic process along the build. Linseed outdoor oil paint Screw kit Hinges (door, windows and chicken coop) Chicken fence 1" holes / 1/2" squares. Beginners Guide to Ham Radio, Make Your Own. Ever watch the Stranger Things series on Netflix?

It’s not just a great show with Stephen King-like paranormal activity wrapped up in an idealistic 80s town. It also features some excellent electronics technology that was at its prime back in the 80s and is still kicking today. In one scene, three boys are sitting around their very first ham radio with their science teacher in tow. For these kids, ham radio was the equivalent of today’s smartphones or wireless internet, and allowed them to communicate with others around the world with no wires in between! DIY - Magnetic Connectors: 5 Steps (with Pictures) Arduino ile SD Karttan mp3 Ses Dosyası Çalma. Folding Camera Slider: 4 Steps (with Pictures) Portable Air Conditioner: 9 Steps (with Pictures) Basic Electronics Tutorials. 3D Printed Water Pump: 10 Steps (with Pictures) For some time I really enjoy making usefull working things with 3D printer, like my bike smartphone holder or when I fixed my fridge or even my Ludwik drone.
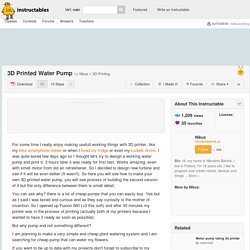
I was quite bored few days ago so I thought let's try to design a working water pump and print it. 3 hours later it was ready for first test. Works amazing, even with small motor from old air refreshener. So I decided to design new turbine and see if it will be even better (It wasn't). So here you will see how to make your own 3D printed water pump, you will see process of building the second version of it but the only difference between them is small detail. You can ask why? But why pump and not something different? Open Audio: Teensy Audio Board - First Audio. After having good success with the speed of the Teensy products for doing audio-relevant operations, I've decided that it's now time to start playing with actual audio signals.

To do this, I need some sort of interface for getting analog audio signals into and out of the Teensy. Luckily, Teensy makes an audio board just for this purpose. Today, I'm going to give the Teensy Audio Board a try. Buying The Parts: The first step of a new project is always fun: buying the parts. I go to Adafruit or Sparkfun, I see what they have in stock, and I order all the stuff that I need. For this project, I used a Teensy 3.2, a Teensy Audio Board, some 14-pin female headers for the Audio Board, a 10K pot to fit into the "volume knob" spot on the Audio Board, and a 3.5 mm stereo audio jack. Adjustable Bookshelf: 10 Steps (with Pictures) Building a modular adjustable bookshelf from these plans is easy to do and a fun DIY weekend project.
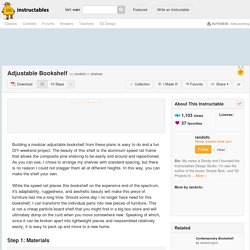
The beauty of this shelf is the aluminum speed rail frame that allows the composite pine shelving to be easily slid around and repositioned. As you can see, I chose to arrange my shelves with standard spacing, but there is no reason I could not stagger them all at different heights. In this way, you can make the shelf your own. While the speed rail places this bookshelf on the expensive end of the spectrum, it's adaptability, ruggedness, and aesthetic beauty will make this piece of furniture last me a long time.
Should some day I no longer have need for this bookshelf, I can transform the individual parts into new pieces of furniture. Raspberry Pi Wiimote Paint. People have done some cool stuff controlling Raspberry Pi robots with Nintendo Wiimotes.
Now I don’t have any robot bits, but I do have an old Wii sitting unloved upstairs, so I found the remote, put batteries in it and started to think about what I could do. I can’t drive a robot, but I can drive a turtle – a virtual Python graphics turtle. So I made a paint program that is controlled using a Wiimote. I based the code on the excellent example on the Raspberry Pi Spy web site – Python code below.
You are in effect driving the turtle, and as such I think this is possibly quite useful for teaching how Python turtles work as you have to think from the Turtle’s point of view: if it’s facing down you need to turn right to go left. A Compact Home-Made Raspberry Pi Tablet. June 28, 2017 A compact Raspberry Pi based tablet.

Although a software developer by day and tech hobbyist by night, I’ve never been into buying every new gadget that comes out. I got my first smartphone in 2015, and have so far resisted getting onto the tablet bandwagon, perhaps because I’m often at or near a computer anyway, rendering a tablet redundant. I recently got to try an Android tablet for a few days but found it too limiting due to the closed nature of most of the software available for it.
Around the same time, I discovered the Raspberry Pi 3 and its matching 7″ touchscreen, and realized I could build a nice Linux tablet completely to my liking based on those, so that is what I set out to do. How to Make Simple Audio Amplifier With Mosfet: 4 Steps (with Pictures) Unusual Uses for Zip Ties: 12 Steps (with Pictures) Stickvise - Hacks for the low profile PCB vise. PiCorder. This project is a super slim CamCorder based around a Raspberry Pi ZeroW, a Pimoroni Touchscreen and Camera Module.
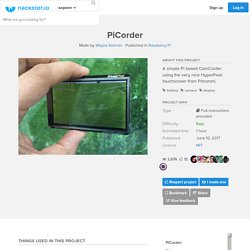
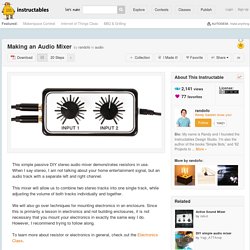
This is a straight forward assembly with a bit of soldering. Hardware Setup Steps Fit Pin Header Fit the 40 pinheader to the Pi Zero, either solder it or use the hammer head. Fit Zero Lipo Solder the Zero Lipo to the header. Attach Camera module Attach the camera module to the Pi's camera connector and peal back the stick on the back of the module to stick to the undersized of the Pi's PCB. Make Your Own Solar Panel With LEDs: 8 Steps (with Pictures) Making an Audio Mixer: 20 Steps (with Pictures) Typically enclosures are made as after thoughts for electronics projects.
In most of these projects throughout this class we will be starting with the enclosure. Not only that, I am going to show you how to build them well. There will be no soap dishes with wires sticking out of them in this class. If you want to ignore my methodology and go your own way, that is your business. Cheapest Smart Home for $38: 8 Steps (with Pictures) The Raspberry Pi Zero W does not have a header integrated but it’s very easy to add one (and you can buy it for less than $2 on Amazon). You can solder it very easily in a minute. Thanks to those PINs, we can now connect the Raspberry Pi Zero W to our RF transceiver. The latter will communicate via radio frequency with your RF sockets to turn them on and off. Camera Storage Backpack. I got my hands on a free promotional backpack and needed camera storage, so this happened. Kaizen foam used to organize parts, grommets and paracord used to hold the large tripod. ■ Music by The Marphoi Project: ■ Kaizen Foam provided by FastCap: I start with the freebie backpack and cut the gasket things that keep the flap from opening all the way because, well, I want it to open all the way.
The backpack is turned inside out so I’m able to get the exact shape of the inside of the bag. I use a piece of cardboard and trace the backpack on it. Camera Remote Footpedal: 7 Steps (with Pictures) Turn Nearly Anything Into a Speaker: 13 Steps (with Pictures) Insert the jacks into the mounting holes in the enclosure. Make note of which jack is connected to the side of the transformer labeled "P". This stands for primary. Typically the primary is the input side, but we are actually driving the transformer backwards, so the primary side is our output to the piezo. The reason the input is the output is because of impedance, a concept we are not really covering in this class, but one particularly important when dealing with transformers and AC electronics.
Long story short, impedance is kind of like resistance in AC electronics (but not exactly the same). Precision Soldering for Mortals!: 6 Steps (with Pictures) Use a DIY Proximity Sensor to Automate Your Haunted House: 6 Steps (with Pictures) In most cases you will use a microcontroller such as an Arduino to monitor the signal from the sensor. To do this, connect the ground terminal from the sensor to the GND pin on the Arduino. Connect the 5V wire from the sensor to either the 5V pin or a digital output pin set to HIGH.
Then connect the signal wire from the sensor to an analog input pin on the Arduino. Pigeon: a 3D Printed Cloud Camera That Uses the New Raspberry Pi Zero W - All. After the installation is completed, you will be able to watch the camera live feed by accessing: ATtiny Watch Core. Hardware fundamentals: how pull-down and pull-up resistors work. 3D Printable USB Air Purifier / Fumes Extractor - All. Como dessoldar CI em SMD sem Ferramentas Especiais - Nova Eletrônica. Atualmente no mercado você pode encontrar qualquer tipo de ferramentas para eletrônica, mas para quem é hobbysta ou iniciante investir em ferramentas especiais quase sempre é inviável, principalmente na atual situação do país. Tirar um CI SMD é sem danificar o CI ou as trilhas da placa de circuito impresso requer habilidade, técnica e ferramentas especiais.
Quando não temos nenhum destes tres itens partimos para a criatividade. HUNDREDS OF PUSH BUTTONS WITH ONE PIN - Arduino. YouTube Subscriber Counter with ESP8266. Follow the official assembly instructions for the Feather Huzzah using female headers (or stacking headers, though you'd have to cut the long legs off) Likewise follow the assembly instructions for your seven-segment FeatherWing display.
Before you dive into the code for this project, you should first make sure you've got your Arduino software set up properly to program the board you are using, which in my case involves installing the SiLabs USB driver and installing ESP8266 board support (explained in more detail in the Feather Huzzah tutorial): 5 Ways to Remove a Stripped Screw. Build a Raspberry Pi-Based Cable Shutter Release for Sony Cameras.
Replacing a simple and inexpensive remote cable release for your camera with Raspberry Pi may seem like a classic case of over-engineering, but using the tiny machine to control the camera opens up a whole new world of photographic opportunities. Using a simple Python script, you can turn Raspberry Pi into a powerful and flexible intervalometer or trigger the shutter using sensors connected to the computer. Easy Waterproof Clothing. 3D Printed Digital Night Vision (The OpenScope) I love light, physics, optics, and electronics. I started designing night vision optics a few years ago when I got into playing airsoft with some buddies.
Atom Icon by okazu - Dribbble. CNC Made From Garbage - All. Canadians produces 725 tonnes of e-waste annually. After seeing all of the electronics thrown away at my school, I am not surprised by this statistic. How-to make a ‘usb battery’ Found out yesterday that there’s a shuffle shortage and gadget battery life can only be expected to get worse. bummer. at least you can make the most of your waiting-for-shuffle blues and solder yourself a ‘usb battery’. this little gizmo runs off a 9 volt battery and supplies your favorite little device with the proper 5 volts of mobile power. 42 of the Most Useful Raspberry Pi Commands. Sometimes it’s hard to keep track of all the Raspberry Pi commands you use, so I created a list of some of the most useful and important ones that will make using Linux on the Raspberry Pi a lot easier. PlexiClock. How to make an EMP Jammer.
Using an Infrared Library on Arduino. IRLib not only receives and decodes IR signals but it can transmit them as well using an IR LED and a driver circuit. The library has been used to control TVs, cable boxes, DVDs, VCRs, and IR controlled toys such as helicopters and dinosaur robots. DVD to Laser Engraver. Scan Photo With Your Mobile Phone. Arduino Data Glasses For My Multimeter. Create a Joystick Using the Arduino Joystick Library 2.0. MANUAL DE PROGRAMACIÓN DE ARDUINO. 10 Free eBooks On Circuits - Electronics For You. Make Your Own Custom Shortcut Buttons With an Arduino. Battery powered fog machine - All. How I built a keyboard by hand – Jack Lewis – Blog. Disassembling a CD/DVD reader and reusing its parts. Top 5 Android apps for Electronics Engineers. Four ways to power up the Arduino Uno. Overview of Quadcopter Components / How to Select Parts - All. 3D Printed Camera LED Ring.
Antenna - Boost 433MHz receiver module receiving signal (XY-MK-5V) Laser Etching Glass. How to : Control Speed of Motor? Salvaging Liquid Crystal Displays (LCDs) Pole-Mounted Mason Jar Garden Lights. Cheap precision drill stand - All. Simple Inverter. 12v DC to 220v AC. - All. Universal cable shortener - All. Arduino Attiny Programming Shield - All. Watercolor Resist Cards - All. High-Range Wireless Power. Make your own IR remote that can reach anywhere - All. 3D printable 'Drone It Yourself' kit turns any object into an UAV. Minecraft Server on Raspberry Pi 1.8.9 - All. Brilliance by Design: Resin-inlaid Wood. FindChips: Electronic Components, Distributor Inventories, Datasheets. Electronic Components Online - Build Electronic Circuits. HOW TO MAKE A MODED GLUE GUN / Tutorial / DIY. Learning System. Which Programming Languages Can You Use With Arduino?
Make: DIY Projects and Ideas for Makers. $2 Arduino. The ATMEGA328 as a stand-alone. Easy, cheap and very small. A complete guide. - All. How to Open a Lock With a Coke Can - All. Make your own 3d hologram projector using CD case & smartphone. Dot Matrix Business Card - All. Basics of Opamp circuits - a tutorial on how to understand most opamp circuits - Electronics-Lab. A minimalist solution to make VR panorama - All. MDI Project Wiki - MDI Project Wiki.
Introduction to hobbyist Lock picking Aka: LockSport - All. Cable Chick's Cable & Connector Guide. Understanding TRRS and Audio Jacks - Cable Chick Blog. Learn Electronics and Arduino Just By Watching These Videos.