
jQuery Cheatsheet. Favico.js - Make a use of your favicon. Badges Animate your favicon with animated badges.
You can customize type of animation, position, background color and text color. Slide animation Fade animation Pop animation Pop & fade animation Without animation Position Shape setting Custom font support Color settings Images / Video / Webcam Create icon on the go from images, videos or even a webcam stream Regular image to icon var favicon=new Favico(); var image=document.getElementById('imageId'); favicon.image(image); HTML5 Video to icon var favicon=new Favico(); var video=document.getElementById('videoId'); favicon.video(video); //stop favicon.video('stop'); Webcam video to icon This is only for fun but it works :) Works on Chrome, Firefox and Opera var favicon=new Favico(); favicon.webcam(); //stop favicon.webcam('stop'); Badge options Bower bower install favico.js Check out also Tinycon, Notify Better or favicon.js.
Roadmap More options (Badge position, animations,...) License. Bien isoler ses variables en Javascript. Une histoire de fonctions anonymes et auto-exécutantes (IIFE)...

Parce-qu'on n'y pense pas assez, et que c'est bien pratique quand même ! JS NICE: Statistical renaming, Type inference and Deobfuscation. Un nuage de Tag 3D avec Jquery et tagShpere. Les utilisateurs de wordpress et autres CMS savent q’il existe des générateurs de nuages de tags en 3D, mais en flash.

C’est jolis tout ça mais c’est du flash, quel dommage… Que nenni, avec Jquery, c’est possible ! Le fonctionnement est assez simple. Il y a deux prérequis : Installez jquery sur votre page (la plupart des CMS l’ont par défaut, mais au cas où il suffit de rajouter entre <head> et </head> : Après, téléchargez le plugin jquery qui nous intéresse : jquery.tagSphere.js et insérez là dans votre page HTML, juste après jquery : Voilà, nous pouvons démarrer. Ensuite, dans le corps de la page : Vous noterez les class= »link1″, class= »link2″ et class= »link3″. Donc pour un poil de customisation graphique, on peut rajouter les styles suivants : Et on obtient le résultat tout en haut. L'ami du développeur - Vérification de formulaire - Plugin JS jQuery-Validation-Engine. Bonjour les amis.

Aujourd’hui, je vous présente un plugin JavaScript qui me tient à coeur. Il s’agit de jQuery-Validation-Engine réalisé par Position-Absolute. Ce plugin présente de nombreux avantages et je m’en vais de ce pas vous les présenter. Une utilisation très simple La première chose qui m’a séduit dans cet outil, c’est le côté simple d’utilisation. Mise en place. Posabsolute/jQuery-Validation-Engine. Timeline JS - Beautifully crafted timelines that are easy, and intuitive to use. ElementTransitions. Bootstrap-modal by jschr. PageSlide: a jQuery plugin which slides a webpage over to reveal an additional interaction pane. Advertisement a jQuery plugin which slides a webpage over to reveal an additional interaction pane by Scott Robbin Download PageSlide Now If you've ever used the mobile version of Facebook, or Path,then you've probably seen something akin to PageSlide in action.

Clicking on a button or link slides the page over to reveal a hidden pane,one that usually contains secondary navigation, a form, or additional information. There are several ways to use PageSlide, some of which are shown below.Additionally, there is a responsive demo which shows how PageSlide can be used as a mobile solution. Slide to the right, and load content from a secondary page Slide to the left, and display hidden content from this page in a modal pane Modal This slide uses "modal" option set to "true". Where can I get it? If you are interested in learning more about PageSlide, it's recommended that you view the project on GitHub.
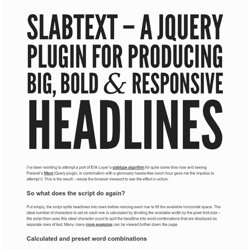
Other jQuery Plugins If you like this plugin, feel free to check out some of the others I've built. Realistic Hover Effect With jQuery — Adrian Pelletier. SlabText – a jQuery plugin for creating big, bold & responsive headlines. I’ve been wanting to attempt a port of Erik Loyer’s slabtype algorithm for quite some time now and seeing Paravel’s fittext jQuery plugin, in combination with a gloriously hassle-free lunch hour gave me the impetus to attempt it.

This is the result – resize the browser viewport to see the effect in action. So what does the script do again? Put simply, the script splits headlines into rows before resizing each row to fill the available horizontal space. The ideal number of characters to set on each row is calculated by dividing the available width by the pixel font-size – the script then uses this ideal character count to split the headline into word combinations that are displayed as separate rows of text. Many, many more examples can be viewed further down the page. Calculated and preset word combinations This can be achieved by presetting the word combinations (using <span class="slabtext"> wrappers) within the markup [1] . Home.