
How To Create A Cinemagraph In Adobe Photoshop. Updated May 09, 2016.

Every now and then you encounter a graphic technique that makes you wonder, “How did they do that?” Lately I have been seeing a lot of images where a portion of that image is in motion. It may be a head and shoulders shot of a model where the model suddenly blinks or a gorgeous landscape image with a stream and the water is moving. Every time I encounter one of these I ask, “How did they do that?”.
In fact, I am encountering them more and more on the web thanks to the explosion of Animated Gif’s that seem to be popping up everywhere from Facebook to stock photography sites. The technique is called a “cinemagraph” and it, it turns out, they are really easy to create. So where does the term “cinemagraph” come from. To get started, all you need is Photoshop or a video editor and a video and you are good to go. Before you start rooting through your video collection you need to be aware of a few things: Use a tripod when you shoot the video.
Adobe Photoshop CC Tutorials for Beginners. In this Adobe Photoshop CC training course from Infinite Skills, you will learn how to use the worlds most popular graphics and photo editing software.

This training is designed for the absolute beginner, and you will learn Adobe Photoshop CC from the ground up, with no prior experience required. This training course breaks down the features and tools of Adobe Photoshop CC into easily understood parts, increasing your ability to understand and retain the information. You will learn how to: organize your files using Adobe Bridge, work with Camera Raw images, create and manage color in an image, utilize layers in Photoshop and work with filters.
Andy shows you how to use tools such as dodge and burn, the magic wand, brushes, cloning and healing, and even Type in Photoshop CC. Comprendre les masques de fusion dans Photoshop cc. Principes Le masque de fusion fonctionne de la même manière que ce que nous avons vu avec le mode masque.

La seule différence réside dans le fait que la nouvelle couche (le masque) est enregistrée dans votre fichier. Elle n’est pas provisoire. Le masque est une sélection avec un traitement particulier sur le calque. Le masque de fusion est une image bitmap sur laquelle il faut travailler en noir et blanc exclusivement. Création du premier masque de fusion Une fois une sélection rapide créée avec le mode maque, je voudrai obtenir cette zone pour la transformer en masque.
Formations créatives et gratuite sur le motion design. Photoshop. Formations créatives et gratuite sur le motion design. After Effects Tutorials, Plug-ins and Stock Footage for Post Production Professionals. 3D Graphics - 3D Modeling - Three-dimensional Graphics Design.
Login > Digital-Tutors. After Effects Tutorials > Getting Started with CINEWARE in After Effects Tutorial. In this series of tutorials, we will learn the powerful new workflow between After Effects and CINEMA 4D using the CINEWARE effect.

We take the first lesson to layout the differences between all this new terminology, then we jump right into creating our project by learning how to use CINEMA 4D projects in After Effects. We learn ways to speed up your workflow with the render settings and how to use cameras interchangeably back and forth between both software. This training is full of helpful tips for getting some of the tougher parts of the CINEWARE interchange working for you.
Issues like shadows and stacking order are explained in-depth so that you can let your creativity flow. This tutorial assumes that you have had intermediate experience in After Effects and beginner to intermediate experience in CINEMA 4D. If you've never used CINEMA 4D before, it is highly recommended that you watch the Beginner's Guide to CINEMA 4D. LENODAL.COM : identités (télé)visuelles : blog, médias, forums. Apprendre les bases de Cinema 4D. Sessions onDemand des événements en ligne. MAX Online - Adobe MAX 2014. Photoshop. Correction des vidéos pour leur donner l'aspect d'un film. Vous est-il déjà arrivé de filmer une vidéo dont l'apparence est trop chaude (orange) ou froide (bleue) ?

Ou bien de vouloir monter des métrages de qualité variable, provenant de différentes caméras ? Si c'est le cas, c’est votre jour de chance. Adobe SpeedGrade CC regorge de fonctionnalités qui vous aident à corriger les couleurs, à harmoniser la couleur d'un plan à l'autre et à ajouter des effets de style. Mieux encore : vous pouvez désormais importer vos projets vidéo dans SpeedGrade directement depuis Adobe Premiere Pro CC. Aucune expérience préalable de SpeedGrade ou de Premiere Pro n'est requise, mais si vous rencontrez des problèmes en suivant le didacticiel, n'hésitez pas à poser des questions sur notre forum. How to correct color and create stylized looks in video in SpeedGrade CC. New to color-correcting your videos?

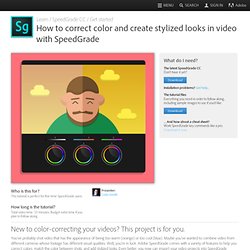
This project is for you. You’ve probably shot video that has the appearance of being too warm (orange) or too cool (blue). Maybe you’ve wanted to combine video from different cameras whose footage has different visual qualities. Well, you’re in luck. Adobe SpeedGrade comes with a variety of features to help you correct colors, match the color between shots, and add stylized looks. Use the Timeline Track controls. What’s the Difference: New Adobe CC 2014 vs. CS6, CS5, CS4, CS3? Résumé des nouvelles fonctionnalités.