

AttributeTransfer - Basic. Particle Flow tips & tricks - deKO.LT. Tutorials. The kill field: A technique to kill Maya particles. MayaParticles < Maya < TWiki. How can I get more control over random particle colours?
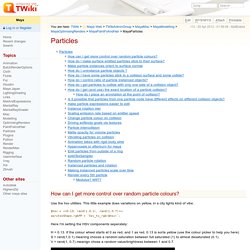
Use the hsv utiltiies. This little example does variations on yellow, in a city lights kind of vibe. $hsv = <<0.13, rand(1,0.1), rand(1,0.7)>>; spritesShape.rgbPP = `hsv_to_rgb($hsv)`; Here I'm setting the HSV components seperately: H = 0.13. How do I make surface emitted particles stick to their surface? Kept thinking I was over-engineering this and a lot would/should happen automatically, apparently not.
Emit particles from surface check emitter is in surface mode (often defaults back to omni), check 'need parent uvs' add general particle attributes goalU goalV parentU parentV goalPP set goal weight to 1 set creation expression goalU = parentU; goalV = parentV; See? Make particle instances orient to surface normal An extension of the above trick. Normal_orient_instances.ma: normal_orient_instances.ma How do I uninstance particle objects ? Unfortunately you can't simply duplicate the instancer to retrieve the mesh. In creation: Mayanparticlesadvancedtechniques2012.pdf. Maya Dragon Fluid Tutorial. Maya Fluids and nparticles Tutorial : Fluids interacting with geometry.
Dariel Rodriguez. Random for Instanced particles??? Quote: Hey ranxx, you are correct that the docs say that it returns a number between the min and max numbers in the "rand function". but it also defines the max number as the maximum number returned.

So, to my understanding - the max number can be returned. Therefore, I use the .9 to prevent an unspecified index number from being called. rand Returns a random floating point number or vector within a range of your choice. float rand(float maxnumber) float rand(float minnumber, float maxnumber) vector rand(vector maxvector) vector rand(vector minvector, vector maxvector) maxnumber specifies the maximum number returned (in the first syntax format listed above). Minnumber and maxnumber specify the minimum and maximum numbers returned. ~Ilan. RnD for Maya hardware particles clouds. Maya Particle Effects. In this movie we are going to take our plane here and turn it into a surface emitter.
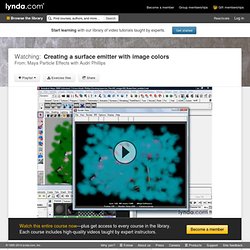
In the Dynamics module section, I am going to go Particles > Emit from Object into the option box here. I'm going to take the Surface Emitter type. I'm going to accept all the defaults here and I have named it emit1. I hit Apply. Get rid of that. There are several things I have to do now to prepare my particles to accept the color from the plane surface that they are emitting from. And you say, "why are they blue? " Fluid Rendering Optimizations Maya/MR. Super Awesome Ultimate Sprite Rig. By Mike Rhone This tutorial has been written so that the novice artist can create a working particle rig.
It is assumed you are comfortable with the basic concepts of 3d and Maya. Before I made the career move to effects, I was a character rigger. I have found that many of the skills I learned in the rigging department have helped me to make fast, re-useable particle rigs that are easy to animate. This tutorial will prepare you to approach an effects setup like a rigger would. Set the project Set up a new project, and name it ‘explosion_rig’.
Setting up your preferences to work with particles When working with particles, you need to set your preferences to ‘play every frame’. You should never rely on Maya when it comes to timing out animations. Emission surface We could start off this rig with a basic omni or directional emitter and work from there, but I prefer to use a half of a polygon sphere to emit our particles from. Particle Texture Emission in Maya. This tutorial is about how to utilize the texture emission available with particles in Maya and make an object dissolve.
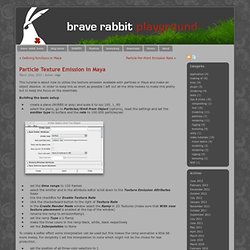
In order to keep this as short as possible I left out all the little tweaks to make this pretty but to keep the focus on the essentials. Building the basic setup create a plane (NURBS or poly) and scale it to xyz 160, 1, 90select the plane, go to Particles/Emit from Object (options), reset the settings and set the emitter type to surface and the rate to 100.000 particles/sec To create a softer effect some interpolation can be used but this makes the ramp animation a little bit more messy. For simplicity I set the interpolation to none which might not be the choice for real production. The UV repeat and offset values are for creating a clean start and end for the ramp animation.
Autodesk Maya Tutorial - nParticles - Cereal Bowl. Advanced Collision Expression.