

Picking your medium. Stop Motion or CGI? Computer Animation Defeated By Stop-Motion. Animated movies are just as popular as ever, and thanks to Pixar’s vision the computer-animated movie has been the favored format for over a decade.

That’s not to say it’s the best format. Give me hand drawn Disney animation over Pixar any day of the week. As the novelty of computer animation has worn off and as the price tag of computer animation has grown, the trend is beginning to balance. StopAnimation-00Fnt. Techniques And Methods Of Creating Stop Motion Animation Essay. The dissertation focuses on the techniques and methods of creating stop motion and how it is implemented on various forms of visual media.

The initial motivation for the content and structure of this dissertation is based on personal experience during my project and also some research on it. Several research and reviews also helped me to specify and provide certain suggestions. View topic - Use The EasyDriver Stepper Motor Driver + Arduino. With a stepper, you really need to look at the amperage, and not the voltage.The easy stepper has a current control pot on it.
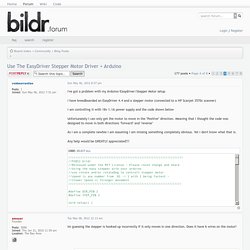
You can turn that to adjust the current (note the pot is backwards, so + is lover not higher). It has a max supply of 750Ma, so half way would be about 375ma. Dot Blog. Putting together a Stop Motion animation in Premiere Pro. Putting together a Stop Motion animation in Premiere Pro I decided to write a more full featured tutorial for this week and thought a good subject to cover would be making a stop motion animation in Premiere Pro which is also pretty similar to Final Cut Pro so if you know what to do in Premiere Pro you can apply your knowledge to FCP just change a few shortcuts.
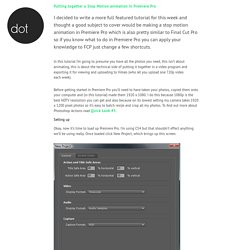
In this tutorial I’m going to presume you have all the photos you need, this isn’t about animating, this is about the technical side of putting it together in a video program and exporting it for viewing and uploading to Vimeo (who let you upload one 720p video each week). Before getting started in Premiere Pro you’ll need to have taken your photos, copied them onto your computer and (in this tutorial) made them 1920 x 1080.
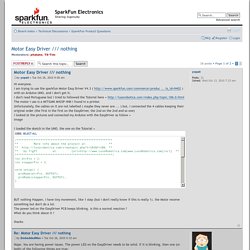
Motor Easy Driver /// nothing. Hi yopaii, Very important: to avoid damage immediately the EasyDriver (ED): when ED is powered on to power it off:1) connect the sleep input of the ED to the ground; the axe of the motor now is free and you may rotate it with your hand; now you may2) shut down the ED power;
Use The EasyDriver Stepper Motor Driver. Stepper (or step) motors are really cool.
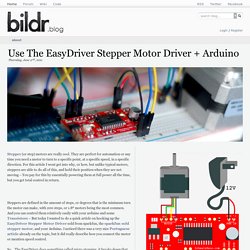
They are perfect for automation or any time you need a motor to turn to a specific point, at a specific speed, in a specific direction. For this article I wont get into why, or how, but unlike typical motors, steppers are able to do all of this, and hold their position when they are not moving – You pay for this by essentially powering them at full power all the time, but you get total control in return.
Steppers are defined in the amount of steps, or degrees that is the minimum turn the motor can make, with 200 steps, or 1.8º motors being the most common. Tutorials and Resources to Control Stepper Motor With Arduino Board. Controlling stepper motors with an Arduino board promise to be an easier task, and in the following, you can find a series of tutorials aiming to introduce you into the area of controlling any stepper motor with or without shields.
Designed for the DIY culture, the Arduino microcontroller is a pretty awesome open-source embedded system used in a wide range of robotics applications. An electric motor can be powered and controlled directly from the Arduino board, or using the same Arduino board but with an additional shield. The first option is not always the right method and has its limits. For example, you can connect directly to the Arduino board only small stepper motors that require a small amount of current in spinning. Big Easy Driver stepper motor driver. An Open Source Hardware Stepper Motor Driver Description: The Big Easy Driver is a stepper motor driver board for bi-polar stepper motors up to 2A/phase.
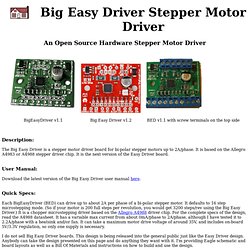
It is based on the Allegro A4983 or A4988 stepper driver chip. It is the next version of the Easy Driver board. User Manual: Download the latest version of the Big Easy Driver user manual here. Quick Specs: Each BigEasyDriver (BED) can drive up to about 2A per phase of a bi-polar stepper motor. I do not sell Big Easy Driver boards. Status: How to wire an arduino-based 3-axis CNC machine : Wire the stepper motor to the EasyDriver. Stepper wiring. About all Reprap stepper drivers are bipolar (as opposed to unipolar), so if you're using the standard drivers, you will need a stepper than can be wired as bipolar.
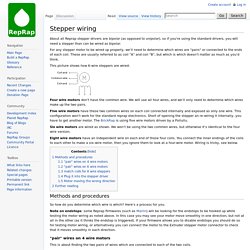
For any stepper motor to be wired up properly, we'll need to determine which wires are "pairs" or connected to the ends of each coil. These are usually referred to as coil "A" and coil "B", but which is which doesn't matter as much as you'd think. This picture shows how 6-wire steppers are wired: Four wire motors don't have the common wire.
Big Easy Driver Hookup Guide. Hardware Overview The Big Easy Driver is designed around the Allegro A4988 motor driver.
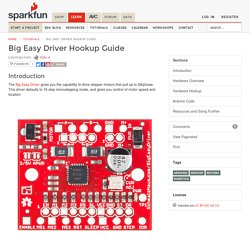
Each pin present on the board has two connection points. The first, which are the pins closest to the center of the board, are spaced out to fit standard 0.1" headers. The secondary connection points are closest to the edge of the board, and are spaced to fit 2-pin screw terminals. Shopping Cart. Dragonframe Motion Control "How To" Motion Control With Arduino: Motorising a Camera Slider. The availablility of cheap stepper motors and drivers these days allows ample opportunity for experimenting outside of the more expensive and complicated 2D/3D cutting and printing projects. For this project, I'll take the OpenBuilds camera slider (refer to the build video in Building a Basic Video Slider With Open Source CNC Parts) and motorise it.
I’ll also create a self-contained system for controlling the motor. Motion control and hardware integrations for stop motion software. Reducing flicker for stop-motion animation and time-lapse photography. [Today’s post is by Benjamin Markus, who is working with us as an intern this summer.] If you’ve ever tried your hand at stop-motion animation or time-lapse photography, chances are you’ve run into the common problem of inconsistent lighting or luminance variation between consecutive pictures taken on the same camera, with the same lens and settings.
This issue is usually referred to as flicker. There are many causes of flicker, including–but not limited to–auto camera settings, the type of lens used, high aperture settings, fast shutter speeds, Av stepping, Tv stepping, natural lighting changes, incandescent and fluorescent lighting, fluctuating electricity, clothing worn while animating, and the materials that are being photographed. This article provides solutions for reducing flicker, both during shooting and in After Effects. manual fix in After Effects Here’s a fix based on advice given by Dave LaRonde. 1. Using Color Correction effects built into After Effects camera settings. Dragonframe Motion Control "How To" Building a Basic Video Slider with Open Source CNC Parts. A video slider is a device that allows you to mount your camera on moving platform and slide it smoothly in one direction. It's used in all sorts of applications, and offers a stable and portable solution for adding movement to your shots.
We'll be building our own slider that features a rugged, simple design. For the last three or four years, we've been bombarded with all the latest and greatest DSLR sliders to come out. Largely these have fallen into two categories. One is cheap and cheerful, usually a good deal under $200, sometimes under $100, and often based on some felt-pad low-friction design. There seems to be fairly limited middle ground that isn't just poor quality versions of good sliders, or beefed up cheap sliders. In my search for the perfect cheap DIY slider, I found everything failing to meet my expectations. Strangely, I could find very few people who'd adapted this hardware to photographic purposes. Questions? Motion Control With Arduino: Motorising a Camera Slider. Controlling focus and other camera gear - StopMotionAnimation.com. Cinetics Blog. Microsoft Word - cinemoco-dragonframe-setup.docx - cinemoco-dragonframe-setup.pdf. Stop Motion Camera Dolly. DitoGear + DragonFrame + Arduino.
Dragonframe Motion Control "How To" Camera Dolly / Train Track Style. 'The Advanced Art of Stop-Motion Animation': Digital Cinematography: Part 2. Buy The Advanced Art of Stop-Motion Animation by Camera Effects Once you have set up your sets, puppets, lights, and camera, the shooting process is relatively straightforward. You take a frame, move the puppet or object, take another frame, and move the puppet or object again.
That is essentially what it’s all about, but at the same time there are plenty of options for embellishing your shots for a richer cinematic experience. Certain effects can be achieved by your camera right on your stop-motion set, with little to no additional work done in post-production. Rack Focus A particular composition often seen in live-action films or still photography is when there is a foreground subject close to the camera and another subject in the background or middle ground of a shot. [Figure 4.13] Focus puller designed by Brett Foxwell. In stop-motion, a rack focus must obviously be done frame by frame, so often it will be the animators themselves who do this, along with animating their subjects.