

NOOBS - Raspberry Pi Documentation. 7 Operating Systems You Can Run With Raspberry Pi. Who can argue with a $40 computer?
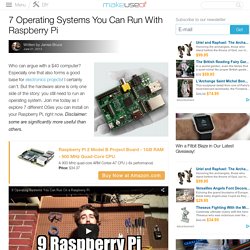
Especially one that also forms a good base for electronics projects! I certainly can’t. But the hardware alone is only one side of the story: you still need to run an operating system. Join me today as I explore 7 different OSes you can install on your Raspberry Pi, right now. Disclaimer: some are significantly more useful than others. Linux Three different flavours of Linux are available officially: Pidora (based on Fedora); Archlinux (a DIY OS); and Raspian (Debian).
Raspian is the recommended OS for everyone new to the Raspberry Pi, but if you fancy trying out some of the others too, a new tool from the creators of Raspberry Pi has been released which allows you to choose from a selection of images during boot-up (including some of the others on this list). OpenElec & XBMC. LCD Controller. How to Make a Raspberry Pi Media Panel (fka Digital Photo Frame) The goal of this project was to create a low cost Raspberry Pi Media Panel--a nice looking screen that could stand in the living room or attach to the refrigerator with the primary purpose of streaming personal photo and video content full time, but also be able to do some other cool things when needed...like show the weather, play a movie, play music, or receive AirPlay content.
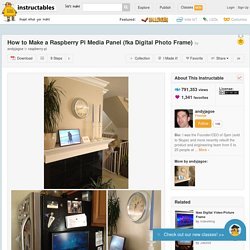
Read this blog post if you want to learn more about what a media panel is and why you might want one. Success criteria were: -Low cost: a full blown computing device and screen for between $100 and $200 all in -Attractive: meaning my wife finds it aesthetically acceptable for the living room -Light: no more than a few pounds -Thin: no more than an inch thick, including frame -Quick: can be built in a few hours or less -Simple: requiring mainly assembly, versus construction or manufacturing Update: Several people have asked me about an integrated product/service like this that is off-the-shelf. We call it Fireside.
How to Connect Raspberry Pi to a Laptop LCD Panel via LVDS/LCD Controller Board. Animal LVDS Mini Board. Animal LVDS Mini Board is a low cost LVDS LCD expansion board for BeagleBoard Rev-C, BeagleBoard-xM, PandaBoard, PandaBoard-ES and compatible clones.
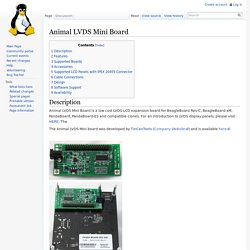
For an introduction to LVDS display panels, please visit HERE. The The Animal LVDS Mini board was developed by TinCanTools (Company Website) and is available here. World Leading Distributor of Electronics, Electromechanical and Industrial Components. Supported cameras. On this page, you find list of the supported cameras as of the current release.
Supported means here: Able to download images from the camera (or upload images to the picture frame). For remote control support check out the Remote Control Overview page. Support for additional cameras may be in the current libgphoto2 SVN trunk code and will be added to the next release. Cameras capable of MTP, PTP or PictBridge are supported without needing to be specifically listed here. If your camera is neither supported in the current release nor in current SVN trunk, it is possible that.
How to Choose an LCD Screen For Your Raspberry Pi Media Panel. There are countless ways to use a Raspberry Pi.

Some need small screens, some need large screens, some need no screen. This guide talks about how we selected LCD screens for the Raspberry Pi media panels we are building. A media panel is a new and different class of computing appliance. We selected an AU Optronics B154pw01 for our 15″ media panel and a LG Philips LP171WU3 for our 17″ media panel.
Below we explain why. Mechanical Considerations The most important mechanical considerations are aspect ratio, pixel resolution, weight, and dimensions. Aspect Ratio: We decided that 16×10 was the best aspect ratio for our media panels. LP171WU3 LCD Panel Back Optical Considerations Brightness, contrast ratio and color depth are the most important optical considerations. Our focus will be on making sure our screen has acceptable brightness and contrast ratio. Camera Pi – DSLR Camera with Embedded Computer. I’ve had the idea of embedding a computer DSLR camera for a couple of years now, but for whatever reason I never got around to implementing it, mostly due to the cost of small single board computers.
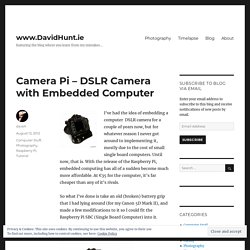
Until now, that is. With the release of the Raspberry Pi, embedded computing has all of a sudden become much more affordable. At €35 for the computer, it’s far cheaper than any of it’s rivals. So what I’ve done is take an old (broken) battery grip that I had lying around (for my Canon 5D Mark II), and made a few modifications to it so I could fit the Raspberry Pi SBC (Single Board Computer) into it. The result is what I call “Camera Pi”. I left a few holes in the case so that I could get at the USB and network ports, and video port. it’s a fully functioning computer with a Linux Operating System (Raspbian), has 2 USB, network, video, HDMI and GPIO.
RASPI. Cases for your Raspberry Pi. An ARM GNU/Linux box for $25. Take a byte!