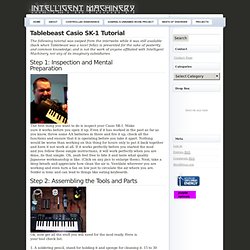

Tablebeast Casio SK-1 Tutorial. The following tutorial was swiped from the interwebs while it was still available (back when Tablebeast was a nicer fella); is presented for the sake of posterity and common knowledge; and is not the work of anyone affiliated with Intelligent Machinery, nor any of its imaginary subsidiaries.

The first thing you want to do is inspect your Casio SK-1. Make sure it works before you open it up. Even if it has worked in the past as far as you know, throw some AA batteries in there and fire it up, check all the functions and ensure that it is operating before you take it apart. Nothing would be worse than working on this thing for hours only to put it back together and have it not work at all.
If it works perfectly before you started the mod and you follow these simple instructions, it will work perfectly when you are done, its that simple. Ok, now get all the stuff you will need for the mod ready. 1. DIY MIDI Electronics for custom MIDI Controllers, MIDI Decdoers, MIDI Encoders, MIDI Retrofits. Casio SK-1 MIDI Mod - nuxx.net. My Casio SK-1 and Power Supply Overview When my sister and I were growing up in the 80s my parents purchased a Casio SK-1 for us.

Years later I found myself wanting to trigger the interesting sounds it made (both internally and via it's unique single-patch sampler) via MIDI. After coming across Paul Messick's SK-1 MIDI Mod which adds MIDI support, I decided that I wanted to build one for myself. After first using an untested PDF layout found on his page and finding it to not work (and missing at least one part from his schematic) I put the project on hold for a while. Some photos taken during that first attempt can be found here.
After mostly wrapping up the MIDIbox SID-NUXX I decided to revisit the Casio SK-1 MIDI Mod project and began laying out a new PCB based on Paul's original schematic. NOTE: Much of the information found on this page was gleaned from Paul's MaxMidi DYI - SK-1 MIDI Mod page. Abandoned! This project has been abandoned. Firmware Jumper Settings Bill Of Materials Design. Keyboard Article: MIDI Mod for Casio SK-1. This article first appeared in the August 1987 issue of Keyboard Magazine.

Making weird noises into a Casio SK-1 and then playing them back is some of the most fun you can have standing up. Amazing as it seems, this cute little keyboard is a real, honest-to-goodness polyphonic sampler that sells for under $100. (For a full list of the SK-1's somewhat startling array of features, see Keyboard Report, Oct. '86.) Sooner or later, though, just about everybody who gets to fooling around with one has the same reaction: "Gee, wouldn't it be great if they had put a MIDI port on it? " There's a reason why they didn't, of course. Scanning Keyboards: Hardware Theory The easiest way to get the SK-1 to understand MIDI messages is to fool it into thinking they're coming from its own keyboard. Casio SK-1 Sampling Keyboards. SK-1. Gijs of Geiskes.nl has just sent me some information on their recent experiments with patching signals from an Casio SK-1′s ROM chip to a video monitor .
The circuit is simply a diode to prevent the back flow of current and a resistor to drop the +5 Volt logic gate to a +2 Volt required for generating a video signal. The color of the pixel is determined by the voltage in between 0 ( Black ) and 2 ( White ), so if multiple points on the ROM chip were mixed with various resistor values color images will occur. Casper SK-1. The SK1 is known in the circuit bending world as being one of the most interesting and diverse instruments available for modification.

There are so many possible modifications, that a patch bay is commonly added, which allows the user to manually make thousands of different patching combinations. The patches can range from very simple to extremely complex depending on how deeply the user wishes to explore. There are a few standard features that I add to every SK1 I modify. Circuit-Bending and Living Instruments by Q.R. Ghazala. SK1 bending. Circuit-Bending and Living Instruments by Q.R. Ghazala.