
Articles for keyword: video. Jump to Navigation LOGIN|REGISTER|Lost password?

|What's this? Search form You are here Home » The Fold » Articles for keyword: video Articles for keyword: video Convention 2014: The Daily Fold III by Jason Ku The 2014 Convention Monday Newsletter, bringing the convention to you! Convention 2014: The Daily Fold II The 2014 Convention Sunday Newsletter, bringing the convention to you! Convention 2014: The Daily Fold I The 2014 Convention Saturday Newsletter, bringing the convention to you! Diagrams and Video: Hex Star OrigamiUSA members please sign in to access this article. by Maria Sinayskaya Diagrams and video for a 6 piece modular star by Maria Sinayskaya.
Diagrams: Star Hilli by Klaus-Dieter Ennen and Sara Adams Diagrams for a modular star "Hilli" by Klaus-Dieter Ennen, as well as video instructions by Sara Adams Diagrams: Patty Bat by Talo Kawasaki and Sara Adams This action model is great for Halloween - and it's a double action: the bat flaps its wings, and produces quite some noise!
Origamic Architecture, pop-up cards and other kirigami. Origamic architecture (OA) and pop-up cards are a type of kirigami.

When compared to paper snowflakes, these paper art forms are like the “extreme sports” of kirigami. Kirigami Cut-Outs Most people will remember kirigami as the paper snowflakes made by school-aged children. However, you can cut paper to form masks, animal silhouettes, logos, and coat-of-arms. If you have the patience and tools, the possibilities are endless. [Photo by Marivi] Origamic Architecture and Pop-Up Cards OA was developed by Masahiro Chatani in the 1980’s (read bio).
Have published many books on how to make these amazing creations. Most origamic architecture designs are viewed when the paper is open half way (90° angle). Other Paper Arts There are many artists who create dazzling designs by cutting paper. Check out this lampshade made by Peter Ayres. As one might expect, artists who can do one form of paper cutting can usually do the other forms.
Top 10 Sites about Origami. 10 top origami websites. Recently, I ‘ve added ‘Links I like’ in the right bar.

In this post you’ll find some more information about my first ‘10 top’. To keep this list from being too long, I’ll change it regularly and this page… I guess it will grow and grow as long as there are enthusiastic orgamists on the web. 1. Eric Joisel A website about the work and the person of the French origami artist Eric Joisel (deceased in 2010.) 2. Also French, the best origami-shop I know. 3. If I want to know in which book a particular model can be found or if a book is worth buying. 4. Blog by Saadya Sternberg in which he writes about his own work: sculptural origami. 5.Happy folding Great website by Sara Adams featuring more than 100 excellent instructional videos in which Sara explains and shows how to fold a model step by step. 6.
Bernie Peyton is an origami master and biologist who worked with endangered species in the Andes, Peru. Origami Modular Spinning Top Folding Instructions. Origami modular spinning top is a fun and easy modular toy.

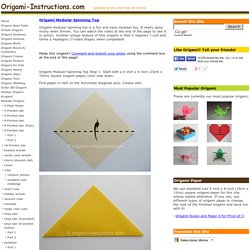
It really spins nicely when thrown. You can watch the video at the end of the page to see it in action. Another unique feature of this origami is that it requires 7 unit and forms a heptagon (7-sided shape) when completed! Made this origami? Comment and Submit your photo using the comment box at the end of this page! Origami Modular Spinning Top Step 1: Start with a 6 inch x 6 inch (15cm x 15cm) square origami paper, color side down. Fold paper in half on the horizontal diagonal axis. Origami Modular Spinning Top Step 2: Fold the top layer A-B down to A-C. Origami Modular Spinning Top Step 3: Fold point A to point D. Origami Modular Spinning Top Step 4: Fold the top layer down as shown below. Origami Modular Spinning Top Step 5: Now, fold the top layer down again like in Step 4.