

Two Tone Crepe Paper Bows. Kirigami Instructions. Paper Kawaii - Free origami photo & video tutorials, instructions, diagrams, downloads and more! Tutorial: Paper Cut Tea Light Lantern - Super+Super. Tutorial: Paper Cut Tea Light Lantern.
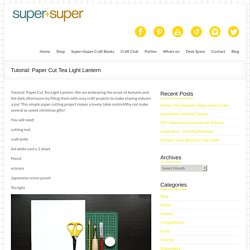
We are embracing the onset of Autumn and the dark afternoons by filling them with cosy craft projects to make staying indoors a joy! This simple paper cutting project makes a lovely table centre.Why not make several as sweet christmas gifts! You will need: cutting mat craft knife A4 white card x 1 sheet Pencil scissors Japaneese screw punch Tea light Start this project bit folding your card in half lengthways and cut along the fold. Draw your skyline on randomly with the pencil Working methodically by cutting all the straight edges first begin to cut carefully with your craft knife, TIP!
Next use your punch to add some window details! Once you are happy with the finished design make the join at the ends of your card skyline by cutting one slot from top to bottom at one end and bottom to top at the other. Paper Tea Cups #1. I’ve been messing around with paper.
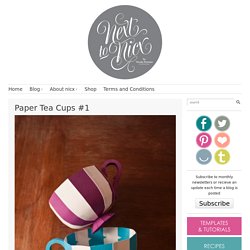
I’m not sure exactly why I decided to make paper tea cups, but inspiration hit over the holidays and I couldn’t find one online. Hence the gauntlet was thrown down! Ultra Cute Origami Easter Bunnies with Cotton Bums - Oh So Very Pretty. I know there’s been an influx of Easter-related posts on our blog – we’ve made a card and watercolored some eggs, and the next thing we’re going to share are bunnies!
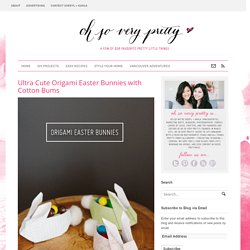
I’m not actually quite sure how bunnies are related to Easter, but a quick search on the web came up with a children’s story, a number of medieval church art inspirations and whatnot! All I remembered was that as a child, whenever we had Sunday School, our teacher would often bring a bunny for the kids to see and pet. Being a competitive little kid, I challenged my teacher once why she would bring a bunny, but not allow any of us to bring it home as a prize.
I Gotta Create!: Tinfoil Rickrack Tutorial. We're going to get crazy with tinfoil!
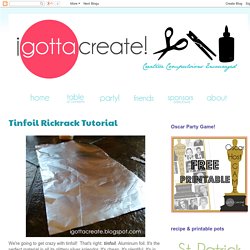
That's right: tinfoil. Aluminum foil. It's the perfect material in all its glittery silver splendor. It's cheap. It's plentiful. For example, if you haven't seen the snowflakes on my Paisley Santa Christmas Cards, you must check out the full post here. 7K+But for right now, here's the basic tinfoil tutorial. 3 Monkeys throwing around some....PAPER!!!: Freaky Friday!!!!! Make your own Glue Dots for a LOT less!!!!
It's Freaky Friday!!!
What is Freaky Friday? Things get crazy and mixed up!!! DIY Folded Paper Butterfly. The Things She Makes: Papercraft Stars. A few weeks ago, I posted a paper geometric heart tutorial and have fallen back in love with simple paper crafts.
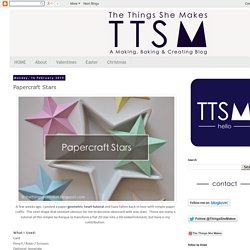
The next shape that seemed obvious for me to become obsessed with was stars. There are many a tutorial of this simple technique to transform a flat 2D star into a 3D embellishment, but here is my contribution. What I Used: Card Pencil / Ruler / Scissors Optional: template For this DIY, I created myself a simple 5-point star at the size I wanted and used this to trace around on my coloured card [but any star printed from google/Word/Pages/cut from a magazine will work just as well: Once you have traced around your template, cut your star and mark the center [note: this does not have to be exact at all. Paper Kawaii - Free origami photo & video tutorials, instructions, diagrams, downloads and more! The Papercraft Post: Cantilever Sewing Box Tutorial. Today I am beginning a new strand: Papercraft Fabrications.
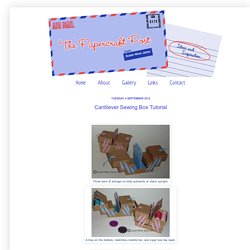
Here I will feature papercraft projects and techniques inspired by textiles, sewing, and needlecraft. This first project is perfectly timed to coincide with National Sewing Month - be prepared! I recently watched and enjoyed Le Havre, the arthouse feelgood movie. The art direction was tops – and the mood was 50’s retro. The Papercraft Post: Mini Magazine Rack Tutorial. I like to shuffle through my museum postcards for inspiration before I start a project, so I though it would be handy to have a desktop caddy for them.
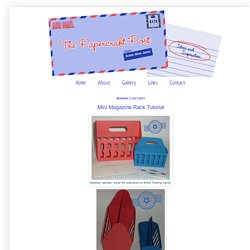
These reto-look mini-magazine racks can be sized to fit either postcards or ATCs. They're also handy for gift presentation. In fact, you can make them up in quantity quickly - so they make good party favours, maybe for a housewarming. I've got downloads for cutting files and .pdfs, followed by a tutorial.MagRackBodyandSidesStyle1.svg MagRackDividerStyle1.svg MagRackBodyandSidesStyle2.svg MagRackStyle2Handles.svg.
The Papercraft Post: Shaker-style Gift Boxes. These Shaker-Style mini gift boxes are right any time of year.
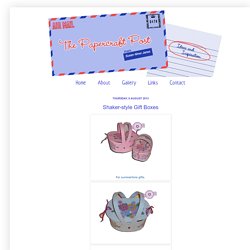
So, I've styled them two ways: all-occasion floral decoration or Christmassy/Wintertime. The boxes are quick and easy to make - there's a tutorial later on in this post. Here are your free downloads:Shaker-StyleBasketFlowers.pdf Shaker-StyleChristmasBasketA.pdfShaker-StyleChristmasBasketB.pdfShaker-StyleChristmasBasketA.svgShaker-StyleChristmasBasketB.svg For the flower baskets, I've just given you a .pdf.
The shapes are easy enough to cut out by hand. Of course, once you have downloaded the Shaker Box files, you can enlarge the pattern templates to make bigger boxes. The Papercraft Post: Keyring Storage Pockets. Here's a handy way to store small craft items - sewing supplies, brads, whatnots - a keyring stash.
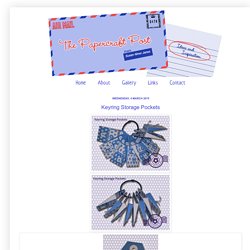
Each tag-like pocket is a "wedge-velope". You can add storage as needed. As you can see from the pic above, I've left it up to you to fill in the contents labels. Keyring Storage Pockets In addition to the printable pockets, you also need a some craft thread, mini-brads, and a 2in book ring. Make your own peg board! Big news guys, I finally took the plunge into the world of power tools the other week… I bought a power drill! This was a long-overdue purchase. I now feel like a superhero; a whole new area of crafting has been opened up to me. I’ve been more and more interested in woodwork over the past few months, so this new gadget is going to enable me to create much more ambitious DIYs. Poppyscabin. Well! Talk about getting carried away....Yes i have definitely done that all right. I am just loving doing my Easel board cards, and this soft Lemon is just too scrummy. Woven Yarn Basket. Make Your Own Modern Wooden Mail Organizer - Tuts+ Crafts & DIY Tutorial.
Need a stylish way to keep your keys and mail organized? This wooden mail organizer is the perfect solution to all your organizational needs. This quick woodworking project is a great way to test out your carpentry skills! One 33 x 30 cm (13 x 12 in) board—the back boardTwo 15.25 cm (6 in) long 2.5 x 5 cm (1 x 2 in) boards—the sides of the boxOne 23 cm (9 in) long 2.5 x 5 cm (1 x 2 in) board—the bottom of the boxThree 23 cm long 2.5 x .5 cm (9 in long 1 x .25 in)—known as "lattice"—front of the boxTwo medium wood clampsWood glueFinishing nailsDrill bit (smaller than the diameter of the finishing nails)Two hooksHammerTape measure Assemble the wooden box how you would like it to be. The sides of the box shown are 15.25 cm (6 in) long. Working with one mark at a time, drill a hole through the slat and slightly into the side board. Place a finishing nail in the hole you just drilled and tap it into place. Once the box is completed it is time to affix it to the back board.
Lori Hairston: Ice Cream Sandwich Box. Pages This Blog Linked From Here Sunday, May 3, 2015 Ice Cream Sandwich Box What is it about ice cream sandwiches? First I used a Spellbinder die to cut the chocolate wafer pieces. Next you'll need to size the box to fit your chocolate wafers. Last Minute Valentine's Gifts - My Lovely Inspirations. Valentine's Day is coming up so quickly! Do you need to put together some last minute Valentine's gifts? Easy Whip Stitched Christmas Card Box.