

FRK Hansen. Accessories er fantastisk og især smykker er lidt ligesom sko.
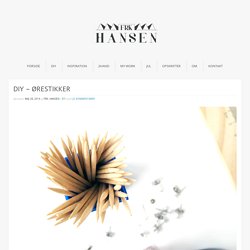
Man kan aldrig få for mange! Jeg er speciel vild med den tendens der har været inden for de små ørestikker. De sidste par år er der kommet så mange fine frem i geometriske former og forskellige metaller. Jeg har gang på gang kastet mig ud i den ene forelskelse efter den anden… Og når jeg står med ting jeg synes er lækre får jeg jo lyst til selv at prøve kræfter med det. Det har bare været svært at finde en indgangvinklen der ikke kræver specielt udstyr og et halvt smykkeværksted. Jeg synes resultaterne er blevet rigtig fint og de har da også allerede høstet søde kommentarer. Alt du skal bruge er: Tandstikker – Ørestikker – Neglelak – Kontaktlim – Hobbykniv – Lineal -Sandpapir Skær tandstikkerne ud i de ønskede længder og slib dem forsigtigt med finkornet sandpapir. Ønsker du at lave det mørkegrå par skal der skæres tandstikker i målene 10mm, 12mm og 15mm, mens dem med glimmer kræver tandstikker i målenen 11mm og 14mm.
A Beautiful Mess. A Beautiful Mess. Jewelry DIYs are one of my favorite things to make.
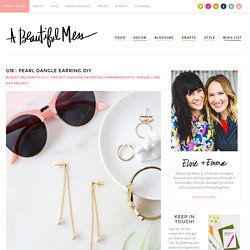
They are relatively quick, easy, and you can make something that's totally specific to your taste. Do you wear silver? Gold? Like bright colors or mostly neutrals? A Geek in Glasses. By Kid’s Crafts Contributor Stephanie, from the Blog A Geek in Glasses.
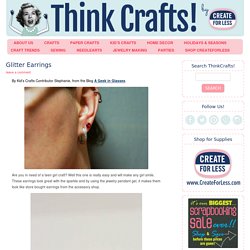
Are you in need of a teen girl craft? Well this one is really easy and will make any girl smile. These earrings look great with the sparkle and by using the jewelry pendant gel, it makes them look like store bought earrings from the accessory shop. Supplies: Start by dipping the earring posts into the Mod Podge. Then dip the earring into the colored glitter of choice. Stick the earring somewhere that it can sit up to dry. Once it is dry, apply one drop of the Jewelry Pendent Gel. Adventures of a DIY mom. Today I'm going to share how I made these earrings.
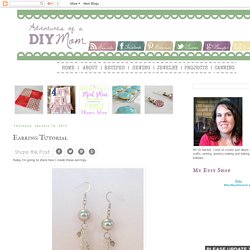
You will need: 2 earrings 2 eye pins 4 head pins 6 small jump rings 2 large jump rings 2 large beads 4 small beads 8 pieces chain - one inch long each I got my supplies from Prima Bead. You can find out more about them here and here. These were super easy to make. 1- start with an eye pin, add a bead and then form a loop on the other end. Click here to see how to form a loop. 2 - use a small jump ring to attach the bead to the earring 3 - Cut 4 pieces of chain one inch long. 4 - use a large jump ring to attach chain to bead 5 - grab a head pin, add a small bead and form a loop on the other end. Attach to chain using a small jump ring. Adventures of a DIY mom. Remember the twisted pearl bracelet I made?
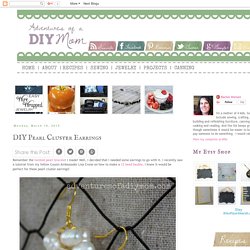
Well, I decided that I needed some earrings to go with it. I recently saw a tutorial from my fellow Cousin Ambassador Lisa Crone on how to make a 12 bead bauble. Almost Makes Perfect. Diy i loooove those modern bar earrings i feel like i’m seeing everywhere lately — so decided to make my own using some super tiny copper pipe i’ve had sitting around for a while. just like last week, this is another DIY that takes only a few minutes!
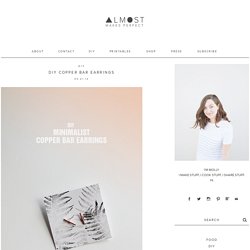
Materials super super tiny piping : this comes in all metallics at my hardware store earring posts and closures needle nose pliers scissors super glue directions 01 | cut down your earring posts to be as tiny as possible, do this by holding onto one with your pliers and snipping. 02 | cut down your pipe to whatever size you want, i just eyeballed it! 03 | glue together! Art Beads. Emily's Elegant Earrings InstructionsDesigned by Cynthia Kimura These beautiful earrings were originally made for Emily to wear in Maggie's Wedding, but we loved them so much, we wanted to offer them as an everyday elegant offering.

Step one: On a sterling silver eye pin, string a 3mm Swarovski faceted round bead followed by a light orange pearl nugget and another round bead. Finish with a simple loop. Blitsy. Blitsy. Blitsy. Bombshell Bling. Bombshell Bling. Bombshell Bling. Bombshell Bling. Bombshell Bling. Cafe Craftea. I feel almost guilty calling this a DIY since it's so simple.
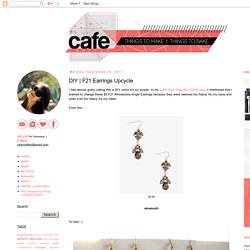
In my Labor Day Shop My Closet post, I mentioned that I wanted to change these $3 F21 Rhinestone Angel Earrings because they were seemed too flashy for my taste and were a bit too heavy for my lobes. From this... -drumroll- To this! :) Supplies (1) jewelry pliers (2) chain (3) earring wires Steps 1. 2. 3. Cafe Craftea. I love how the hardware store has recently been a treasure trove for us crafters looking for unique supplies to work with.
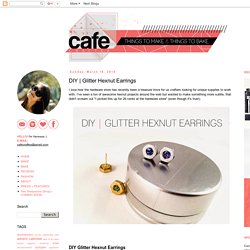
I've seen a ton of awesome hexnut projects around the web but wanted to make something more subtle, that didn't scream out "I picked this up for 29 cents at the hardware store" (even though it's true!). DIY Glitter Hexnut Earrings(Difficulty: Easy) Supplies. Cafe Craftea. It'll be a while before I can afford a pair of real pearls; I'd be too nervous about losing them!
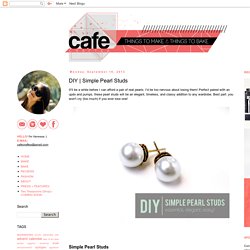
Perfect paired with an updo and pumps, these pearl studs will be an elegant, timeless, and classy addition to any wardrobe. Best part: you won't cry (too much) if you ever lose one! Simple Pearl Studs (Difficulty: Easy) Chic Steals. Hi friends! It’s been awhile since I’ve shared a DIY here, for many reasons. Life took over for awhile. But I’m back – with a fun and easy DIY for you all to try out! Big, bejeweled pendant chandelier earrings have been on-trend for awhile now…but unless you’re planning on whipping out that soldering torch and applying to your rhinestones…they’re a little hard to make. Enter translucent vinyl PVC as a backing – plus some strong glue – and you don’t ever need to pick up that pesky torch.
Crafts Unleashed. Crafts Unleashed. If you haven’t tried hammering wire to make jewelry, you’re missing out on a very fun craft. It may look hard to do but it’s really easy! These hammered DIY chandelier earrings took me ten minutes to make. Unbelievable? Well, believe it! A special jig makes the process so much easier. Create Your Style. Darby Smart. Dream a Little Bigger. Dream a Little Bigger. Dream a Little Bigger. Dream a Little Bigger. Dream a Little Bigger. EHow. Etcetorize. Evie S. I’ve been asked a few times where I get my ideas from. While creative ideas can be sometimes be elusive, sometimes they hit me instantly. Fashion Diva Designs. Hey my dear ladies, your Fashion Diva is always here to inspire you and to give you some wonderful ideas. For today I have a very interesting post that is called “DIY: Gorgeous Gilded Earrings”. Are you excited? You don’t have to spend money on accessories any more, because you can make some at your home.
Fire Mountain Gems. Design Idea D51J -- Designer -- Esther, Jewelry Production Specialist, Marketing Content Development Group, Exclusively for Fire Mountain Gems and Beads® To learn more about Esther Pollock, read her jewelry artist success story here Using flush-cutters, cut the following lengths of sterling silver 1.5mm rolo chain: Two 1-3/16 inch lengthTwo 7/8 inch lengthsTwo 3/8 inch lengthsRepeat to cut two 3-1/2 inch lengths of sterling silver half-round 24-gauge wire. String onto one sterling silver 2-inch headpin one sterling silver 8x5mm bead cap and one 8-9mm white potato pearl. Using round-nose and chain-nose pliers, form a wrapped loop on one end of one 3-1/2 inch length of sterling silver wire. Flamingo Toes. For The Makers.
For the Makers. For the Makers. For The Makers. Francoise et moi. As you guys MAY have picked up from my last post, I’m all about the brass these days. Francoise Et Moi. Fun Family Crafts. Fun Family Crafts. Fun Family Crafts. Fun Family Crafts. Happy Go Lucky. Happy Go Lucky. Happy Go Lucky. Happy Go Lucky. Happy Go Lucky. Happy Go Lucky. Happy Go Lucky. Happy Hour Projects. Happy Hour Projects. Happy Hour Projects. Happy Hour Projects. Happy Hour Projects.
Happy Hour Projects. Happy Hour Projects. Happy Hour Projects. Happy Hour Projects. Happy Hour Projects. Happy Hour Projects. Hello Glow. How About Orange. My practical self tends to buy only silver earrings since they match everything. But it would be good to add some color, so I made a few beaded hoops to add to the mix. Idle Hands Awake. The blog is back! Huzzah! Thank you so much to everyone for your patience during my embarrassing technical hiccup. Infarrantly Creative. Infarrantly Creative. Instructables. Instructables. Instructables. Jewelry from Home. Jewelry From Home. Jewelry Making Journal. JoAnn. JoAnn. JoAnn. JoAnn. JoAnn. JoAnn. JoAnn. JoAnn. JoAnn. JoAnn. JoAnn. JoAnn. JoAnn. JoAnn. JoAnn. JoAnn. Joy in the Jumble. Lia Griffith. Lia Griffith. Lines Across. Lines Across. Living with Three Moon Babies. London Jewelry School. Loose Ends. Loose Ends. Lotts & Lots.