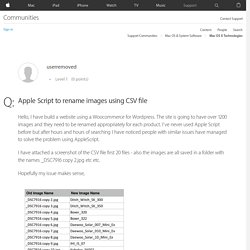

Apple Script to rename images using CSV file. In applescript it goes something like this: this all assuming the CSV file is a plain text file with a comma delimiting the old and new filenames on a given line.

If you have another structure you need to give specifics so this can be modified set theCSVData to paragraphs of (read "/path/to/theCSVFile.csv") set {oldTID, my text item delimiters} to {my text item delimiters, ","} repeat with thisLine in theCSVData set {oldFileName, newFileName} to text items of thisLine tell application "System Events" Rinominare file in base al contenuto foglio excel - rinominare file dati excel. Gabriele master (988)Inserita il 10 set 2012 no, non hai capito come funziona : - la formula è una formula di Excel, devi incollarla nel foglio e ti serve per farti creare la lista con i comandi che poi andremo ad incollare sul Terminale - dove salvi il foglio excel è indifferente (puoi anche non salvarlo), perché a te serve solo per farti creare i comandi, poi questi li copierai e incollerai sul terminale - fai un "copia" ed "incolla" normalissimo (l' "incolla valori" funziona solo tra fogli excel, in questo caso siccome tu vai ad incollare su un'altro applicativo, il risultato sarà comunque quello che vedi nella colonna, e non la formula che l'ha generato) eccoti un esempio : Chiedi pure se hai altri dubbi, capita una prima volta la logica, vedrai che poi è semplicissimo.

Scream of the Crop: How to Resize and Crop Photos in Adobe Photoshop CC (2014 release) This chapter is from the book Actions are basically tape recordings that live inside of Photoshop and you can use them to automate boring, repetitive tasks.

Actions have been in Photoshop for many years now and ever since they were added, users have been asking for the ability to have conditional actions (meaning, a step in the recording where you can insert a condition, like “if this particular thing exists, then do this instead”). For example, if you wanted to have one action that properly resizes both your wide and your tall images for your online portfolio, you’d want your action to be “conditional” (if it’s wide, run this action; if it’s tall, run this one instead).
Step One: Start by opening a wide image, and then go under the Window menu and choose Actions to bring up the Actions panel. Step Two: Now it’s recording what you’re doing, so go under the Image menu, choose Image Size, and resize your image, so it’s about 1200 pixels wide by 800 pixels tall, and then click OK. Introduction To Photoshop Scripting. Automation is useful in the work of every designer.

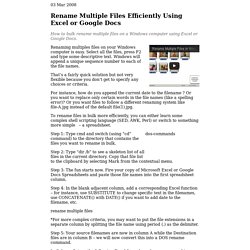
It saves precious time on repetitive tasks and helps us solve certain problems more quickly and easily. You can automate your workflow in Photoshop with actions, which are pretty popular and which most of you already know about and use. Today, we’ll introduce you to an advanced automation technique: scripting. All you need for this is basic knowledge of JavaScript, which some of us Web designers already have. Photoshop resize image to specific size, keep proportion? Rename Multiple Files Efficiently Using Excel or Google Docs. How to bulk rename multiple files on a Windows computer using Excel or Google Docs.

Renaming multiples files on your Windows computer is easy. Select all the files, press F2 and type some descriptive text. Windows will append a unique sequence number to each of the file names. That’s a fairly quick solution but not very flexible because you don’t get to specify any choices or criteria. For instance, how do you append the current date to the filename ? To rename files in bulk more efficiently, you can either learn some complex shell scripting language (SED, AWK, Perl) or switch to something more simple – a spreadsheet. Step 1: Type cmd and switch (using “cd” command) to the directory that contains the files you want to rename in bulk. Step 2: Type “dir /b” to see a skeleton list of all files in the current directory. Step 3: The fun starts now. Step 5: Your source filenames are now in column A while the Destination files are in column B – we will now convert this into a DOS rename command.
Introduction To Photoshop Scripting. Best Photoshop Export Action Ever. Recently here at Uncorked we’ve been looking at ways to optimize and improve our processes, and in reflecting on how we do things here at Uncorked, I brought up the number of times I’ve been standing over a designers shoulder and been telling them to “just press F5”.

A blank stare always ensues, huh? While I’ve been using this export action for forever myself, I’ve never shared it. Shame on me. So I’ve shared it with everyone here at Uncorked and figured I’d share it with everyone else as well. I know there are lots of “cut-up” asset production helpers out there, but feel free to give this one a shot and see if it’s as useful for you as it has been for me. Provided here is an action set containing two actions: Layer Export (F5)Layer Export Retina (F6) After downloading and unzipping, go to your Actions palette in Photoshop and from its options pulldown, select “Load Actions...” and choose the unzipped file.