

Create Custom Xcode Templates. Hey Guys, We have all been through… Hey Guys, We have all been through where we have to time and again set up a new project, and every time we have to use some common files/templates in every new project and isn’t it tiresome to set up network manager, API calls, Alert manager, etc for multiple projects?
We came across this pain and after giving it a thought and all the agony a programmer has to go through we thought how can we make a template that’s reusable and save us time? Adding these classes by writing manual code is time-consuming. With Xcode templates, we can speed up the process of adding them to any of the projects that require these files. After all, time is money 💰 💰 💰 💰. The more you know… □ 7 Tips to be More Productive with »Xcode 12« 1.
Decide Where to Open a File In Xcode, you can open a file in various ways: in the standard editor, in a new or existing assistant editor, in a new or existing tab, or in a new window. Here's how you can decide about this: When clicking on a file in the Navigator, hold down SHIFT + OPT The first visible editor will be highlighted and you can move that selection by moving the mouse cursor over another open editor to open the file there. 2. You shouldn't waste your time digging for a file in your folder hierarchy. As if this wouldn't be cool enough, this dialog also lets you decide which editor to open the file in: hold down CMD + OPT + SHIFT while double-clicking the file to open. Xcode Tips and Tricks (How To) Xcode Tips and Tricks, Episode 1: Keyboard Shortcuts. 24 Quick Xcode Tips. Xcode is a huge program, and if you can learn one or two new tips that help you work more effectively you can save hours of time every week.
In this article I want to walk you through 24 quick Xcode tips that help you write code faster, build better tests, and navigate around large projects more efficiently – there’s something for everyone! This article is also available as a video if you prefer. The content is the same, so use whichever is easiest for you. Sponsor Hacking with Swift and reach the world's largest Swift community! 1. Swift can synthesize memberwise initializers for structs, but not for classes. 2. When building software, it’s important to make sure your app works for everyone. 3. Documenter le code swift pour Xcode - Mindsers Blog. Cet article est libre d'accès pour tous grâce à la générosité des abonnés de Mindsers Blog qui soutiennent notre blog indépendant.
Si vous appréciez le contenu que je propose, je vous invite à vous abonner dès aujourd'hui. La documentation est très importante, on le sait. Et une bonne documentation passe aussi par les commentaires du code de votre application. Je vous avais même dit qu'il était possible de bien intégrer ses commentaires à son IDE pour qu'il les comprenne, les prenne en compte et les utilise en documentation. Pour Swift et Xcode, suivez le guide. Partons de ce code, joyeusement écrit à l'arrache. Leurs distances ? Ce que l'on va faire est simple. La description Pour cela il faut ajouter des commentaires d'une autre forme au-dessus de notre attribut distance et de notre méthode roule(). Ceci va ajouter nos commentaires en description de chaque entité.
La description supporte le Markdown. Comme vous le voyez pour la méthode roule(), il est possible d'afficher un bloc de code. Betterprogramming. OK, now that we have a binary code file, let’s use it in another project.
In Xcode, press Cmd+Shift+N and from the window that appears, selectSingle View Project. Press Next. Call the project whatever you want, for instance, SimpleApplication, and press Next again. After the project is created, we are ready to integrate the library we created in the previous section. The first thing is that we need to add the compiled library’s files to the new project. In the opened Finder’s window, create a new folder in the project’s root folder and name it lib. Go back to the library project in Xcode, find the file libNetworking.a in the project navigator, right-click on it, and select Show in Finder. Static and Dynamic Libraries and Frameworks in iOS. When developing iOS apps you rarely implement everything from the ground-up, because operating system as well as open source community offers large amount of functionality ready-to-use.
Betterprogramming. There are two ways to create your own swift package.
You can either use the Terminal application or Xcode (Version 11+) application, depending on what you prefer. Option 1: Using Terminal To create a new Swift package, open the Terminal application (Applications > Utilities > Terminal.app), and create a folder named MyFirstSPMDemo/>: $ mkdir MyFirstSPMDemo$ cd MyFirstSPMDemo Or using the single-line command: Introduction to Xcode 9. Properly Installing Xcode Themes on macOS. Let’s be honest the default pre-installed Xcode themes do the job but over time aren’t as useful, and what I mean by that is; eyesight.
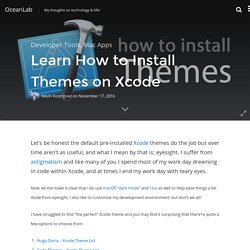
I suffer from astigmatism and like many of you I spend most of my work day dreaming in code within Xcode, and at times I end my work day with teary eyes. Now, let me make it clear that I do use macOS “dark mode” and f.lux as well to help ease things a bit. Aside from eyesight, I also like to customize my development environment; but don’t we all? I have struggled to find “the perfect” Xcode theme and you may find it surprising that there’re quite a few options to choose from: The above links will offer various theme options to get you started, but my favorite one thus far and I’m glad I found it via twitter a few days ago is: Let’s get started. Option One – Manually: Go ahead and under the Finder menu bar navigate to Go and select Go to Folder, a window should open. Codethemes.net. Swift Week 1: Xcode And Playground. Apple Developer Documentation. Xcode Playground Support. Swift developers can approach the language in many different ways.
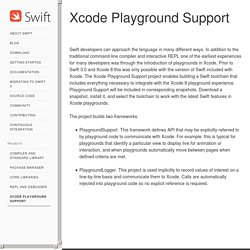
In addition to the traditional command-line compiler and interactive REPL one of the earliest experiences for many developers was through the introduction of playgrounds in Xcode. Prior to Swift 3.0 and Xcode 8 this was only possible with the version of Swift included with Xcode. The Xcode Playground Support project enables building a Swift toolchain that includes everything necessary to integrate with the Xcode 8 playground experience. Playground Support will be included in corresponding snapshots. Download a snapshot, install it, and select the toolchain to work with the latest Swift features in Xcode playgrounds. The project builds two frameworks: PlaygroundSupport. How to use Swift Playgrounds: Learn to code with Apple's Swift training app.