

Compact Framework Controls (Part 1): Creating Custom Controls and Designers « Critical Development. I’ve been having a lot of fun learning how to create rich design-time experiences for custom controls in Compact Framework for the past few days.
It’s been frustrating, and the documentation is hard to find unless you’re already familiar with the metaphors and know the buzzwords. Creating and Migrating Smart Device Custom Controls by Using Visual Studio 2005. Tim Wilson OpenNETCF.org April 2006 Applies to: Microsoft .NET Compact Framework version 1.0 Microsoft .NET Compact Framework version 2.0 Microsoft Visual Studio .NET 2003 Microsoft Visual Studio 2005 Windows Mobile 2003 software Summary: Learn how to use Visual Studio .NET 2003 and Visual Studio 2005 to create custom controls and upgrade existing custom controls that are targeted at smart devices and the .NET Compact Framework.
This article emphasizes the steps required to build a custom control in addition to the process of defining a design-time experience that benefits end developers. (49 printed pages) Download Create_Migrate_Designer_Controls_VS2k5.msi from the Microsoft Download Center. Contents. Getting Started with Graphics Programming. Using Managed Graphics Classes. Graphics Methods. Text Antialiasing. Antialiasing refers to the smoothing of jagged edges of drawn graphics and text to improve their appearance or readability.
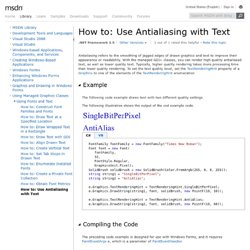
With the managed GDI+ classes, you can render high quality antialiased text, as well as lower quality text. Typically, higher quality rendering takes more processing time than lower quality rendering. To set the text quality level, set the TextRenderingHint property of a Graphics to one of the elements of the TextRenderingHint enumeration The following code example draws text with two different quality settings. The following illustration shows the output of the cod example code. Draw Images with Transparency. [This documentation is for preview only, and is subject to change in later releases.
Blank topics are included as placeholders.] The .NET Compact Framework supports transparency, but with only one transparency color. The SetColorKey(Color, Color) method must have the same color specified for the low color and high color range. This example creates a Bitmap of a rectangle with red and black designs and demonstrates two techniques for setting the transparency: Use the SetColorKey(Color, Color) method based on a pixel in the image. To demonstrate, run the application first with both transparency techniques commented out to see how the image appears with no transparency set. Note that the Graphics object that is used to create the bitmap is explicitly disposed. Rounded rectangle. In this short article I'd like to demonstrate how to draw rounded rectangles by P/Invoking the GDI function RoundRect .
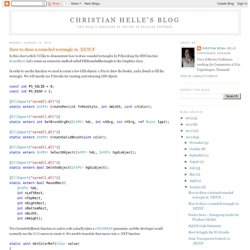
Let's create an extension method called FillRoundedRectangle to the Graphics class. In order to use the function we need to create a few GDI objects: a Pen to draw the border, and a Brush to fill the rectangle. We will mostly use P/Invoke for creating and releasing GDI objects const int PS_SOLID = 0; const int PS_DASH = 1; [ DllImport ( "coredll.dll" )] static extern IntPtr CreatePen( int fnPenStyle, int nWidth, uint crColor); static extern int SetBrushOrgEx( IntPtr hdc, int nXOrg, int nYOrg, ref Point lppt);
Bob Powell's Windows Forms Tips and Tricks. Contrôles Windows Forms dans le .NET Compact Framework. Mise à jour : novembre 2007 Le .NET Compact Framework prend en charge les fonctionnalités Windows courantes, notamment l'ordre de plan (la profondeur), le focus, l'activation, la capture, la superposition et les relations parent-enfant.
Les fonctionnalités exigeant beaucoup de ressources, par exemple les énumérations et les événements qui ne conviennent pas aux applications smart device, ne sont pas implémentées. Contient des classes pour programmer les applications de périphérique à l'aide du .NET Compact Framework. Windows Forms Controls in the CF. Design-Time Features for Windows Forms Controls and Components. Visual Studio .NET Building Windows Forms Controls and Components with Rich Design-Time Features Michael Weinhardt and Chris Sells This article assumes you're familiar with Visual Studio .NET and C# Level of Difficulty123 Visual Studio .NET provides support for designing rich features into your controls and components, allowing you to set properties, set form placement, inherit from base classes, and much more.
In this article, the authors answer these common questions by building a clock control and taking the reader along for the ride. When building a Windows® Forms application, you create forms, add components and controls, consume events, and write custom code. This article offers an introduction into the world of design-time functionality in the .NET Framework. Simon Hart: Writing designer friendly controls for Windows Mobile. One thing that you sometimes need when writing Visual Studio designer friendly controls for Windows Mobile, is knowing if your code is running in design time - which is essentially running on the desktop or not.
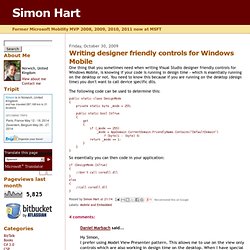
You need to know this because if you are running on the desktop (design time) you don't want to call device specific dlls. The following code can be used to determine this: public static class DesignMode{ private static byte _mode = 255; DesignMode support in CF 2.0. Block code execution in designer. UserControl DesignMode null. Mobile Development has proven to be quite the chore.
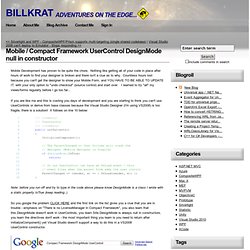
Nothing like getting all of your code in place after hours of work to find your designer is broken and there isn't a clue as to why. Countless hours lost because you can't get the designer to show your Mobile Form, and YOU HAVE TO BE ABLE TO UPDATE IT, with your only option to "undo checkout" (source control) and start over. I learned to try "all" my views/forms regularly before I go too far... If you are like me and this is costing you days of development and you are starting to think you can't use UserControls or derive from base classes because the Visual Studio Designer (I'm using VS2008) is too fragile, there is a solution! It follows on line 10 below: 1 /// <summary> 2 /// Constructor.