

Turn a Wooden Pallet Into Unique Photo Frames. Easy wall art from bulk food sacks. DIY Wooden Pallet Picture Frame. Magnificently executed, this absorbing and provocative DIY pallet picture frame can dignify any picture of memorable events or of your lovely ones.
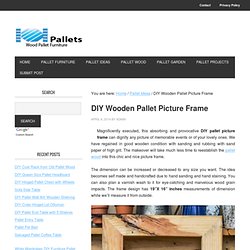
We have regained in good wooden condition with sanding and rubbing with sand paper of high grit. The makeover will take much less time to reestablish the pallet wood into this chic and nice picture frame. The dimension can be increased or decreased to any size you want. The idea becomes self made and handcrafted due to hand sanding and hand staining. You can also plan a varnish wash to it for eye-catching and marvelous wood grain impacts. Submitted By: M Walsh. Recreative works blog. My apartment walls are full of cool art prints but I’m getting tired of the same boring frames.
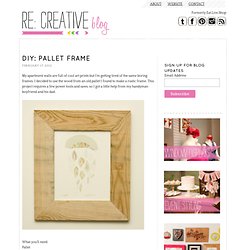
I decided to use the wood from an old pallet I found to make a rustic frame. This project requires a few power tools and saws, so I got a little help from my handyman boyfriend and his dad. What you’ll need:PalletJigsawTable sawMitre SawWood gluePlexiglassMetal rulerSharp utility knifeStaple gun4 push points Picture hanging hooksPiece of cardboard 1. Use the jigsaw to cut off the planks on the skid. 2. 3. Pallet to Posters from TechShop. When dealing with reclaimed materials, and especially something that wasn't meant for longevity like this pallet, things will assuredly not go according to plan. Reclamation is also different from demolition because you actually want to keep the materials.
That being said, some of the nails did not want to co-operate. Periodically I would shear a nail head when pulling this pallet apart. Number one: How do you get under a sheared nail head without gouging the wood? Flip the lumber over and use another nail to tap the broken bit out! Number two: How do you pull a long nail with no head? I mainly wanted the slats and didn't plan on including the 2x4's in this project, so didn't worry about buried nails. ~thrifty thursday~{how to make pallet picture frames} SNS 178 - reclaimed wood projects. Welcome to Saturday Nite Special, the multi themed DIY link party!

* Home Decor / Gardening * Crafts, / Sewing / Recipes / Printables / Blog tips * Theme of the week Every Fri 7pm to Sunday 11 pm Pacific.You are about to get overwhelmed in the most wonderful of ways. If you have non idea what to do with reclaimed wood, this party will convince you otherwise.There is just nothing cooler or more authentically old looking than working with old wood from the getgo.From the above thumbnails:1. 3. 4. 5. 6.
Au fil de l'eau - Bois flotté. Fournitures: - Une planche de 20 / 70 cm de large minimum.

DIY Pallet Frame {Poster Size} - Spoonful of Imagination. I have been wanting a rustic, vintage United States map for in our home.
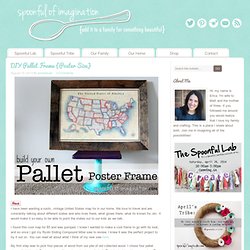
We love to travel and are constantly talking about different states and who lives there, what grows there, what its known for, etc. It would make it so easy to be able to point the states out to our kids as we talk. I found this cool map for $5 and was pumped. I knew I wanted to make a cool frame to go with its look, and so once I got my Ryobi Sliding Compound Miter saw to review, I knew it was the perfect project to try it out on. You can read all about what I think of my new saw here. Realiser-un-cadre-300106. Tableau Déco en planches. Un tableau Déco avec des planches, mais pas n’importe quelles planches… des vieilles planches grisées par le temps.Qui n’a pas au fond du jardin ou dans son garage une palette ou des planches oubliées et inutiles .
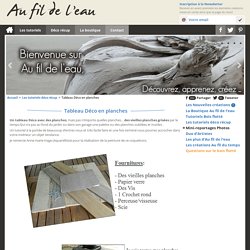
Un tutoriel à la portée de beaucoup d’entres vous et très facile faire et une fois terminé vous pourrez accrocher dans votre intérieur un objet tendance. Je remercie Anne marie Hage (Aquarelliste) pour la réalisation de la peinture de ce coquelicots. Etape 1: - Récupérer des planches si possible de la même épaisseur , vieilles et grisées naturellement par le temps elles auront plus de charme et accentueront l’authenticité de votre tableau. - Mesurer et couper toutes vos planches à la même dimension, ne pas hésiter à poncer les extrémités une fois sciées. Etape 2: - Je dispose côte à côte mes planches et je mesure la largeur de mon tableau, (ces mesures serviront à découper les planches transversales qui viendront se fixer à l’arrière du tableau ).
Etape 3: Bonne création! Comment encadrer un tableau et fabriquer un cadre bois tout simple. Le tutoriel complet.
C'est la mise en oeuvre de la feuillure qui peut rendre délicate la fabrication d'un cadre de tableau par un bricoleur ayant peu d'outillage. Nous verrons plus loin, pour ceux qui désirent un peu s'équiper, comment contourner la difficulté. Mais cette feuillure n'est pas indispensable et vous pouvez parfaitement construire un cadre simple, sans feuillure, et qui vous donnera entière satisfaction !
Voici un cadre très simple qui vous servira de base à la construction de cadres beaucoup plus élaborés. A vous d'en adapter la technique à vos propres besoins ! Le bois utilisé pour ce cadre. Easy picture frame from pallet wood.