
Comment faire une manipulation 3D et faire sortir un élément d’une image. Bienvenu dans ce nouveau tutoriel, dans ce dernier nous allons apprendre Comment faire une manipulation 3D et faire sortir un élément d’une image et l’incruster sur un smartphone. et voilà un aperçu du résultat final Ressources utilisées dans le tuto Images utilisées Version de Photoshop utilisée : Adobe Photoshop CC 2017 mais compatible avec presque toutes les versions de Photoshop .Niveau : facile Temps requis : 15mn Pour commencer le travail, ouvrez un nouveau document de 3000×2000 pixels , résolution 72Dpi Couleurs RVB8bits .

Photoshop : Créer une caricature à partir d'une photo ! Inspiration - Tous les articles sur inspiration > Blog Du Webdesign. Photoshop, transformer votre signature calligraphique en pinceau. Dans ce tutoriel photoshop, vous apprendrez à transformer votre signature calligraphique en pinceau photoshop ou en fichier PNG pour apposer votre signature sur vos photos avec Lightroom.

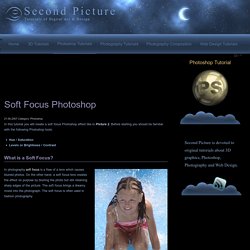
Retrouvez la vidéo du tuto photoshop en fin d'article Tuto retouche photoshop Réalisez votre signature et photographiez là Commencez par réaliser votre plus belle signature sur un papier. Faites le avec le plus de contraste possible, comme un papier blanc et un stylo noir. Une fois la signature faite, prenez une photo avec votre appareil photo ou encore votre téléphone portable. Préparez votre photo avec Caméra Raw ou Lightroom Toutes les opérations faites avec Camera Raw peuvent être faites avec Lightroom. Une fois votre photo ouverte avec Caméra raw ou Lightroom, prenez la pipette et cliquez sur le papier blanc pour équilibrer la balance des blancs. Soft Focus Photoshop. Second Picture is devoted to original tutorials about 3D graphics, Photoshop, Photography and Web Design. 21.06.2007 Category: Photoshop In this tutorial you will create a soft focus Photoshop effect like in Picture 2.

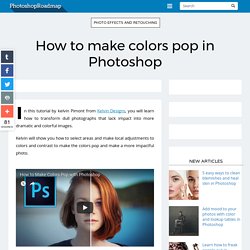
How to make colors pop in Photoshop - Photoshop Roadmap. In this tutorial by kelvin Pimont from Kelvin Designs, you will learn how to transform dull photographs that lack impact into more dramatic and colorful images.

Kelvin will show you how to select areas and make local adjustments to colors and contrast to make the colors pop and make a more impactful photo. If you want to master Photoshop’s color adjustment tools and techniques, you should consider taking a look at this Photoshop color correction on-demand class, Adobe Photoshop Mastery: Color and Tone by Ben Willmore. Photoshop thinks about color and tonality. You’ll go way beyond the basics and learn how to use the most powerful, precise and versatile adjustments. Welcome to the future of photo editing. Meet Luminar Neptune, the best photo editing software and Photoshop plugin for Mac (coming to PC this fall). Download and try Luminar for free today... Making of Urban. Transformer une image simple en couverture de magazine. Transformer une image simple en couverture de magazine Bienvenue dans ce nouveau tutoriel Photoshop, un tuto complet pour apprendre comment rendre une image simple en une couverture de magazine sous Photoshop, nous allons utiliser les filtres de Photoshop et quelques techniques afin de rendre notre image plus attrayante. en gros nous allons apprendre comment Transformer une image simple en couverture de magazine Attention ce tutoriel ne marche pas avec toutes les images à cause des couleurs mais seulement avec les images similaires à celle utilisée dans notre tutoriel. et voilà un aperçu du rendu final du tutoriel Transformer une image simple en couverture de magazine Pour commencer, je vous invite à télécharger l’image utilisée dans le tuto.

Puis importez-la dans Photoshop. Puis, allez dans Menu > image > Réglages > Virage HDR et ajustez les valeurs comme ceci. Utiliser le filtre Camera Raw pour réaliser un effet dramatique - Tuto Photoshop les meilleurs tutoriaux photoshop gratuit. Comme d’habitude toujours plus de tuto sur TutsPS, dans ce dernier nous allons utiliser le filtre Camera Raw de Photoshop pour réaliser un super effet dramatique, une méthode très utilisée par les photographes pour accentuer des photographies et obtenir des effets pro en quelques étapes.

Add dynamism with paint. Posted in: Tips & Tutorials, by Mark White January 4, 2017 1.

Create basic line work Begin by sourcing references to help you with your illustration. 2. On a new layer, go over the rough sketch, this time with more precise lines and details. 3. On a new layer, use a Black Hard Round brush to roughly go over the areas where the shadows on your players would be. 4. Swirling clouds help to add a sense of motion. 5. Add colours by pathing the individual parts out and then filling them with your desired colours. 6. Invert the black outlines of the opponents to white. 7. Add more detail using Gradient Overlay. 8.
Repeat this for all the shadows of our hero, this time setting the blend mode to Multiply. 9. Path out a strip on the side of the jersey, fill it with purple, add a Stroke of 3px, with Position set to Outside. 10. Use a Soft Round brush, set the colour to #8affcf, and brush in slightly on the jersey and shorts to create a transition. 11. 12. How to easily remove logos from clothing in Photoshop.
Labels and graphics on clothing can be distracting or unwanted in a photograph.

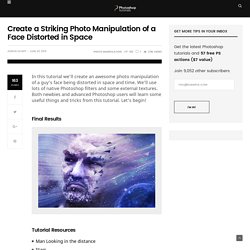
Clients will often want logos removed – especially if they are from a competing brand. Sometimes it is better to remove them completely. Usually, logos are placed over textures and patterns on clothing. These textures need to be replaced when removing a logo using different Photoshop retouching tools. How to cut out hair in Photoshop. Create a Striking Photo Manipulation of a Face Distorted in Space - Photoshop Tutorials. In this tutorial we’ll create an awesome photo manipulation of a guy’s face being distorted in space and time.

We’ll use lots of native Photoshop filters and some external textures. Both newbies and advanced Photoshop users will learn some useful things and tricks from this tutorial. Let’s begin! Final Results Tutorial Resources Step 1 Open the file “Man Looking in distance”. Create an Abstract Portrait in Photoshop - Photoshop Tutorials. On this tutorial we will create abstract photo artwork of a girl portrait with disintegration effect on it.

We will learn to create disintegration effect in a handy and practical technique, adorn the photo with stunning lighning and then complete it with color adjustment. Throughout the tutorial, we will have fun to learn simple and handy tricks to create photo artwork in photoshop. Photoshop. Avant de commencer, je précise à nouveau que cette partie ne vous explique pas Photoshop, c’est à dire comment fonctionne le logiciel, mais elle vous informe de l’utilisation du stylet et des propriétés spécifiques du logiciel d’Adobe destinées aux possesseurs de tablette graphique. Effet Canson. Ce tutoriel est écrit avec Photoshop Elements 10. Voici un tutoriel sympathique pour créer un effet de carte sur papier Canson. Image source : Vous pouvez télécharger gratuitement l’image qui a servit pour ce tutoriel : ► Winter Scene Stock, sur DevianArt ► ouvrir l’image ► dans le panneau Calques, faire un double-clic sur la vignette du calque Arrière-plan pour le convertir en calque libre (calque 0)
Create-a-photo-manipulation-of-the-emerald-city-of-oz-with-adobe-photoshop. In this tutorial I'll show you how to create an inspired Emerald City based on The Wizard of Oz, with royal buildings, a poppy field, a yellow brick road and a green gate. You'll learn how to enhance the color and lighting, use texture, create depth of field, and use drawing and painting as well as advanced compositing techniques. The following assets were used during the production of this tutorial: I just love the magnificent and gorgeous buildings as well as the fantasy atmosphere of the city, and I want to recreate this scene on a bright, sunny autumn day. There will be lots of steps, and some techniques will be repeated or done in the same way, so I'll go into more detail in the first stages and be shorter in the later ones. Create This Surreal and Medieval Style of a Battlefield in Photoshop - Page 2 of 4 - Photoshop Tutorials.
Subscribe and get the latest Photoshop tutorials, tips, and more via email. As a way of saying thanks, you'll also receive a free copy of Lomocam Photoshop Actions ($7 retail value). Create a Vintage and Romantic Scene of Old Memories in Photoshop - Photoshop Tutorials. Face Art Illustration Bildmanipulation. Wechselt jetzt von Photoshop zum Adobe Illustrator. Theoretisch könnt ihr diesen Schritt auch in Photoshop machen, jedoch bevorzuge ich Illustrator, weil ich dort mehr Möglichkeiten habe mit Pfaden zu arbeiten bzw. diese zu bearbeiten.
Wenn ihr noch nie mit Illustrator gearbeitet habt, könnt ihr das Tutorial (Illustrator Grundlagen) ansehen. In Illustrator fügen wir das Bild mit dem freigestellten Gesicht (STRG+V) ein. Dieses dient uns als Vorlage für die Shapes. Nachdem ihr das Bild auf die erste Ebene eingefügt habt, geht auf das Fenster Transparenz und setzt die Deckkraft auf 50%. Im nächsten Schritt erstellt ihr eine neue Ebene. Tipp: Damit ihr immer die Vorlage sieht, setzt auch hierbei die Deckkraft der Shapes auf 50%. Space Environment Fxencore Photoshop Tutorials. Cool graffiti techniques in Photoshop. How to turn a photo into a painting (realistically) Créer un effet de route brumeuse avec Photoshop. Route de montagnes avec Photoshop extended CS5 Pour faire ce tutoriel, il faut vraiment partir à la recherche des bonnes images. Une route sinueuse et un paysage de montagne pris en hauteur.
Je vous mets les liens des images qui m’ont servies, mais vous pouvez aussi partir à la recherche d’images. J’écris ce tutoriel, en supposant que vous avez téléchargé les images du pré-requis. Pré-requis : Route ( Yosemite Valley (