

Paracord bracelet with a side release buckle. Woven paracord bracelet/watchband. For this project, you'll need approximately 10 feet of paracord, scissors, lighter, tape measure, hemostats, watch, and a 5/8" side release buckle.
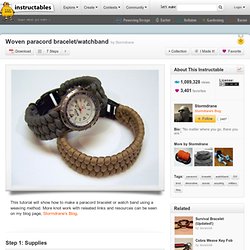
I used a 5/8" ITW Nexus contoured side release buckle, but you can use other less expensive ones like those found at Creative Designworks. Paracord can be found at local Army/Navy stores or from various online sources: Supply Captain, Lighthound, Cool Glow Stuff! , ebay, etc... The actual amount of paracord that will be used depends on your wrist size. My wrist is about 8.5 inches and I actually used around 8 or 9 feet after finishing the bracelet/watchband. *If making a watchband, the watch needs to have about 5/8" space between the lugs(where the watch pins go) so that 5 strands of paracord will fit. Potato Batteries: How to Turn Produce into Veggie Power! Potato Batteries: How to Turn Produce into Veggie Power! Photo to Wood Transfer Tutorial in 5 Simple Steps. Transferring a photo to wood is one of my favorite crafting techniques!
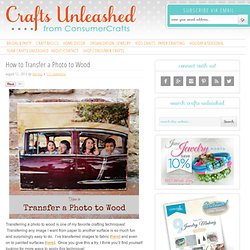
Transferring any image I want from paper to another surface is so much fun and surprisingly easy to do. I’ve transferred images to fabric (here) and even on to painted surfaces (here). Once you give this a try, I think you’ll find yourself looking for more ways to apply this technique! To begin with, know that you cannot use an image that comes from your ink jet printer at home. The ink will smear and you’ll be disappointed (unless you were going for an impressionist style piece!). Step 1: Paint the edges of your wood panel. Step 2: Apply a generous amount of the transfer solution to the image. Step 3: Press the image, photo side down, onto the wood panel. Step 4: Use a damp cloth or sponge to wet one section of the paper at a time. Step 5: Once you are satisfied with the image, sand the edges lightly. I love the end result! You can also paint the wood before you transfer your image. Narnia and the North!
Yesterday I asked the girls what they wanted to do afterlunch and Jenna said, "crafts" (of course).
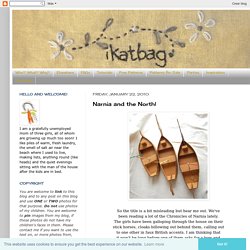
So we cut up acorrugated cardboard box and made ships. Emily's was the Dawntreader, Jenna wanted a princess figurehead and Kate had no opinion so we left the prow of her ship bare. We started out with the basic ship, which was justa flat bottom with two symmetrical sides. These were hot-glued to the bottom, meeting at the bow(front). If anyone is interested, here is the pattern - I thought I'dtrace it out and save it here in case we want to make theseagain - like if we ever did a nautical-themed birthdayparty. Two strips of cardboard were also glued across themiddle of the boat, each with a hole to support themast and sails.
Next we added the figurehead and tail and a command bridge and helm (steering wheelthingy)- made with cardboard and toothpicks. The mast was made from a dowel and a popsicle stick.I'd have liked the masts to be taller but all we had werethese precut foot-long dowels. Thermoelectric Generator Project. Elementary School Science Fair Project Ideas. Sofia 3D Papercraft. Disney Family. Crystal Rainbows and Shamrocks. We needed some St.
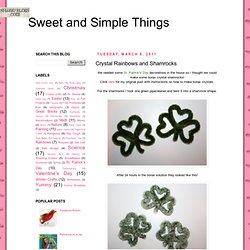
Patrick's Day decorations in the house so I thought we could make some borax crystal shamrocks! Click here for my original post with instructions on how to make borax crystals. For the shamrocks I took one green pipecleaner and bent it into a shamrock shape. After 24 hours in the borax solution they looked like this! The rainbow was a little tricky. I put in 2 full scoops of borax {with the provided scoop}. Then I glued on some extra large cotton balls onto the ends of the rainbow to cover up the twisted ends of the pipecleaners. Science Experiments You Can Do At Home or School. 20 Creative DIY Project Ideas. We all have many old and unused items lying around in our homes or garages waiting to be thrown away.
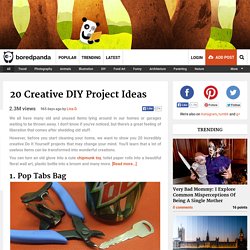
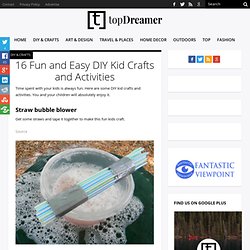
I don’t know if you’ve noticed, but there’s a great feeling of liberation that comes after shedding old stuff. However, before you start cleaning your home, we want to show you 20 incredibly creative Do It Yourself projects that may change your mind. You’ll learn that a lot of useless items can be transformed into wonderful creations. 16 Fun and Easy DIY Kid Crafts and Activities - DIY & Crafts Time spent with your kids is always fun.
Reciclar carton, rollos de papel. Email 22.2K 53+ 140Email Les dejamos muchas ideas para reutilizar el cartón de los rollos de papel, de varias maneras distintas.
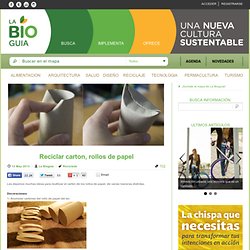
Decoraciones: 1- Acumular cartones del rollo de papel del wc. 2- Aplanarlos, marcar con una regla cada 1cm, y cortar con cuter o tijeras las “rodajitas” de cartón. 3- Colocar formando flores y hojas, o al gusto, y unir con pegamento termofusible o un grapadora.