

Two Methods for Shooting Star Trails Made Easy. As a landscape photographer, it can be easy to find stunning subject matter to photograph during the day.
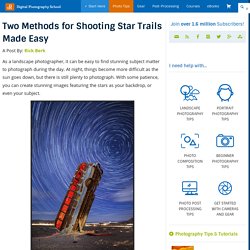
At night, things become more difficult as the sun goes down, but there is still plenty to photograph. With some patience, you can create stunning images featuring the stars as your backdrop, or even your subject. This image is a composite of 156 separate exposures, merged using StarStax software. Each exposure was ISO 400, f/2.8, 30 seconds. The red glow inside the bus was done by shining a red LED flashlight inside the bus from the other side, during one of the exposures. Equipment list. Night Photography Complete Star Trails Tutorial - 300+ free Photoshop Tutorials. In this video I will show you the photo session and Photoshop editing of the images to create a star trail and 4K time lapse.
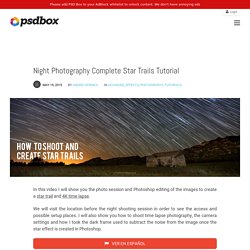
We will visit the location before the night shooting session in order to see the access and possible setup places. I will also show you how to shoot time lapse photography, the camera settings and how I took the dark frame used to subtract the noise from the image once the star effect is created in Photoshop. Night Photography Complete Star Trails Tutorial - 300+ free Photoshop Tutorials. Star Trail Photography Tips. Tricky question, and different people swear by different methods.
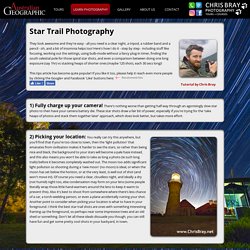
Basically, taking one long exposure is a hell of a lot easier to do, but has some significant drawbacks. The problem is that the camera's sensor is just like any other electrical device, and it gets hot if you leave it running for too long, and this heat creates an ever increasing amount of random speckles of colour/light to register throughout your image, called 'hot pixels' (the effect looks similar to ISO noise). This means that for lengthy exposures, the longer the shot is, the lower quality it will be. Mike Orso, Nowhere Land. Location The International Car Forest of the Last Church, in Goldfield, Nevada.

The Ultimate Guide to Shooting Milky Way Photography. With the low light capabilities of digital cameras drastically increasing in recent years, Milky Way photography is booming in popularity.

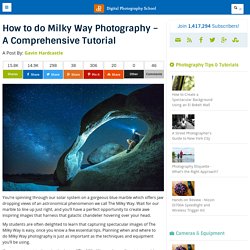
As a result, it is becoming more and more common to see photographers staying out past sunset and late into the night. How to do Milky Way Photography - A Comprehensive Tutorial. You’re spinning through our solar system on a gorgeous blue marble which offers jaw dropping views of an astronomical phenomenon we call The Milky Way.
How to do Milky Way Photography - A Comprehensive Tutorial. How to Shoot a Star Trails Selfie. There are times when planning and patience can result in a killer shot.
This nighttime star trails selfie (above) that I captured in the Canadian Rockies was one of those times. I’d planned to shoot star trails over Mount Rundle and the town of Banff, Alberta while hopefully capturing reflections in Vermillion Lake, surrounded by melting ice. My initial vision was for a completely cloudless sky, but the small yet persistent low clouds ended up adding an ethereal quality to the shot I hadn’t expected. When I looked back at my first 30 second exposure, I knew right away that this shot had some potential. All I had to do was set things up properly and then play the waiting game. Photographing Stars Using a Kit Lens. Looking at a starry sky while sitting in the open is always a soothing experience, but shooting those stars is a much better one.
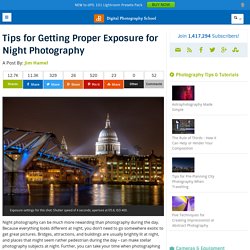
Have you seen those amazing starry skies and Milky Way photographs from professional photographers and wondered how to do this yourself but never tried it because you thought you did not have the proper equipment? Let me tell you, “You were wrong”. If you own a normal DSLR camera and are interested in shooting stars (and the Milky Way), you can do this with your kit lens. I will explain the whole process step by step in the easiest possible way, so that even if you do not have much technical knowledge, you can understand and implement this method. Tips for Getting Proper Exposure for Night Photography. Exposure settings for this shot: Shutter speed of 4 seconds; aperture at f/5.6; ISO 400.
DeepSkyStacker - Free. How to Shoot the Night Sky (Introduction to Astrophotography) The following post on photographing the night sky is by jgomez65 – one of dPS’s forum members.
Several people asked me to post a simple tutorial on how I took some night sky pictures. I am not an astrophotographer in any way, shape or form, nor do I have any expensive equipment. I simply read several tutorials, picked a dark spot on the beach and tried to do my best. Anyway, here is how I did it. 1. Beginners Tips for Night Sky and Star Photography. Star Photography My favorite type of personal photography is taking night shots of the stars (long exposure pictures). I am often busy shooting pictures of people at weddings, or apartments, or models, and it’s important for me to make sure I take pictures for fun regularly. Taking pictures for no one other than myself is highly rewarding, soul filling, and fun! I also love taking travel photos and HDR photos, in this article we will take a close look at exactly how you can take your own epic star photographs. 30 seconds at f/2.8, ISO 1250.