
10 DNS Errors That Will Kill Your Network. In-Depth 10 DNS Errors That Will Kill Your Network 3.

Improperly Configured Forwarding Ordinarily, when a client confronts its DNS server with a request for a resource record in an outside domain, the DNS server searches for a name server in the target domain and submits the query to that server. This standard query resolution has a couple of problems. First, the internal server can get so preoccupied chasing down recursive queries for public hosts that it runs out of resources to handle queries for its own zones. An internal root server doesn’t need to waste energy or cause security problems by chasing referrals. If you have a business relationship with an ISP, you might get an agreement with them to use their DNS servers as forwarders. If you have a multi-tiered private DNS namespace supporting AD, configure the DNS servers in the child domains to use the internal root DNS servers as forwarders.
Don’t forget to enable forwarding at each child DNS server. 10 Ways to Troubleshoot DNS Resolution Issues. Introduction We all need proper DNS resolution for our network applications.

When it this is not working, what do you do? Let us find out… Let’s face it, when DNS resolution is not working, using anything on your computer that has to do with networking is painful because there is good chance it will not work. DNS really is not a “nice feature” of a network, it is a requirement. So how do you troubleshoot this critical network infrastructure service when you are on an end user PC (or your PC) and DNS is not resolving a DNS name? 1. Many times, if you open your web browser, go to a URL, and that URL fails to bring up a website, you might erroneously blame DNS. How to Clear All Caches and Free Up Disk Space in Windows 8. How to Clear All Caches and Free Up Disk Space in Windows 8 Clearing the cache on your computer is (usually) a quick and easy way to help speed it up.

Deleting those temporary files frees up space, helping you computer run smoother, especially if you have not cleared the cache for a extended period. However, finding the different caches in Windows 8 is a little trickier than in previous Windows systems. Since Windows 8 is basically running two different computing environments at once (the new Start Screen/Metro UI and the regular desktop) you actually have to clear a bunch of different caches.
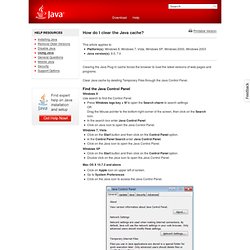
Step 1: Delete Your Temp Files To start with the basic temporary file cleanup, go to the Start Screen and type "disk. " You will see an option to "free up disk space by deleting unnecessary files" under the settings tab. From here you can select the files you wish to delete and you can also see the estimated space will gain from your actions. Step 2: Delete Your Internet Explorer History You're Done! How do I clear the Java cache? Clearing the Java Plug-in cache forces the browser to load the latest versions of web pages and programs.

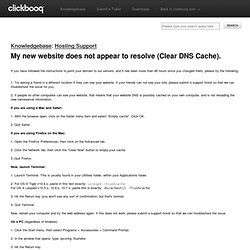
Clear Java cache by deleting Temporary Files through the Java Control Panel. Find the Java Control Panel Windows 8 Use search to find the Control Panel Press Windows logo key + W to open the Search charm to search settings OR Drag the Mouse pointer to the bottom-right corner of the screen, then click on the Search icon. In the search box enter Java Control PanelClick on Java icon to open the Java Control Panel. Windows 7, VistaClick on the Start button and then click on the Control Panel option.In the Control Panel Search enter Java Control Panel.Click on the Java icon to open the Java Control Panel. My new website does not appear to resolve (Clear DNS Cache). If you have followed the instructions to point your domain to our servers, and it has been more than 48 hours since you changed them, please try the following: 1.

Try asking a friend in a different location if they can see your website. If your friends can not see your site, please submit a support ticket so that we can troubleshoot the issue for you. 2. If people on other computers can see your website, that means that your website DNS is possibly cached on your own computer, and is not reloading the new nameserver information. If you are using a Mac and Safari: 1. 2. If you are using Firefox on the Mac: 1. 2. 3. Now, launch Terminal: 1. 2. 4. Now, restart your computer and try the web address again. On a PC (regardless of browser): Change your Settings > Windows 8.