

CEB Press Build Instructions. This page gives you all the information you need to make your CEB Press from stock steel and parts.
The steps in Mechanical Fabrication and Electronic Components are independent of each other, but within each category, the suggested order should be followed. Once you finish both, you can continue on to Final Machine Integration. At that point, your machine can be used. The entire fabrication procedure is contained in a master PDF file - CEB A-Z Fabrication Instructions 2011 [edit] Drawer See Fabrication Diagram and Master Index for part numbers Tack two sets of 70 and 71 together Instead of 5/8" thickness for 70, use 1/2" thickness on one rail Tack so that 5/8" can be replaced with 1/2" if needed Grind tacks off top QC - work on a flat surface, so top side is within 1/64" inch even for both rails QC - tacks ground down to surface of rails as can be felt with a flat surface SpreadsheetEdit The purpose of this section is to build and assemble all mechanical components of the CEB.
[edit] Paint. CEB Automation Prototype II. This is 2010 continuation of work from 2009.
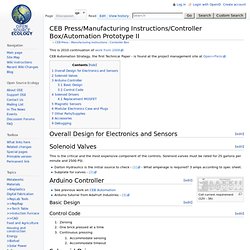
CEB Automation Strategy, the first Technical Paper - is found at the project management site at Open+Pario. This is the critical and the most expensive component of the controls. Solenoid valves must be rated for 25 gallons per minute and 2500 PSI. Dalton Hydraulics is the initial source to check - [1] - What amperage is required? 3 amps according to spec sheet. Coil current requirement (12V - 3A) See previous work on CEB AutomationArduino tutorial from Adafruit Industries - [3] [edit] Basic Design [edit] Control Code Zeroing One brick pressed at a time Continuous pressing Accommodate sensing Accommodate timeout We are using [PWM Driver v1.1] boards from the RepRap project to control the solenoids in The Liberator.
Makerbot StoreinstructionsMake sure to address the known bug in assembly (incorrect diode placement). Only 3 channels, but otherwise perfect. BTW, Makerbot Industries is a pretty good example of a business based in open source hardware. Arduino Control of CEB Prototype 2. Starting with the installation of Arduino on Mac OS X 10.3.9 - - we move on to examine system requirements: Computer and USB connection for programming Arduino for control 2 Solenoid Valves --relays to drive solenoid from arduino (12V 3.5A required?)
Arduino max sink/source is 20mA. 1 limit switch Power supply to arduino Power supply to solenoid valves We have Arduino Duemilanove: Power plug (after done with USB programming) 2 signal outputs to control solenoid valve power (via 5V_in power solenoid?) FeF Liberator Fabrication. Source the electronics.
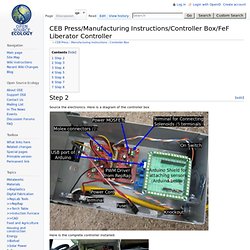
Here is a diagram of the controller box Here is the complete controller installed: Electronics Box Gross Electronics: Electronics Box - local hardware store Extension Cord Or house wiring with Female Plug and Male Plug. 2 alligator clips for battery connection - auto parts store House wiring box (blue box in picture above below the Arduino Shield - hardware store Fuse holder - car parts store 12v quick connect plugs - 5 pairs - for quick-coupling to solenoids out of controller box - car parts store Stranded 5A wire for solenoid connections Spade terminals (10) for connection to solenoid terminals Underground phone cable - makes very tough connectors for sensors Potting compound PVC pipe - with 1 end capped Stranded Cat 5 wire for sensor connections [5] Supermagnets - Microelectronics:
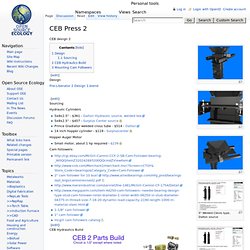
Grate Shaker. CEB Press 2. CEB Press 2 From Open Source Ecology Jump to: navigation, search.
CEB Automation Prototype II. The Liberator Assembly. This is the current assembly, it is in progress, expected to be completed by the end of october: CEB Press Prototype III Assembly CEB Press Prototype III Assembly- Adjusting the drawer CEB Press Prototype III Assembly- Soil loading system CEB Press Prototype III Assembly- Installing the secondary cylinder Hard-lining the main cylinder Below is the old version.
After unpacking the crate as in The Liberator Packing List, or building the components, you are ready to assemble the machine. GVCS - CEB - Assembly Assembly begins by locating a flat spot on the ground, preferably in a covered space in case of foul weather. Step 1. Step 2. Step 3. Step 4. Step 8. The Liberator Full Release - Mechanical Fabrication. (last updated 6.2.10) This text, in conjunction with pictures and videos, constitutes complete fabrication documentation.
The product is The Liberator Beta v2.0 automatic CEB press, capable of producing 13-16 bricks per minute. All the .dxf files are here. See The Liberator Packing List to identify the parts discussed below. The frame consists of 7/16" thick, 6" wide u-channel. The Liberator Beta v2.0 is fabricated as follows. Frame overview, see frame_overview.dxf (94.2 KB) from 01/20/2010 03:36 pm at Open+Pario The u-channels are shown around the cylinder and below the hopper. CEB Press - Initial CAD Files - open+pario [project hosting] Bill of materials for The Liberator II.
CEB Press - Initial Cut List - open+pario [project hosting]