

Monkey Business: Fabric covered boxes. When I first started this blog, I originally thought it would be a perfect mix of recipes and crafts, but I've really only focused on the cooking/baking part.
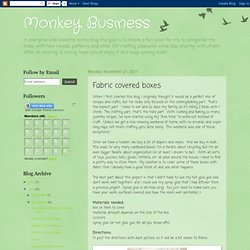
That's the easiest part. I need to eat and so does my family, so it's killing 2 birds with 1 stone. The crafting part.. that's the hard part. With cooking and baking so many yummy recipes, I've now started using my "free time" to work-out instead of craft. Unless we get a nice relaxing weekend at home, with no errands and super long naps, not much crafting gets done lately. Since we have a toddler, we buy a lot of diapers and wipes. Monkey Business: Fabric covered boxes. DIY Summer shorts (free pattern) Hello DIY’er!

I hope you are enjoying the summer and the heat… As I saw that you liked both posts with patterns included, I created a simple pattern of a summer shorts you can make with the fabric you like. It’s a basic pattern which you can you can use as you like depending on what fabric you choose and the finishing touches you prefer. DIY BRALETTE. It's february!
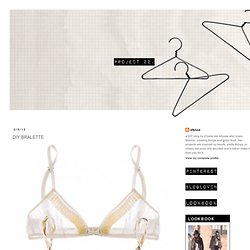
Valentines day is just around the corner so I thought this Bralette DIY would be perfect for the occasion. It's actually super easy to make and they're so pretty. You will need Pattern - Print pattern scaled to fill entire paper. Add seam allowance to the curved edge. Fold-over clutch, metal zipper. I'm hot for fold-over clutches.
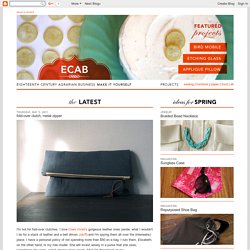
I love Clare Vivier's gorgeous leather ones (aside: what I wouldn't I do for a stack of leather and a belt driven Juki?) And I'm spying them all over the (interwebs) place. Take out your jean’s waistband tutorial…aka make your pants bigger! Oli the photo-bomber I’m so excited about this tutorial!

Everyone has a pair of pants in their closest that just doesn’t’ fit for whatever reason, and now, you can make them fit!! How to Make a Thong. If you feel comfortable with your sewing abilities, stitch together pieces of stretchy elastic lace trim to form a simple, sexy thong. 1Gather your materials.
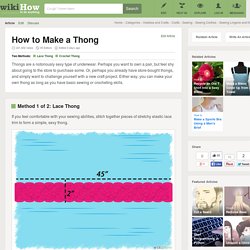
You will need 45” of stretch lace trim, about 2 inches (5.1 cm) thick. Ad 2Cut two 14.5” pieces of lace for the waist band. 3Cut two 8.5” pieces of lace for the crotch. 4Place the two 14.5” pieces of lace on top of each other with the front sides facing each other. 5Pin each end together using one pin on each side. 6Place the two 8.5” pieces of lace on top of each other with the front sides facing inward. 7Place pins down the center of the lace pieces. Curve the pins toward the corner of the lace once you are about 1.5” from the end. 8Use a serger/overlock sewing machine to sew the ends of the 14.5” pieces together.Alternatively, use a zig-zag stitch to hand sew the pieces together. 11Sew the pieces together using a zig-zag stitch or sewing machine. Flat-Felled Seams. Note: today we continue our occasional series of seam finishing tutorials written by April Henry.
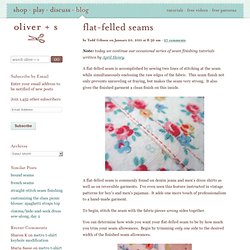
A flat-felled seam is accomplished by sewing two lines of stitching at the seam while simultaneously enclosing the raw edges of the fabric. This seam finish not only prevents unraveling or fraying, but makes the seam very strong. It also gives the finished garment a clean finish on this inside. A flat-felled seam is commonly found on denim jeans and men’s dress shirts as well as on reversible garments. Lav’s lapped zip. Yes, to some my nickname may sound like the place one goes to to, uh, go.
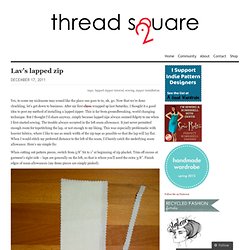
Now that we’re done chuckling, let’s get down to business. After my first class wrapped up last Saturday, I thought it a good idea to post my method of installing a lapped zipper. This is far from groundbreaking, world changing technique. But I thought I’d share anyway, simply because lapped zips always seemed fidgety to me when I first started sewing. The trouble always occurred in the left seam allowance.
When cutting out pattern pieces, switch from 5/8” SA to 1” at beginning of zip placket. Stitch seam RS together, B to T to bottom of placket, back tack, then machine baste the placket. Turn garment right side up, top toward you. Shown RS up, top away from you - note the extra SA width on the left Pin to right zip tape, with top of tape hanging off edge (good thing you bought a longer than called-for zip! Baste, if necessary, or simply stitch from B to T, with zip foot to left, needle close to folded edge.
How to Insert a Magnetic Snap Closure. The magnetic snap is indispensable to the construction of purses, totes and bags.
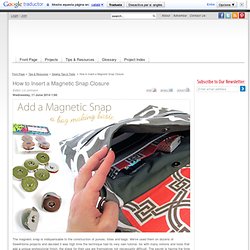
We've used them on dozens of Sew4Home projects and decided it was high time the technique had its very own tutorial. As with many notions and tools that add a unique professional finish, the steps for their use are themselves not necessarily difficult. The secret is having the time and patience to go through the instructions in the correct order, and with extra precision in your marking and measuring.
Simply homemade: Scripture/book cover tutorial. I love Thursdays.
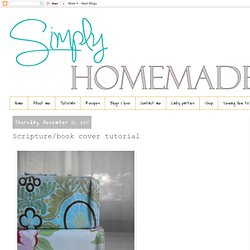
Husband works Monday-Thursday every week (4 10's) and so in my mind Thursday marks the beginning of my weekend. In light of that little bit of randomness, Happy Thursday!! Verdant Bents: Make your own easy top. The Spring Top Pattern I never made a top before and in the past few days I have made two. It is addicting! Attempting creative: Bag, You're It! Tutorial. I am way late on this tutorial. But I have another project this week. Will that make up for my tardiness? (In full disclosure, my hometown has been suffering some flooding in recent hours, and my mind has been in other places.)
The Beauty of Bias Tape Part 2: Freshen Up an Old Towel. Don’t get rid of those old, worn-out bath towels! Freshen them up with some homemade bias tape and turn them into cute washcloths instead. The first thing you’ll need to do is make your own fun, colorful bias tape. Click here to get last week’s how to. Fabric Covered Notebook Tutorial. Fabric Storage Basket…with handles. Oh, I’m so excited to have Crystal here again today from Stitched By Crystal. Craft Me Not: Easy DIY iPhone Case Tutorial. My husband gave me new iPhone 4Gs for a Christmas gift (lucky!)... And It's been almost a week now and I haven't get any new case so I thought of creating one and why buying.
Materials:2 pcs fabrics size 10 x 4 inches 2 pcs fusible interfacing 10 x 4 inches1 pc fabric size 2x2.5 1. For the tab, fold the 2.5” tall by 2” wide tab piece lengthwise in fourths and edge stitch. Zippers Unzipped- How to Sew a Zipper. The Best Way to Sew Bias Tape. Crayon Booklet Party Favors. So before I go back in time to share some of my summer (and pre-summer – eek!) 900+ Free Sewing Patterns for Beginners to Experts. Cookie barclose This website makes use of cookies to enhance browsing experience and provide additional functionality. Sewing Tips: Installing a Basic Zipper.
Sewing Tips for Beginners & Pros. Zippered Clutch Tutorial. Color Me Domestic: The Perfect Wallet: DIY Fabric Wallet. Just a quick note, if you make this wallet for yourself, or someone else, I'd love to see it! Summer Breeze Tank. Spa Towel Wrap. I hope you’ve had your coffee, cause I’m getting up close and personal this morning. When you step out of the shower or bath, what is your first layer of choice, after drying off your bum with your towel? RECYCLING SHIRT - 5 ~ Fashion Templates for Measure. RECICLAGEM DE CAMISA - 5 ~ Moldes Moda por Medida.
VESTIDO FÁCIL DE FAZER - 8 - Moldes Moda por Medida. How to Make Piping to Sew With. Have you ever used piping in a project? Trillium Design: Simple Card Wallet Tutorial. Scrap Your Stash guest post: fabric scrap key chain tutorial. How to Sew a Zipper. My Decoupaged Life: Easy Sewing Machine Cover {tutorial}