

Asus Xtion Pro Live Ubuntu 14.04 Installation – RoboR@m. Hackster. RigTig's Big 3D Printer. I looked at I2C, Serial and SPI.
The final choice of ESP12 as SPI master and Arduino Nano as SPI slave is perhaps somewhat non-obvious when you consider that the highest level controller is the Arduino Nano. Here's what I learnt from researching and my conclusions about communication between ESP12 and Arduino Nano for this project. [The Arduino] Wire library has blocking I/O. That means, it goes into a busy loop and waits for the I2C communications to complete. Your application can do nothing while the TWI hardware is talking over the I2C bus. Summary: A 32-byte message takes about 1 millisecond, which equates to about 0.05mm for an effector moving at 50mm/sec. Serial Nano has only one hardware serial port. Summary: Technically workable and faster than I2C.
Maximum speed is the clock speed of the slower partner (16MHz for Nano). Pearltrees – Add-ons for Firefox. 3D Printed Polar Drawbot Can Make You a Modern Day Michelangelo. [Image Attribution: Stephen (kongorilla) Kongsle] Kongorilla’s work was among the inspirations for Carlo’s design Carlo Franciscone, an Italian engineer from Novara, has done a redesign of the mechanical parts used to build a wall-mounted Polar Drawbot based on work he’s seen by others on the web, and the result is one of those “take my money” items.
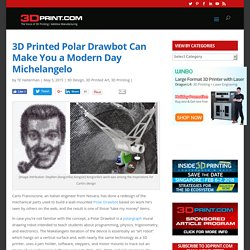
In case you’re not familiar with the concept, a Polar Drawbot is a polargraph mural drawing robot intended to teach students about programming, physics, trigonometry, and electronics. The Makelangelo iteration of the device is essentially an “art robot” which hangs on a vertical surface and, with nearly the same technology as a 3D printer, uses a pen holder, software, steppers, and motor mounts to trace out an image of your choosing. Software converts PNG, JPG, BMP, and GIF images to the instructions to draw the finished product, and as an added bonus, includessupport for DXF files. Drawing Machine – part 2. Skift Design is making an installation for the Technoport conference in Trondheim, and as a part of that they wanted a drawbot.

They contacted Omega Workshop at NTNU, and got in contact with me and Gunnar who was actually making one already! What needs to be done to make a presentable machine? The creation presented in part 1 wasn’t really non-hacker friendly, with all the gaffer tape and soda bottles. Tobbelobb/hangprinter: A RepRap hanging from the ceiling. Maker Packs. Inkscape obtient un convertisseur OpenSCAD. Tool Switching - Multi Extrusion. Motivation In the last years the filament market was flooded with a lot of innovative materials, like metal or wood filled, soft touche and similar to get a specific surface finish onto parts or fiber reinforced, magnetic, electrical conductive, temperature or wear resistance, low friction filaments for engineering requirements.
All these filaments come with their unique set of downsides they might be brittle, hard to get to stick to the build plate, slow to print, warp or are simply expensive. Being able to combine several materials in one part opens up a whole new universe of design possibilities. Mechanical parts that combine ridged and flexible elements in one object for eg. hinges that don't require assembly. Cases for PCB's with flexible and translucent elements to expose switches and board mounted LED's, covered in a layer of copper or brass fill plastic for the desired steampunk look. two 0.4 mm hotends with standard filaments, eg. Goal. Sans titre. Sans titre. FuseBox1.3 2020 by Culain.
Edit: Yeah i'm still at it. i just don't find time to finish this design.
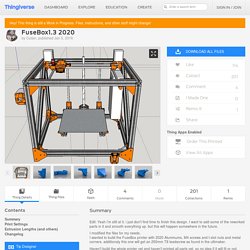
I want to add some of the reworked parts in it and smooth everything up. but this will happen somewhere in the future. I modified the files for my needs. I wanted to build the FuseBox printer with 2020 Aluminums, M4 screws and t-slot nuts and metal corners. additionaly this one will get an 250mm T8 leadscrew as found in the ultimaker. Haven't build the whole printer yet and haven't printed all parts yet. so no idea if it will fit or not.
How to make Mini Home made CNC Machine Arduino+28BJY-48 Stepper motor. Standard Profiles I-Type. Standard Profiles I-Type.
Customizable E3D v6 Carriage / Bowden Mount by TNS. 3D printing: convert a Picture into a 3D Model. Posted By Zach Correa on Jan 20, 2016 |
Anet A8 3D Printer Laser Engraver Mod – lokster // space. 3D Scanner Turntable for Cell phones (updated) You spoke, I listened!
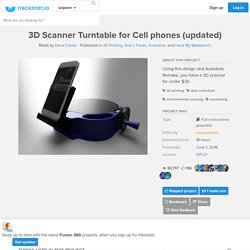
V2.0beta is now available for download! The base is now in 4 separate parts that press fit together and the tolerancing on other press fit parts has been improved. The iPhone Cradle is now also Height Adjustable to allow for further tweakablility and allow scanning of smaller items. Anet A8 [3DPrint.Wiki] Assembly Instructions Assembly videos from Anet Assembly (Updated 2016/12/29.
![Anet A8 [3DPrint.Wiki]](http://cdn.pearltrees.com/s/pic/th/anet-a8-3dprint-wiki-154546014)
This video applies to A8 with new Z axis nut supports.) Part 1 Assembly (Updated 2016/12/29. Ramps1.4. Introduction Ramps is short for reprap Arduino mega pololu shield, it is mainly designed for the purpose of using pololu stepper driven board (similar to 4988 driven board).
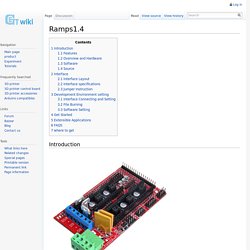
Ramps can only work when connected to its mother board Mega 2560 and 4988/DRV8825. Drawing Delta. Drawing Delta Robot, made with Anton as part of Dorkbot Bristol's Draw project. It's all Anton's fault, really. He suggested a delta robot, we built a quick lashup to see how it worked, and the lashup became permanent. Here's the lashup, built with gluegun and things we had lying around. Servos are regular 7 quid Futabas, from the very helpful Mad On Models in Newport, along with servo arms, balljoints, and rod with M2 threaded ends.
Well, they come threaded on one end, you need to get an M2 tap and thread the other end yourself. Sketchy (RC Servo) - 3D printer list. BlocksCAD. Fabriquer une imprimante 3D - Conseils pour fabrication maison. Les imprimantes 3D maison sont en plein essor. En 2006, il n’y avait pas de telles imprimantes. Aujourd’hui, il y en a des milliers. Et beaucoup d’entre nous veulent fabriquer leur propre imprimante 3D. Homemade PCB-Mill / Laseretcher. PCB mill for under $10. Some problems and limitations 05/06/2014 at 05:48 • 7 comments Although this mill has produced some good results, it has also made some garbage. It would be naive of me to expect this mix of dumpster parts to perform as well or reliably as a proper mill. I don't want to make this sound too discouraging, but I'll try to describe some of the weak points of this project.The X and Y axes behave exactly as they did in the printer.
One motor moves the print head along a shaft using a toothed belt, while the other turns a roller that moves the object via friction. I have not had any real problems with the print head axis, but the paper axis is not as reliable. There were no problems when I was simply drawing on nice, flat paper. Tous les sites pour trouver des modèles 3D (à imprimer ou non) « Si vous cherchez des modèles 3D à utiliser dans vos créations ou à imprimer, il existe un moteur de recherche baptisé Yobi3D qui propose des milliers de modèles super cools. Les filtres du moteur sont pratiques, car ils permettent de choisir le format, la présence ou non de texture et surtout la "printability", c'est à dire la facilité avec laquelle vous pourrez imprimer un modèle en 3D. Easy,ça veut dire que ça ne demande aucune modification, Medium ça va demander un peu de boulot de réadaptation et Hard ça veut dire que vous allez en baver pour sortir un truc qui ressemble à votre modèle 3D.
Vicious Circle CNC. Simpson. Simpson. Comment fabriquer ses filaments d’ABS pour son imprimante 3D à moindre cout. Mini CNC router, complete plans and instructions. Arduino Controlled CNC / 3D Printer Hybrid. Repetier or Marlin Firmware for Arduino Mega implement G2 an G3 circular interpolation so they are good to use for CNC and 3D Printing.
However they have limitations regarding pure CNC instructions such as pecking an other GCode's. Download and install Arduino IDE Here: How to Make a Three Axis CNC Machine (Cheaply and Easily) A salute to those who have laboured through to this point (and to demonstrate that it is reproducable) Here are some pictures of other peoples machines. Photo 1 - Chris and his friend put together this unit; laser cutting the parts out of half inch acrylic. How to wire an arduino-based 3-axis CNC machine. How to make a mini milling machine- manual or CNC! Simple CNC Machine. What I'm going to try and show you in this instructable is how to build a simple CNC machine. Now when I say Simple I mean you only require basic tools & materials to build the machine.
The machine is made out of Sawn Timber, drawer sliders, nema 17 Stepper motors, a TB6560 Driver Controller Board and a Dremel Trio as the milling/cutting tool. Arduino 3-axis Mini Lazer Paper-Cutter. Updated : 16/3 Add step 4, about using the stage. CNC Laser Gravierer [der-frickler.net] RepRap Forums. Printrbot Assembly by Arvin. Comment fabriquer une imprimante avec une carte Arduino. Arduino est une plateforme de prototypage libre et facile à utiliser. Elle permet à tout novice amateur, artiste ou passionné d’électronique de créer des environnements et des objets électroniques interactifs.
Si vous utilisez Arduino pour la première fois, il est conseillé de commencer par la création d’une imprimante ou d’un traceur DIY. Comment construire une imprimante 3D pour moins de 150 euros - première partie - eSKUeL.net. Les imprimantes 3D ont le vent en poupe, et pourtant, il s'agit d'appareils réservés à un public très averti, et ayant, en moyenne, 500€ à débourser. Tout geek que je suis, j'ai voulu jouer avec cette nouvelle technologie, mais l'investissement initial m'a clairement rebuté. Il était alors temps de chercher LA solution, surtout pour un bricoleur comme moi.
Graveuse laser DIY à base de diode graveur DVD : Machines laser. Un graveur laser à commande numérique à base de Raspberry Pi. Ma printer 3D ! Début, plans et fabrication... : Imprimantes 3D. Impression 3D, imprimantes 3D, scanners 3D, plans 3D, actualités, dossiers, interviews. CNC Laser Gravierer [der-frickler.net] Comment construire une imprimante 3D pour moins de 150 euros - première partie - eSKUeL.net.