

Communication série entre Arduino et Python - Glassbox. English version Récupération de données captées par l'Arduino avec Python via USB Télécharger le code Python.

MecaMedia. Acoustic Levitator: 25 Steps. Arduino Data Glasses for Multimeter. 3 Creative ideas with Arduino. Instructables. Arduino Project-Self Balancing Robot. Amazing Ardiuno School Projects. Top 10 Arduino Projects. Arduino : l’essentiel – Tout ce qu'il faut savoir pour utiliser un Arduino. How Servo Motors Work & How To Control Servos using Arduino. Debimax/cours-debimax. Didacticiel Programmation. Aller au contenu principal Didacticiel Programmation Image Didacticiel Scratch Premiers pas avec Scratch > Premier jeu (labyrinthe) >

Technologies et sciences des ingénieurs - mBlock : vidéos d'initiation. 2.5- Conversion - SCIENCES DE L'INGENIEUR.
Bac STI EE et SIN. Solidworks. TPE. Scilab. Arduino. Solaire. Labview. MCC. Robots. Ethernet. Composants. Analyse Fonctionnelle. Projets. Mesurer une température avec un capteur 1-Wire DS18B20 et une carte Arduino / Genuino. Par skywodd | Oct. 22, 2016 | Licence (voir pied de page) Catégories : Tutoriels Arduino | Mots clefs : Arduino Genuino Capteur Température OneWire 1-Wire DS18B20 Cet article a été modifié pour la dernière fois le Dec. 11, 2017 at 2:19 p.m.
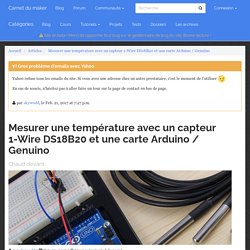
Cet article n'a pas été mis à jour depuis un certain temps, son contenu n'est peut être plus d'actualité. Dans ce tutoriel, nous allons apprendre ensemble à utiliser un capteur 1-Wire DS18B20 pour mesurer une température au moyen d'une carte Arduino / Genuino. Nous verrons aussi comment mesurer plusieurs températures en même temps avec plusieurs capteurs sur un même bus. Sommaire Bonjour à toutes et à tous ! Dans un précédent tutoriel, je vous avais expliqué comment utiliser des capteurs analogiques de température. On peut donc légitimement se poser la question suivante : existe-t-il des capteurs de température numériques, avec toute l'électronique de mesure intégrée dans un même composant ? Le capteur DS18B20. Resotech - Cours.
Sciences de l'Ingenieur-SI-Lycee-Artaud. Arduino Ep.17 - Application Android avec le module Bluetooth HC-06. Sciences Industrielles de l’Ingénieur. Lessons from Rebuilding Illumitune. Skill Level: Intermediate by Nate | July 06, 2011 | 56 comments A few SparkFun engineers have been volunteering their time and skills at a local kid's museum called World of Wonder (WOW).
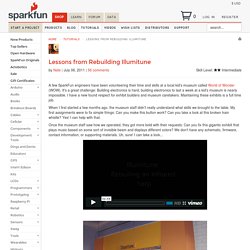
It's a great challenge: Building electronics is hard, building electronics to last a week at a kid's museum is nearly impossible. I have a new found respect for exhibit builders and museum caretakers. Maintaining these exhibits is a full time job. When I first started a few months ago, the museum staff didn't really understand what skills we brought to the table. Once the museum staff saw how we operated, they got more bold with their requests: Can you fix this gigantic exhibit that plays music based on some sort of invisible beam and displays different colors? Utilisation du logiciel aviméca.
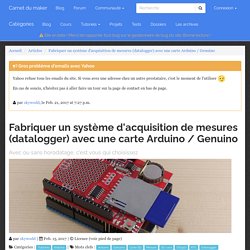
Fabriquer un système d'acquisition de mesures (datalogger) avec une carte Arduino. Par skywodd | Feb. 15, 2017 | Licence (voir pied de page)
[Physiqueensti.free.fr] tutoriels animés pour calc. PCCL - Physique Chimie pour la troisieme - 3e - 3eme - Soutien scolaire gratuit et libre d'accès. Animations pédagogiques flash interactives, définitions, exercices corrigés pour : Chimie - Optique - Mécanique - Energie - Electricité - Ions - Tension alte. Illumitune Infrared Harp. Seven Pro Tips for ESP8266. Seven Pro Tips for ESP8266. Arduino Star-Finder for Telescopes. Encoder Library, for Measuring Quadarature Encoded Position or Rotation Signals. Encoder counts pulses from quadrature encoded signals, which are commonly available from rotary knobs, motor or shaft sensors and other position sensors.
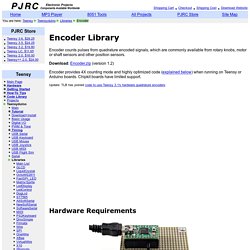
Download: Encoder.zip (version 1.2) Encoder provides 4X counting mode and highly optimized code (explained below) when running on Teensy or Arduino boards. Chipkit boards have limited support. Capers II, a Hexapod Robot: 22 Steps (with Pictures) Another step we will perform prior to mounting the electronics inside the Capers II chassis, because the electronics become much less accessible once inside the robot's body, is configuring a series of jumpers on the Botboarduino and SSC-32 servo controller.

Each board has several jumpers used to select various settings. Many of these jumpers configure power delivery options for the board and it is therefore vitally important that they are set correctly. Botboarduino Jumpers. Desktop CT and 3D Scanner With Arduino: 12 Steps (with Pictures) CT scanning requires a source of radiation (e.g. x-rays or light) on one side of an object and detectors on the other side.
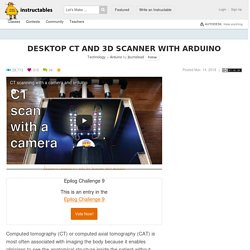
The amount of radiation that makes it to the detector depends on how absorptive the object is at a particular location. A single image acquired with this setup alone is what produces an X-ray. An X-ray is like a shadow, and has all the 3D information projected into a single 2D image. Google Code Archive - Long-term storage for Google Code Project Hosting. DIY - Solar Battery Charger: 6 Steps (with Pictures) Floating Smart Magic Mirror From Old Laptop With Alexa Voice Recognition: 6 Steps (with Pictures) Before you start disassembly, note that the following steps will most likely void your laptop and monitor's warranty.
Do note, this step isn't cumpolsory and you can direectly atach your electronics behind the LCD. However removing the electronics of the laptop and monitor allow you to get a significantly thinner and easier to build mirror. You also want to make sure all the hardware works before before you disassemble and install it in the mirror.
You can also skip to the Software step to test the software and see if the OS runs well on your machine. ROBOT domestique SCOOBA 385 - éduscol STI. Easy Tesla Coil!: 6 Steps (with Pictures) There are only a few parts, so building your circuit is simple.
Just make sure to have the circuit diagram handy while following along. First we will install the three legs of the Transistor in breadboard slots E1, E2 and E3 with the heat sink and front of the transistor facing back toward slot F. Next we will insert the three capacitors into slots H14/H17, I14/I17 and J14/J17 respectively so that they are in parallel. Doter - Huge Arduino Based Dot Matrix Printer: 13 Steps (with Pictures) You might ask why the story of fail if my project is working? Because at the beginning there wasn't a Doter. I wanted to make maybe a little bit similar thing but much more sophisticated - a 3D printer. The biggest difference between 3D printer that I wanted to make and almost any other 3D printer was that instead of standard nema17 stepper motors it will use a cheap 28BYJ-48 motors that you can buy for about $1 (yes one dollar for a stepper motor).
Of course I knew that it will be weaker and less accurate than standard stepper motors (when it comes to the accuracy it is not that simple, because most of the motors in 3D printers has 200 steps per revolution, and 28BYJ48 has about 2048 steps per revolution or even more depends on how you use them, but those motors are more likely to lose steps and gears inside them are not the best, so it's hard to say if they are more or less accurate). ArduinoInitiationEntreesOnOffOptoFourcheComptageInterruption. // --- Programme Arduino --- // Trame de code générée par le générateur de code Arduino// du site www.mon-club-elec.fr // Auteur du Programme : X.
HINAULT - Tous droits réservés // Programme écrit le : 13/2/2011. // ------- Licence du code de ce programme ----- // This program is free software: you can redistribute it and/or modify// it under the terms of the GNU General Public License as published by// the Free Software Foundation, either version 3 of the License,// or any later version.// This program is distributed in the hope that it will be useful,// but WITHOUT ANY WARRANTY; without even the implied warranty of// MERCHANTABILITY or FITNESS FOR A PARTICULAR PURPOSE.
See the// GNU General Public License for more details.// You should have received a copy of the GNU General Public License// along with this program. If not, see < Arduino : l’essentiel – Tout ce qu'il faut savoir pour utiliser un Arduino. VieDesObjets JeromeAbel 2. FabLab House. Training Theo Jansen's Mini BEEST: 11 Steps (with Pictures) The master of Exercised BEEST shown in the former step can command it various steps in real time. He uses a IR remote. However, a well trained beast may be able to follow your command without special gimmick like IR remote. Now you the master enter the final stage, where your BEEST is tamed better to follow your finger signals. It may look like using something like Force because BEEST follows your command with no physical contact nor special gimmick.
To make BEEST know your finger signal, you the master additionally give it three simple eyes. [video 6a: One-Eyed BEEST Has Evolved into Three-Eyed] Here four basic finger actions are used. Shaking finger at a distance from an eye: BEEST steps forward Moving finger or palm near to an eye: BEEST steps backward Keeping finger far from every three eye: BEEST keeps still at rest Moving finger or palm near to an eye quickly twice in a row: BEEST stops its stepping [video 6b: Basic Finger Signals and Exercising 3Eyed BEEST] Mini Strandbeest goes electric with Arduino. Mini Strandbeest goes electric with Arduino Arduino Team — November 9th, 2017 Strandbeests, as originally conceived, are gigantic PVC creatures that walk across the sand under wind power. While building one is certainly an enormous undertaking, smaller models are available that let you experience this strange kinetic motion in a more approachable size.
These are also normally propelled by moving air, but maker “ArduinoDeXXX” decided to take things further with a pair of DC motors and an Arduino Nano. Training Theo Jansen's Mini BEEST: 11 Steps (with Pictures) Plus.google. Mini Strandbeest goes electric with Arduino. Onduleur.
Rawlemon Solar Architecture. Using Motors With L293D IC: 6 Steps (with Pictures) “The L293D is a monolithic integrated, high voltage, high current, 4-channel driver.” Scilab/Xcos pour l'enseignement des sciences de l'ingénieur. La modélisation dite « acausale » est une forme récente de modélisation des systèmes qui permet de décrire les équations modélisant les phénomènes physiques sans anticiper l'orientation des liens entre les composants ou phénomènes. Il n'y a notamment pas de choix particulier de variables échangées entre composants (force ou vitesse par exemple), ni de notion d'entrée / sortie.
Cette particularité conduit à une très grande flexibilité des modèles de composants développés, une réutilisation des modèles sur de nouveaux projets et la possibilité de construire des bibliothèques de composants. Welcome chez dada ! Technologie. Arduino. USB Bridge for App Inventor 2. Cette application permet de faire l’interface logiciel entre App Inventor 2 et une carte arduino, XBEE…. par exemple en utilisant un câble USB OTG. App inventor ne permet pas en natif d’utiliser le port usb, j’ai donc réalisé cette application pour permettre à nos élèves de créer facilement des IHM , et des interfaçages avec les différents capteurs d’un téléphone ou d’une tablette. Utilisez et recyclez vos anciens téléphones en utilisant ses fonctions internes à la place d’utiliser plusieurs shield arduino : écran tactile, afficheur, lecteur mp3, lecteur de carte SD, envoie de SMS, GPD,GSM, bluetooth, wifi, capteurs divers….,pour vos applications à base de microcontrôleur.
(Arduino,Teensy, XBee…) De plus la programmation par block sur app inventor est très facile pour des débutant. WebGE. Electrotechnique - Site de création multimédia en Electrotechnique. Electrotechnique Vous trouverez, regroupées dans cette catégorie, toutes les animations que j'ai postées ayant trait à l'Electrotechnique. N'hésitez pas à me faire part, pour les animations qui vous intéressent, de vos remarques. GEEA.ORG. Web_GE: Cours, TP, TD de génie électrique en sciences de l'ingénieur au lycée Pierre Emile MARTIN. Le site de Fabrice Sincère. ECLigne - L’Etude de construction en ligne. Animations.