

Youtube. Youtube. Youtube. Very DeepSleep and energy saving on ESP8266 – Part 1: Basics – Arduino, ESP8266, ESP32 & Raspberry Pi stuff. Intro: For the seasoned ESP user I might be over explaining things here, but apparently some people struggle with basic things around deepsleep, hence my perhaps somewhat overly long explanation.
For battery fed projects, low energy consumption is a must. De ESP8266 can help with that, using DeepSleep. Earlier I published a rather simple DeepSleep program, combined with MQTT, but from an energy conserving point of view there are more things in setting up DeepSleep that can make a difference. There are also couple of other things to take into consideration. The ideas here are not new. I will just describe what I did to bring my ESP8266 to minimal energy consumption. 1. 2. The problem here is that many of the LDO’s that have a very low quiescent current, also have an output current that is on the edge of what the ESP8266 needs at startup.
In all honesty I would advise AGAINST using any regulator giving less than 300mA. Apparently it is possible to use two HT7333 chips in parallel. 3. 4. 6. 7. Core™ i7-7500U Processor (4M Cache, up to 3.50 GHz ) Product Specifications. Launch Date The date the product was first introduced.

Lithography Lithography refers to the semiconductor technology used to manufacture an integrated circuit, and is reported in nanometer (nm), indicative of the size of features built on the semiconductor. Mini-itx.com: ASRock J4125-ITX motherboard. ASRock J4125-ITX motherboard with Passively Cooled Quad Core 64-bit 2GHz (2.7GHz Burst) Celeron J4125 Gemini Lake Refresh 14nm processor with VT-x support and integrated Intel UHD 600 Graphics with 10-bit HEVC Acceleration.

Up to 32GB of system memory*; 4x SATA 6Gb/s; PCI-E x1 Slot; Realtek RTL8111H Gigabit Ethernet; Realtek ALC892 High Definition 7.1 Channel Audio with S/PDIF Out. Windows 10 64-bit driver support. Rear Panel: Mouse PS/2 port; Keyboard PS/2 port; 1x VGA (supporting up to 2048x1536 @ 60Hz); 1x DVI-D (supporting up to 1920x1200 @ 60Hz); 1x HDMI (supporting up to 4096x2160 @ 60Hz); 2x USB 3.2 Gen1 ports; 1x Gigabit Ethernet port; 2x USB 2.0 ports; 1x S/PDIF Optical Audio Out; 5x 3.5mm audio connectors (Side Speaker / Rear Speaker / Central / Bass / Line in / Front Speaker / Microphone). Board Expansion: 1x PCI-E x1 Slot; 1x M.2 Type E Socket suitable for M.2 WiFi/Bluetooth Cards including Intel CNVi modules. UEFI BIOS: This board uses a UEFI BIOS. Arduino Workshop - Chapter Three - SWITCH CASE Statements. Arduino Workshop - Chapter Three - IF Statements.
Library. Change payload topic - General - Node-RED Forum. Node-RED Change payload topic General You have selected 0 posts. select all.
Using - Sqlite Browser and Sqlite Database. Intro to Node-RED: Part 3 Advanced Nodes. Node-RED Tutorial: Email Alerts & Notifications. Subflows - Node-RED Essentials. Flow structure : Node-RED. When you first start using Node-RED, you probably start adding all of your nodes to the same tab in the editor.

You may import some example flows others have shared, or build prototype flows to test different things out. Over time, that can lead to a mess of nodes and wires that make it hard to find particular parts of the flow. Putting some thought into how to structure your flows at the start of any development project can help keep them organised and make them easier to maintain. The main method of organising flows in Node-RED is by separating them across multiple tabs within the editor. Subflows : Node-RED. A subflow is a collection of nodes that are collapsed into a single node in the workspace.
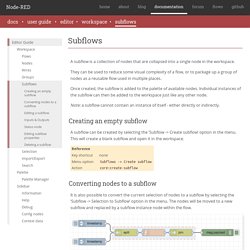
They can be used to reduce some visual complexity of a flow, or to package up a group of nodes as a reusable flow used in multiple places. Once created, the subflow is added to the palette of available nodes. Individual instances of the subflow can then be added to the workspace just like any other node. Writing Functions : Node-RED. The Function node allows JavaScript code to be run against the messages that are passed through it.
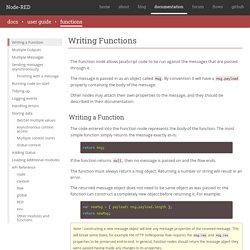
The message is passed in as an object called msg. By convention it will have a msg.payload property containing the body of the message. Other nodes may attach their own properties to the message, and they should be described in their documentation. Database examples - insert and select using binding (flow) A selection of database examples.
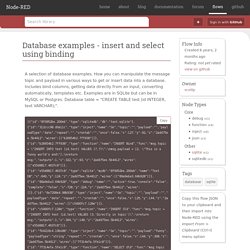
How you can manipulate the message topic and payload in various ways to get or insert data into a database. Includes bind columns, getting data directly from an input, converting automatically, templates etc. Examples are in SQLite but can be in MySQL or Postgres. Database table = "CREATE TABLE test (id INTEGER, text VARCHAR);". Working with messages : Node-RED. A Node-RED flow works by passing messages between nodes.
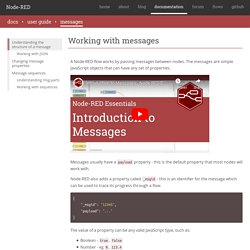
The messages are simple JavaScript objects that can have any set of properties. Top 5 Node-RED Core Nodes. Working with time-series data - Part 2. Tutorial: Node-RED dashboards – multiple lines on a chart – Node RED Programming Guide. Showing multiple lines on a single chart in Node-RED This simple tutorial explains how to display multiple lines on a Node-RED chart.
We’ll be building on a previous example in our lecture series (Example 7.2 in lecture 7) As discussed in that lecture, let’s set up a simple flow to generate a random number and display it on a chart. To start, let’s wire up a simple flow that sends a random number between 0 and 99 to a simple chart. For that you’ll need an inject node to repeatedly fire every few seconds, a function node to generate the random number and one of the node-red-dashboard nodes – in this case the chart node. Before we look a how the chart node works, let’s configure the inject node to send a timestamp every 5 seconds by setting the payload to timestamp and the repeat field to an interval of 5 seconds.
Msg.payload = Math.round(Math.random()*100); return msg; Ender 3 - minimum and maximum layer heights. PrusaLiveZHeight. Best method for 3D printer bed levelling. Simple, Fool-Proof Bed Leveling. Creality Ender 3- Easy Way To Level Your Bed. The Perfect Ender 3 (Pro) PETG Settings. Freecad course - Assembly, example: plastic casing. Happy RETRO COOKING MUSIC Instrumental DINNER Music CAFE Music. Read and compare string form serial port - Page 2. #include <Ethernet.h> byte mac[] = {0x90, 0xA2, 0xDA, 0x0D, 0xFC, 0x17}; IPAddress ip(192,168,23,154); IPAddress server(192,168,23,153); EthernetClient client; void setup() { pinMode (CONTROLLINO_D0, OUTPUT); pinMode (CONTROLLINO_D1, OUTPUT); Ethernet.begin(mac, ip); Serial.begin(57600); while (!
Serial){;} delay(1000); Serial.println("connexion... "); if (client.connect(server,2111)) { Serial.println("connecte"); } else { Serial.println("connexion echoue"); }} cmdBuffer[0] = 0; } } //delay(1); } char processCharInput(char* cmdBuffer, const char c){ if (c >= 32 && c <= 126) { if (strlen(cmdBuffer) < CMDBUFFER_SIZE) { strncat(cmdBuffer, &c, 1); } else { return '\n'; } } else if ((c == 8 || c == 127) && cmdBuffer[0] ! Receiving Text Strings over Bluetooth. Hey d00ds, I have been trying to send pitch and roll values from my android phone to my arduino Uno (it has a HC-05 bluetooth module) and I can receive text okay... most of the time. The text being sent from my phone is something like this: " *12.34567~0.1234567#"Where the '*' is the start character, the '~' is the differentiator, and the '#' is the end of message character. The first section of numbers is the roll, the second is the pitch.
This is my code to receive the string and output it to the serial monitor. #include <SoftwareSerial.h>SoftwareSerial mySerial(10, 11); //RX, TX. Node-red-contrib-stoptimer2 (node) Sends the msg through the first output after the set timer duration. If a new msg is received before the timer has ended, it will replace the existing msg and the timer will be restarted, unless the new msg has a payload of 'stop' or 'STOP', in which case Sends the msg through the first output after the set timer duration.
If a new msg is received before the timer has ended, it will replace the existing msg and the timer will be restarted, unless the new msg has a payload of stop or STOP, in which case it will stop the timer. The second output allows you to send an additional payload of a number, string or boolean. If the timer is stopped, the second output will automatically send a payload of stopped. This is like the built in delay function of node-red, but with the ability to not only restart the timer, but to stop it as well. Node-red-contrib-mytimeout (node) A timer that supports setting the run time by passing JSON to the input Node-red-contrib-mytimeout is a countdown timer that can be trigged by sending it input. It will run until the timer runs out where it will turn off.
It can be turned off, stopped or cancelled with the correct input. It can be 'tickled' (restarted) with an on message or any other command not listed below. Meaning, if you send it junk, you have tickled the timer to continue to run. Node-red-contrib-stoptimer (node) Sends the msg through the first output after the set timer duration. If a new msg is received before the timer has ended, it will replace the existing msg and the timer will be restarted, unless the new msg has a payload of 'stop' or 'STOP', in which case. Linux Logs. KiCad 5.0 - Adding a new symbol library. Jay Bates.
CHIPQUIK 15g Syringe Lead Free Solder Paste. Gammon Forum : Electronics : Microprocessors : millis() overflow ... a bad thing? Introduction On an almost daily basis we get a post on the Arduino forum about how "bad" it is to let the millis "timer" overflow. This thread explains why it is not a problem, if handled properly. Background The function millis () returns an unsigned long, which is the number of milliseconds since the processor was reset (until it overflows). Worried about millis() timer overflow? - Black Electronics. Introduction You need to worry about this if your arduino is going to be powered for more than 49 days, if not below are good practices to follow when using millis() function that avoid overflow. If you do things right, you don’t have to worry about millis() overflow. The trick is to handle overflow. Arduino: How do you reset millis() ? Arduino Tutorial: Avoiding the Overflow Issue When Using millis() and micros()
One of our most popular blog posts right now this is called Arduino Tutorial: Using millis() Instead of delay(). TimingRollover. One of the requested items I found was handling 'rollover' from 'millis()' and also, 'micros()'. This is actually not a very difficult matter to deal with, and it's something I've needed to address a lot of times in various contexts, from kernel drivers to applications, and of course, micro-controllers. First, I shall explain two's complement mathematics, and signed vs unsigned integers. Two's complement is a way to represent negative numbers in binary. It requires that you sacrifice one bit of precision (the most significant bit), to handle negative values. Programming - How can I handle the millis() rollover? Short answer: do not try to “handle” the millis rollover, write rollover-safe code instead.
Your example code from the tutorial is fine. If you try to detect the rollover in order to implement corrective measures, chances are you are doing something wrong. How to run SUDO commands without typing a password. About your privacy on this site. Welcome! To bring you the best content on our sites and applications, we partner with third party advertisers to serve digital ads, including personalised digital ads.
DIY. JSON. Node-RED. Charts. Database. Linux. BUY. Video's. Food. Sonoff IoT/WiFi Relay. ESP8266. Music. RPI. Project & Electronics. Freecad. Recycle Bin.