
Sock Monkey. Gosh… I am supposed to sew some thing for the Earth Month this April, but I can’t wait to sew these sock monkeys.

My hands simply took over my head and see what I did after a few days and nights of sewing…. a house full of sock monkeys!!!! Do you love them? I have seen a lot of sock monkey photos hanging around friends’ photo albums in many photo sharing websites, so envy. These sock monkeys are so cute and so adorable that I would want to hug one, I bet my kids would love to have them to accompany too when mommy is busy with works. Therefore, I went out to shop for some socks thinking that may be 4 to 5 pairs should be enough, I ended up with 20 pairs of colorful socks, simply can’t resist for not buying ;-) . …. With different sizes of socks, I made the sock monkey out of a family, from baby, toddlers, teens to adult. 3rd picture in the above album shows the family photo of the sock monkey, from daddy, mommy, sister, brother, triplet toddlers, and a baby. Pages: 1 2. Today We Made – Free Downloads. Edge Stitch. One Trick to Turn Any Yarn Into a Center-Pull Ball.
Winding yarn. I've always imagined that it would be so much fun to own my own ball winder... to be able to make those adorable little perfect yarn cakes.

But I was astounded at the cost. I decided to do a bit of research first to make sure I chose wisely before purchasing. In the meantime, I learned a very simple technique for winding a centre-pull ball of yarn... and it cost me nothing. I'm not going to be buying a ball winder now! I have no need for one... All you need is a cardboard tube and your own two hands! The perfect size tube is the inner roll from toilet paper. These photos are a tiny bit blurry... because it's actually quite difficult to photograph yourself while your hands are busy winding yarn...
I have taken the tube from inside a roll of baking paper, and will need to cut it down to about one third of the size. Make a small snip in the end of the tube. Tie the start of your yarn in a knot. Slip the knot inside the snip you made at the end of the tube. Begin winding your yarn. Ta-da! T-Shirt Yarn. Since I found out how easy it really is to make t-shirt yarn, I've been keeping an eye out for t-shirts at the flea markets.

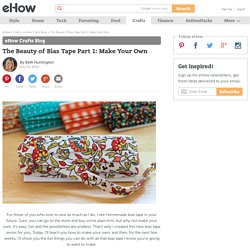
I scored some for 50 cents recently, and had a chance to get them made into yarn today. I decided to share the steps with you! This is not an original tutorial by far, in fact numerous t-shirt yarn tutorials exist online, but I thought I'd give you my take on it! You'll need old t-shirts and fabric scissors. The t-shirts need to be the kind without side seams, where the body of the shirt is made from a tube. Ready? Spread your t-shirt out on your cutting surface - a table or even the floor - and smooth it out so there are as few wrinkles or parts of the fabric bunching up as possible. The Beauty of Bias Tape Part 1: Make Your Own. For those of you who love to sew as much as I do, I see homemade bias tape in your future.

Sure, you can go to the store and buy some plain trim, but why not make your own. It’s easy, fun and the possibilities are endless. That’s why I created this new bias tape series for you. Today, I’ll teach you how to make your own, and then, for the next few weeks, I’ll show you the fun things you can do with all that bias tape I know you’re going to want to make. The beauty of bias tape is, because it is cut on the bias (45 degree angle) of the fabric, it is super pliable, has stretch and it can curve around all kinds of shapes. First, pick out some fabrics you like. You don’t have to have a bias tape maker, but it does make the process a little easier. It also helps to use a rotary cutter to get a nice clean cut.
Now turn on some good music and fold your fabric to form a triangle. Cut off the extra piece. Pivot your triangle so the edge with one fold is at the bottom and clean up the raw edges.