

Unreal Engine assets. Java Online Compiler & Runner. Checking the velocity of an actor. Review Collision in Your Game. Set velocity on character movement. Hi Alundra,Yes it is very possible.
Set character/actor starting velocity. I am trying to find a way to set the character's velocity or movement within the blueprints.
I am using an array to store the vector locations (GetActorLocation) of the character/actor and when a button is pressed, movement input is locked and now is used to navigate through the already travelled locations (taking values from the array and using SetActorLocation). My goal is to store the characters ending velocity (as they press the button to lock movement) and then when they move to one of the previous locations they've been to, allow them to unlock movement but initiate with the ending velocity from when they locked their movement. So is there any way to force the movement of the actor to a specific velocity (e.g. if they were falling, their starting vertical movement should instantly fall at the speed they were last moving).
Please tell me if more information is needed. Thanks.
Pencils, Pixels and the pursuit of Awesomeness. The following is an excerpt from 3ds Max Modeling for Games: Insider’s Guide to Game Character, Vehicle, and Environment Modeling: Volume 1, 2e by Andrew Gahan.
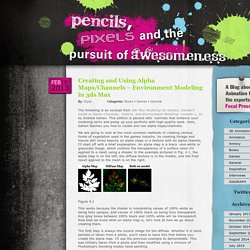
This edition is packed with tutorials that enhance your modeling skills and pump up your portfolio with high-quality work. Here, Gahan teaches you how to create and use alpha maps/channels. We are going to look at the most common methods of creating various forms of vegetation used in the games industry. As creating foliage and leaves still relies heavily on alpha maps or a texture with an alpha channel, I’ll start off with a brief explanation. An alpha map is a black -and-white or grayscale image, which controls the transparency of a surface when it’s applied to a mesh using a shader. Figure 4.1 This works because the shader is interpreting values of 100% white as being fully opaque, and values of 100% black as being fully transparent. The first step is always the source image for the diffuse.
Figure 4.2 Figure 4.3 Figure 4.4. Conceitos básicos sobre o canal no Photoshop. Workflow: Rendering to Texture (Texture Baking) Configurar uma cena com iluminação.
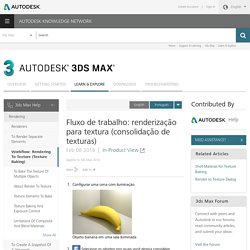
Objeto banana em uma sala iluminada Selecione os objetos nos quais você deseja consolidar texturas. Basic Texture Baking with V-Ray - V-Ray 3.4 for 3ds Max - Chaos Group Help. Selection Rollout (Editable Mesh) A implementação de seleção fornece ferramentas para acessar diferentes níveis de subobjeto, trabalhar com seleções denominadas e normais, configurações de tela, e exibe informações sobre as entidades selecionadas.
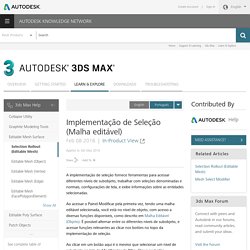
Ao acessar o Painel Modificar pela primeira vez, tendo uma malha editável selecionada, você está no nível de objeto, com acesso a diversas funções disponíveis, como descrito em Malha Editável (Objeto). É possível alternar entre os diferentes níveis de subobjeto, e acessar funções relevantes ao clicar nos botões no topo da implementação de seleção. Ao clicar em um botão aqui é o mesmo que selecionar um nível de subobjeto na tela do Modificador de Pilha. Clique no botão novamente para desativar e voltar ao nível do objeto. Autodesk Knowledge Network. O modificador Seleção de Polígono permite passar uma seleção de subobjeto da pilha para modificadores subsequentes.
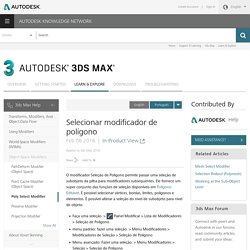
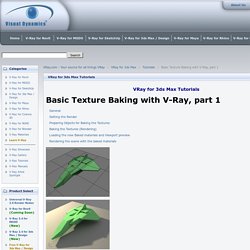
Ele fornece um super conjunto das funções de seleção disponíveis em Polígono Editável. É possível selecionar vértices, bordas, limites, polígonos e elementos. Uso de grades e guias no Photoshop. VRay.com - Basic Texture Baking with V-Ray Tutorial. VRay for 3ds Max Tutorials Basic Texture Baking with V-Ray, part 1 Search Keywords: bake, baking, render to texture General In this tutorial we will discuss the process of texture baking with V-Ray.
Texture Baking - polycount. Texture baking is the process of transferring details from one model to another.
The baking tool starts a certain distance out from the model (usually a low-resolution model for game use), and casts rays inwards towards another model (usually a high-resolution sculpt). When a ray intersects the 2nd model, it records the surface detail and saves that into a texture map, using the first model's Texture Coordinates. Baking tools support multiple map types. High-resolution normals go into a Normal map, occlusion goes into an Ambient occlusion map, etc. Baking Workflow The baking workflow varies for each artist; this is a summary of common baking tasks. High-resolution model: Build the source for your normal map, using DigitalSculpting and/or Subdivision Surface Modeling. Autodesk Knowledge Network. A implementação de SuperSampling é usada pelos materiais Architectural, Raytrace, Standard e Ink ‘n Paint.
Ela permite que você escolha um método de superamostragem. Personalized Social Bookmarking. Solved: MentalRay dll not loading-MAX17. UE4: Solution to Decals Not Rendering/Showing in Indirect Static Lighting Tutorial. Using GameTextures in Unreal Engine 4 – Part 2! Deferred Decals - Puddles, cracks. SubUV Modules. Unreal Engine 4 Tutorial: Material Function (english) SubUV Modules. Texturing. The Texturing functions provide for specialized handling of texture-based actions, such as adjusting UVs of a texture, cropping textures, and many others.
The following is a list of all the functions underneath the Texturing category. CylindricalUVs This function tiles a texture around an object using cylindrically projected UVs centered around the object's center. DetailTexturing The DetailTexturing function simplifies the process of creating detail textures for your material. LocalAlignedTexture The LocalAlignedTexture function tiles a texture on an object in local space. Christy Judge Game Art: April 2015. I wanted to further test tessellation and also learn how to model rocks; I’ve heard this can be an extremely difficult process so I wanted to get it out of the way early.
I watched many, many, many tutorially on how to create game ready rocks. Below I am simply going through all of the processes I’m not actually trying to make a good game ready rock. I’m just trying to memorise the process so that I can add these processes to my work flow. I can come back to these later maybe and make the rocks for our level. Experimentation: Volumetric Decals. In CL# 2586695, Martin Mittring added support for "Volumetric Decals". There is no official release yet so only people who sync using github will be able to try this for now. "Volumetric Decals" are basically RayTraced Distance Fields. You can find lots of information on how ray traced distance fields are done here: Subtracted from Capsule example with noise: To set up a material, you need to set the material domain to "Deferred Decal". Then you need to set "Decal Blend Mode" to "Volumetric Decal".
Material Functions Overview. Material Functions are little snippets of material graphs that can be saved in packages and reused across multiple materials. Their purpose is to streamline the process of material creation by giving instant access to commonly used networks of material nodes. For example, if you find yourself often creating a network just to handle chaotic texture panning, then it will be much faster to save that portion of your network out as a material function and just use that whenever you need such behavior.
Functions are edited in the material editor like a normal material, but with some restrictions on what nodes can be used. When used properly, they can reduce material redundancy which in turn reduces artist maintenance effort keeping those duplicate expressions in sync, and the inevitable bugs that arise when one duplicate is missed during a modification. Material functions are also assets that can appear within the Content Browser. Texturing. The Texturing functions provide for specialized handling of texture-based actions, such as adjusting UVs of a texture, cropping textures, and many others. The following is a list of all the functions underneath the Texturing category. CylindricalUVs This function tiles a texture around an object using cylindrically projected UVs centered around the object's center.
DetailTexturing The DetailTexturing function simplifies the process of creating detail textures for your material. Tutorial: Adding Player Footstep Audio in UE4 with Blueprints. In this tutorial I’ll talk through the process I used to introduce footstep noises to the player character, using Blueprints – as part of my first VR release “The Caretaker” (free to download on Oculus Share). Audio is a fantastic tool in a developer’s tool-kit that can really contribute to a convincing experience in VR – giving the player grounding in the world you’ve created, and greatly enhancing their immersion. Unreal Engine Tutorial - Bullet Physics/Projectile Physics and Penetration Part 3/5.
Multiplayer Shootout. The Simple Blueprint Multiplayer showcase is a game built entirely in Blueprints and UMG UI and is an example of how you might use Blueprint's Session Nodes to facilitate multiplayer in your game. It has a Main Menu, a Server List, and a simple map with a Scoreboard on the HUD. Clicking Play at the Main Menu will host a session and load the gameplay map. Other players can then click Find games to see a list of all hosted games on a new menu screen, where clicking on one of the found games will attempt to join it.
If there are any errors, a dialog is displayed and the user is returned to the Main Menu. This game is also an example of how to manage state using a GameInstance Blueprint. In its current state, this document covers the Online Session Nodes and their implementation for hosting, discovering, joining, and leaving multiplayer games. Starting/Playing the Game This section covers how to start and play the game itself and provides a breakdown of the game's components. Unreal Engine Blueprint API Reference. Measuring an Object.