

Flex Sensor Hookup Guide. Introduction This flex sensor is a variable resistor like no other.
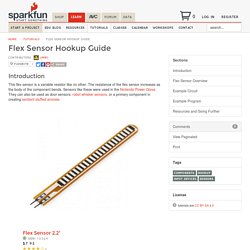
The resistance of the flex sensor increases as the body of the component bends. Sensors like these were used in the Nintendo Power Glove. They can also be used as door sensors, robot whisker sensors, or a primary component in creating sentient stuffed animals. Flex Sensor 2.2" Smoothing. This sketch reads repeatedly from an analog input, calculating a running average and printing it to the computer.
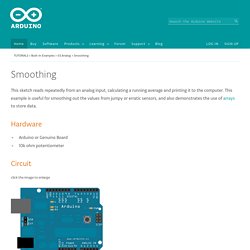
This example is useful for smoothing out the values from jumpy or erratic sensors, and also demonstrates the use of arrays to store data. Hardware Arduino or Genuino Board 10k ohm potentiometer Circuit click the image to enlarge image developed using Fritzing. Connect one pin of a potentiometer to 5V, the center pin to analog pin 0, and the the last pin to ground. Schematic Code The code below sequentially stores 10 readings from your analog sensor into an arrays, one by one. GitHub - adafruit/Adafruit_VS1053_Library: This is a library for the Adafruit VS1053 Codec Breakout and Music Maker Shields.
AnalogRead. Reference Language | Libraries | Comparison | Changes Description Reads the value from the specified analog pin.
The Arduino board contains a 6 channel (8 channels on the Mini and Nano, 16 on the Mega), 10-bit analog to digital converter. This means that it will map input voltages between 0 and 5 volts into integer values between 0 and 1023. This yields a resolution between readings of: 5 volts / 1024 units or, .0049 volts (4.9 mV) per unit. It takes about 100 microseconds (0.0001 s) to read an analog input, so the maximum reading rate is about 10,000 times a second. Syntax. MaxSonar. With MaxSonar ultrasonic rangefinder Library A library is available at It features: Inputs: TX, PW and AN Models: LV, XL and HRLV Filters: NONE, MEDIAN, HIGHEST_MODE, LOWEST_MODE, SIMPLE, BEST I recommend looking at the examples to get started with it.
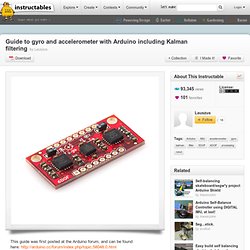
Manually This is a writeup on the MaxSonar ultrasonic range finder. First of All I used the LV-MaxSonar EZ1 but I imagine the fundamentals will be the same and can be applied to all the MaxSonar products. Please feel free to update the information here if you find different results for different products. Sparkfun MP3 Trigger and serial monitor. Sansumbrella/MP3Trigger-for-Arduino. Guide to gyro and accelerometer with Arduino including Kalman filtering. This guide was first posted at the Arduino forum, and can be found here: I just reposted it, so even more will get use of it.
#Arduino chic.
HalloweenJared's Extravaganza!: Arduino, PIR, and MP3 - oh my! In this post, I'll try and explain as best I can how to use an Arduino to play a sound file from a hacked MP3 player.
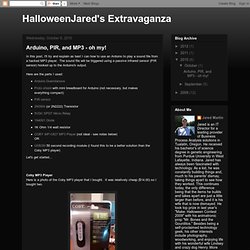
The sound file will be triggered using a passive infrared sensor (PIR sensor) hooked up to the Arduino's output. Here are the parts I used: Arduino DuemilanoveProto shield with mini breadboard for Arduino (not necessary, but makes everything compact)PIR sensor2N3904 (or 2N2222) Transistor5VDC SPDT Micro Relay1N4001 Diode1K Ohm 1/4 watt resistorCOBY MP-C827 MP3 Player (not ideal - see notes below)ORUSB2M 50 second recording module (I found this to be a better solution than the Coby MP3 player)Let's get started... Coby MP3 PlayerHere is a photo of the Coby MP3 player that I bought.
It was relatively cheap ($14.00) so I bought two. Tutorial: Ultrasonic Range Finder + Arduino - GarageLab (arduino, electronics, robotics, hacking) The ultrasonic range finder is a sensor that can be used to measure distance and detect objects.
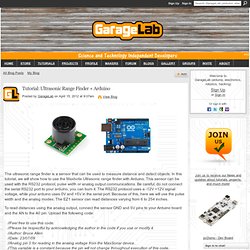
In this tutorial, we will show how to use the Maxbotix Ultrasonic range finder with Arduino. This sensor can be used with the RS232 protocol, pulse width or analog output communications. Be careful, do not connect the serial RS232 port to your arduino, you can burn it. The RS232 protocol uses a -12V +12V signal voltage, while your arduino uses 0V and +5V in the serial port.
Maxuino Getting Started. Maxuino is an open source project for quickly and easily getting the Max/MSP/Jitter talking to Arduino compatible micro-controllers.
This allows Max to read analog and digital pins, write to digital and PWM pins, control servos, drive stepper motors and much more. We have created a series of video tutorials (see the videos and tutorials page) or you can follow the text instructions below. Installation Instructions: Purchase an Arduino or Arduino compatible board.
Companies like Sparkfun or Adafruit have great starter kits.Download the free Arduino software from www.arduino.ccDownload Maxuino for free from the download page at maxuino.orgDownload the free “OSC-route” Max external from CNMATAdd the entire Maxuino folder and the OSC-route object to your Max filepath. Maxbeeuino. Knock. Learning Examples | Foundations | Hacking | Links Examples > Sensors Knock This tutorial shows you how to use a Piezo element to detect vibration, in this case, a knock on a door, table, or other solid surface.
A piezo is an electronic device that generates a voltage when it's physically deformed by a vibration, sound wave, or mechanical strain. Similarly, when you put a voltage across a piezo, it vibrates and creates a tone. Tutorial 01 for Arduino: Getting Acquainted with Arduino. 12 band color organ-RGB LED - Mathfarmer Projects.