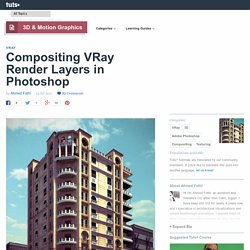

Compositing VRay Render Layers in Photoshop. In this tutorial Ahmed Fathi takes a look at how to composite together VRay render layers using blending-modes and masks in Photoshop.

Once completed, this process allows you to change or tweak any aspect of your image in seconds without having to re-render a thing! Ahmed also covers a few extra post production techniques such as Chromatic Aberration and Depth Of Field, as well as how to emulate a Cross-processed look. Republished Tutorial Every few weeks, we revisit some of our reader's favorite posts from throughout the history of the site. This tutorial was first published in July of 2010.
Additional Files/ Plugins:Download the Project Files for this tutorial As this is a compositing tutorial, not a lighting/rendering tutorial, I'll assume that you have at least a basic knowledge of V-ray, and that you are able to render out your own scenes already. We'll start with the VRayZDepth element. Apply a VrayLightMtl to your entire scene, and then add a VrayDirt map into the color channel. Tuts+ Free 3D & Motion Graphics Tutorials. Model a Stylish Eames Lounge Chair In 3ds Max. In this tutorial we are going to model a 20th century design legend, the Eames Lounge Chair.

The reason I chose this particular object are its different shapes and forms. It has both soft, organic pillows (with wrinkles) and a hard, defined structure that holds it all together, making it an excellent way to learn how to model both soft and hard structures. This is a comprehensive tutorial with 98 steps, and will provide complete instruction to modeling high-end 3D art for the intermediate to advanced 3ds Max user. Republished Tutorial Every few weeks, we revisit some of our reader's favorite posts from throughout the history of the site. The first thing we need to do is find reference photos, blueprints and drawings. I generally model these kind of models by eye, although I would suggest using the right dimensions on models you will be handing to other people, or placing in scenes. Let's begin with the upper backrest. Select the plane and subdivide it. Click Connect to add an edge loop.
Modeling & Rendering an Interior Scene using 3ds Max and Vray: Part 1. Since we're aiming to make a realistic interior scene, the scale of the objects is very important.

To keep things accurate, go to Customize > Units Setup and select the Metric system, and then choose Centimeters from the drop-down. Throughout this tutorial I'll be giving you the values that I used in the scene, however don;t feel you have to match these exactly! Go into the Top View and create a rectangle ( Length:540 cm , Width:450 cm) . Right click on the rectangle and go to Convert to > Convert to Editable Spline. While you still have the rectangle ( which is now editable as a spline ) selected, go to your Modifier tab , go into sub-object mode ( click the small plus sign) and select all 4 splines. Tip: this is a very common technique when creating the 2d layout of the walls. Right click on the rectangle, and go to Convert to > Convert to Editable Poly.
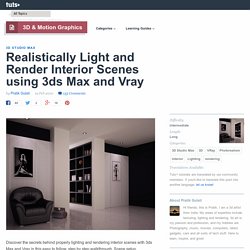
Create a box ( L:370 cm , W: 50 cm, H:225 cm ) and move it so that it intersects one of the walls, as seen in the pic below. Creating The iPhone 4S In 3D Studio Max - Part 1. Realistically Light and Render Interior Scenes using 3ds Max and Vray. Discover the secrets behind properly lighting and rendering interior scenes with 3ds Max and Vray in this easy to follow, step by step walkthrough.

Scene setup, modeling, texturing, lighting, and rendering for realistic output will all be discussed, so there is literally something in here for everyone! Additional Files/ Plugins: Download the Project Files for this tutorial In this tutorial, we’ll be using real units, so the first thing would be to open the menu "Customize > Units Setup > US" and choose "Standard > Feet w/Decimal Inches" as the unit. When you are trying to get a photorealistic quality it is very important to make sure that your object scale is accurate.
Press f10, and from the "assign renderer" tab choose "Vray". Assign a simple Vray material to all the objects in the scene, and set up basic scene lighting and render settings. Now to work on the lighting and render settings to achieve the final result. The settings for a physical camera are: Your scene is now textured! G.I Rendering Techniques in 3ds Max.