

PiBakery - The blocks based, easy to use setup tool for Raspberry Pi. Circuit Simulator Applet. This is an electronic circuit simulator.
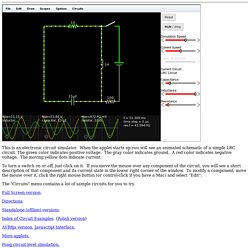
When the applet starts up you will see an animated schematic of a simple LRC circuit. Www.lushprojects.com - Circuit Simulator. This electronic circuit simulator is highly interactive giving the feeling of playing with real components. It's very helpful for experimentation and visualization. Best of all, thanks to the power of HTML5, no plug-ins are required! The original implementation, in Java, belongs to Paul Falstad who kindly gave his permission for me to build this port. Click here to open the simulator in a full window.
How to use this When the simulator starts up you will see an animated schematic of a simple LRC circuit. To turn a switch on or off, just click on it. There are three graphs at the bottom of the window; these act like oscilloscopes, each one showing the voltage and current across a particular component. The "Circuits" menu contains a lot of sample circuits for you to try. Some circuits, eg Basics->Potentiometer, contain potentiometers or variable voltage sources. Turn Your Raspberry Pi 2 Into a Tablet - DZone IoT. I use my Raspberry Pi’s usually with an external VGA or HDMI monitor.
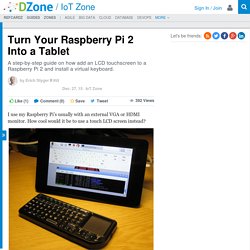
How cool would it be to use a touch LCD screen instead? Raspberry Pi 2 with 7 inch touchscreen Normally I use an external monitor for my Raspberry Pi projects. But this is rather bulky, and for a home automation project I want to have something smaller. Raspy with external monitor I already use a wireless mini keyboard/touchpad to reduce the space needed: There are several display solutions on the market for Raspberry Pi today, but what finally convinced me was the Raspberry 7″ Touch Pi Foundation Display ( which I have ordered.
The Display board gets attached to the back of the LCD: Mounted display board Because the display does not come with a case, I had ordered a display frame from Adafruit ( Adafruit display frame with cover on Three layers of acrylic build up the frame: SCiO. SCiO is a learning device.
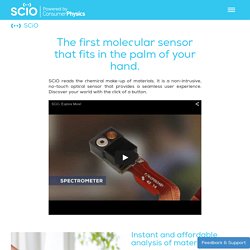
With every scan, SCiO learns more about the world around us, so we can all get smarter. Our development team has taught SCiO some exciting things, like to tell how much fat is in any salad dressing, how much sugar is in a particular piece of fruit, how pure an oil is and lots more. Would you like to teach SCiO to identify or analyze something important to you? What Can I Do With It Today? Out of the box, when you get your SCiO, you will be able to analyze food, plants, and medications. For example, you can: Get nutritional facts about different kinds of food: Dairy products, Fruits and vegetables.
These are just a few of the starter applications that you can use upon receiving your SCiO. Every time you use SCiO you are helping to build a database of knowledge about the stuff around us So when you use SCiO, you are making everyone smarter. SCiO is for anyone who would like instant information about the things they interact with and consume every day. Where Am I? Collecting GPS Data With Apache Camel - DZone IoT. The IoT Zone is brought to you in partnership with WSO2.

Download A Reference Architecture for the Internet of Things to learn more about the server-side and cloud architecture required to intereact with and manage IoT devices. One of the most popular requirements for the field devices used in IoT systems is to provide the current GPS location of that device and send this information to the data center. In this article I will tell you how Apache Camel can turn a full-stack Linux microcomputer (like Raspberry Pi) into a device collecting the GPS coordinates. Which GPS Unit Should I Choose? There is a myriad of GPS receivers available on the market. The picture below presents the BU353 connected to the Raspberry Pi device via the USB port. You can optionally equip your Pi into an external mobile battery, like GOODRAM Power Bank P661. How Can Camel Help Me? Camel GPS BU353 component can be used to read the current GPS information from that device. Show Me the Code Process Manager What's Next? Raspberry Pi Humidity and Temperature Sensor and Dashboard.
Connecting IoT sensor readings to a realtime dashboard was a pain, so we built EON, an open source JavaScript framework for realtime charts, maps, and dashboards.
This opens up a ton of use cases for the embedded world, from Raspberry Pi, to Arduino, to Atmel MCUs, enabling you to collect sensor readings and visualize the data readings on a live-updating UI. In this post, we’ll use a Raspberry Pi Model B and DHT sensor to collect humidity and temperature data and stream it to a realtime, live-updating line and gauge chart. The entire code repository can be found here. There are three main components to this tutorial: The Raspberry Pi circuit and sensor to collect temperature and humidity.PubNub connects the Pi sensor to the web browser interface and sends the data in realtime.EON charts the data on the realtime UI.
The DHT22 is a basic, low-cost digital temperature and humidity sensor. Part 1: The Hardware Setup 1.