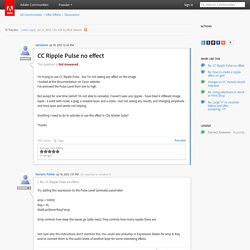

CC Ripple Pulse no effect. CC Ripple Pulse requires at least 2 keyframes to see anything.

No keyframes, no effect. There's a clue in the UI. See where it says (Animate)? The best way to see what you're doing is to turn on Render Bump Map, set a couple of keyframes or write an expression and then move down the timeline to a good spot and adjust the Time Span and Amplitude until you have the effect you want. It's a lot easier to see in a bump map than on an image.
If you want to tie the effect to an audio layer then convert to keyframes and use the linear function to set up a relationship between your audio levels and the Pulse Level of CC Ripple Pulse. An easy way to see the range of values is to use the graph editor with the Audio Amplitude and Both Channels selected. In this example the audio goes from a high of about 30 to a low of 3 with 10 in the middle.
The linear function from AE's Expression language menu>Linear that you can use is linear(t, tMin, tMax, value1, value2) The Motionbuilder-friendly BVH Conversion Release of CMU's Motion Capture Database - cgspeed. June 26, 2010: I've now re-released the Motionbuilder-friendly BVH conversion of the CMU motion files with some minor improvements to the frame-1 T pose.

I recommend the 2010 release over the original 2008 release, however links to both data sets are available below. Please see the 2010 README file for details of the minor changes. There have been no changes to the actual CMU motion data or to the bone structure or names -- only the initial T pose, which isn't part of CMU's original dataset to begin with, has changed. March 22, 2011: all download links on this page were broken because MediaFire deleted all files without notifying me, but should be fixed now. July 22, 2008 I'm happy to announce the free release of an enhanced BVH conversion of the entire set of 2548 human motions from the Carnegie-Mellon Graphics Lab Motion Capture Database. . - T-poses: Every BVH file has a T-pose added as its new first frame. How to Export an animated rigged character from Cinema 4D to Unity 3D « CINEMA 4D. Tutorial: How to create a 3D vector using Cinema 4D and Illustrator. 3D is a useful and important tool for graphic designers.

Not only it is highly useful for prototypes, interior and construction design, it also comes in handy for graphics and logos. While you can have raster and vectors mashed up in a graphic design, a logo and a t shirt design has to be strictly vector. You can create 3D in Illustrator but the engine is not up to the mark and the dedicated 3D programs render in raster formats but still you can try vector exports; alas they will disappoint you again. So if you want a perfect 3D vector for the logo project or T-shirt design project you are working on you have come to the right place. In this tutorial you will learn how to create a striking 3D vector logo.
Step 1 – Render settings… Having the correct render settings is very important. Output : 1920*1080 at 72 ppi. Save: Format- PNG with Alpha Channel on (this will render without a background). Anti Aliasing : Best at min. and max. 16*16 each. Apply Global Illumination Step 5 – Lighting. Top 5 Cinema 4D plugins. In this week's top 5 we'll be taking a look at some of the most useful plugins available to Cinema 4D users.

There are loads to choose from, so we've taken delved a little deeper and found five of the best that any C4D user can benefit from: 01. Zblur This is a top class plugin. Made by Biomekk, Zblur bypasses some of Cinema 4D's downfalls. 02. A great set of spline tools from C4D_Jack. 03. The Riptide plugin from Spanki's Prop Shop may not be exciting but it's certainly useful. 04. We all love blowing things up and watching the pieces fall dynamically to the floor and there are many plugins out there that do this, but Nitroblast from nitro4D is probably the most fully-featured. 05. Motionworks, developer of MovieType is new on the scene. These five plug-ins will add to your efficiency in Cinema 4D, while being both entertaining and in some cases adding features that Cinema 4D should have anyway.
Go and check them out and if you decide to try any of them say we sent you!