
Pixar announces new RIS Renderman. Pixar has created a new modular rendering architecture to RenderMan that brings raytracing to the Academy Award-winning software in version 19 (where they will be coding everything in C++ directly, not in shading language).

The new architecture, RIS, provides highly optimized methods for simulating the transport of light through multiple state of the art algorithms, including an advanced Unidirectional Path Tracer and a Bidirectional Path Tracer with Progressive Photon Mapping (also known as VCM). Along with major feature and performance enhancements, physically-based, artist-friendly workflows, progressive re-rendering, and the established advantages of RenderMan’s traditional REYES architecture, RenderMan now offers two rendering modes within one unified environment, providing the most advanced, versatile, and flexible rendering system available.
“This truly brings the future of fully photo-realistic ray-traced rendering to RenderMan,” said David Hirst, global head of lighting at MPC. Creando Materiales Basicos Vray Tutorial 2/2. Exponential and linear colour mapping in Vray. Within Vray there are various processes and tools that we use to generate what we would consider to be a realistic rendered image.

Options such as tone mapping, light intensity and camera exposure are fully configurable and can be moulded into what a 3D visualiser would name as their workflow. There are no right or wrong processes as they all lead to the same goal, to produce a high quality render. If you choose not to use a linear workflow, it may not be physically correct in terms of light intensity but it might look correct and is therefore acceptable. If you are using a linear workflow, then it is not just the lighting that needs to be accurate, you must also apply the same method to your materials. If you set up everything as linear and render using correct camera exposure but you don’t know how to create a glossy plastic, you are not physically correct. Blown out lights are caused by the camera settings. Exponential – This mode will saturate the colours based on their brightness. Linear color workflow in Vray for Maya. Easy Linear Workflow in Maya Tutorial. Tutorial: Correctly Setting Up a Linear Workflow in Maya.
Creando Materiales Basicos Vray Tutorial 1/2. Vray 2.0 materials guide. An in depth look at each setting within a V-Ray material.

You can jump to a specific section using the links below. DiffuseReflectionRefractionTranslucencyBRDFOptionsMapsReflect/Refract interpolation Diffuse Diffuse This is the actual colour of the surface, reflection and refraction colours can affect the visual appearance of this colour. Roughness Can be used to simulate dust on a surface by controlling the way the surface reflects direct light. Reflection Reflect Like diffuse it uses a colour value to determine the reflection strength. Fresnel reflections Most materials except metals have a Fresnel reflection, making the reflection strong at glancing angles but weak at more front on angles. Fresnel IOR IOR stands for index of refraction and is used to measure how light refracts through a surface relative to the viewing angle (Yourself), confusing at first but read on.
You can find many IOR tables on the internet and they all give different values for real world materials. Luces IES (Vray + 3d Max) FREE Vray Tutorial - Vray rollouts explained: a basic overview. Caustics are light patterns formed by refracted/reflected light. Take a look at the rendered image, these are caustics. There are two types of caustics: GI caustics and direct light caustics.
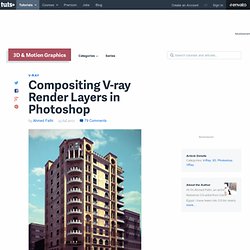
In the GI rollout, you may have noticed two check-boxes: reflected and refracted GI caustics. GI caustics are created by GI light (=bounced light). In fact, if you want the GI light to pass trough transparent objects, you MUST enable refracted GI caustics. Also, if you have for example a max omni or directional light in your scene, they will not generate caustics as it is not GI light. But, if you want caustics from max lights, or very sharp detailed caustics, you have to enable the Vray direct light caustics (also called photon mapped caustics). Your ultimate V-Ray material resource. V-Ray shop, Tutorials, News, Reviews, Artist interviews. Vray Tutorials, HDRI maps, Vray Materials, Textures,... VRay Training Manual for RHINO. CGI Animation Tech Demo HD: "Snappers Facial Rig" - by Snappers Mocaps. Compositing V-ray Render Layers in Photoshop. In this tutorial Ahmed Fathi takes a look at how to composite together V-ray render layers using blending-modes and masks in Photoshop.

Once completed, this process allows you to change or tweak any aspect of your image in seconds without having to re-render a thing! Ahmed also covers a few extra post production techniques such as Chromatic Aberration and Depth Of Field, as well as how to emulate a Cross-processed look. Republished Tutorial Every few weeks, we revisit some of our reader's favorite posts from throughout the history of the site.
This tutorial was first published in July of 2010. Additional Files/ Plugins:Download the Project Files for this tutorial Step 1. Making sense of VRay Settings. Recently Ryan Lintott and I went to a VRay training seminar by the man himself Vladimir Koylazo (one of the makers of VRay) who went through a number of facets of VRay including a step by step way of breaking down your render settings into logical steps to get the best combination of quality and speed.

I thought this was just too gooder process not to share so have decided to put together the following tutorial taking people through these steps he explained so VRay will hopefully become less complicated, and so you can better critique what is happening within your scenes. The real core of this is every scene is different and has different requirements in terms of detail resolution and Global Illumination. There are many settings posted on the web (I have done a few myself) outlining suitable settings for VRay, and much debate over which setting is best.
So here are the steps: In order to break up your scene use the following approach: NOTES on WHOLE PROCESS. Skymedias - Blog Content. Glass Rendering Tutorial with Vray in 3dsmax Author: Jan Rybar Software: 3dsmax, VRay Author Website: ImagesFX Our work is primarily artistically oriented – we are given plans and sketches, and we are entrusted with the task of making great imagery and movies.

Occasionally however, based on the evolution of our software (renderers), clients are requesting for more realism-based images. Architecture in particular, is always about the use of correct materials and while lots of new buildings, mainly offices and public spaces, have large glass facades, you need to deal with creating realistic glass. Just recently, we wrapped up a huge reconstruction project for a skyscraper in NYC and the client asked us to simulate several versions of their facade design.
Most modern glass panels are built from several sheets of glass and each sheet has different properties. In the image above, you can see the basic material of my glass sheet. Creators of V-Ray - 3D Rendering Software.