

3D Catan. Designed, 3D Printed and Painted. : 16 Steps (with Pictures) - Instructables. When a 3D print is finished printing there are often some small issues with the part that need to be addressed including stringing and a flared base.
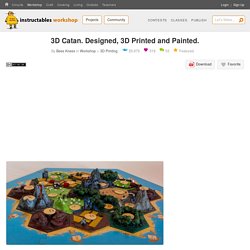
The severity of these issues depend on how well tuned your printer is. Here's how we processed the prints: Remove corner discs The reason we added small circular discs to the tiles was to prevent the corners from lifting and warping. Use snips to cut off the corner discs. Stringing Stringing occurs when the hot nozzle moves to another point within a print-layer and draws out a thin fiber of plastic. Use a sharp hobby knife to remove the bulk of any stringing File and sand the ends of the strings flat. Flared base A flared base is when the bottom few layers of the print flare outwards and are larger than they should be. File and sand the edges of the tiles to remove the flared base. 3D Printed Snowmobile : 11 Steps (with Pictures) - Instructables.
In order to control the snowmobile, we have to be able to turn left or right.
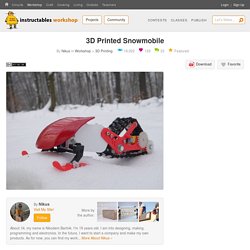
Snowmobiles turn thanks to skids on the front. I struggled a lot with a design of steering system for this project, I wanted to make a suspension for both skids but also control them with a servo motor. Finally, I designed a simple, flexible solution that can be easily controlled with a servo motor and use simple springs as a suspension. Here is how to assemble it: Fix servo motor to the main body (the biggest 3D printed part) with 2 screws. Now we can connect damper support, skid support, and steering joint together, for that I used M3x20mm screws. 3D Printed Excavator : 15 Steps (with Pictures) - Instructables. Now you need to fill everything up.
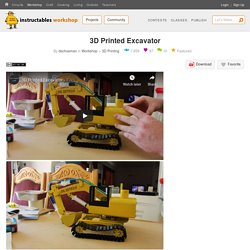
(I removed the carriage here because that just made it much easier to do and photograph) I used 3 different colours in just tap water, so you can see what syringe is activated by what other syringe and you can also see how the fluid moves(Educational as hell). But you can also substitute the water for cooking oil or any other liquid. Make your small glasses of water and you need to suck up the fluid with the syringes in the body(Keep the pipe on so you fill that too). Fill the syringes to a point where you can't move the parts of the excavator more than they should. DIY Low Cost Air Hockey Table : 27 Steps (with Pictures) - Instructables. Introduction: DIY Low Cost Air Hockey Table A professional air hockey setup is usually available only in arcades due to the sophisticated systems that are required to operate it.
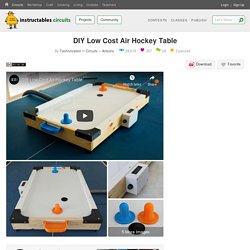
Our goal was to build a DIY air hockey table, bringing this gaming experience at home. By using commonly available materials we have succeeded in making a cost effective and easy to build air hockey table. Our project uses the power of modern technologies such as lasercutting and 3d printing to make a customized and easily scalable system letting one build the game according to their preferences. There is no better joy than seeing the puck gliding smoothly on the cushion of air and dropping into the goal. Do drop a vote in the games contest if you liked the project and check the video linked above. Teacher Notes Teachers! Step 1: Overview of the Playfield To conceptualize the air hockey table, we first designed it on fusion 360. Step 2: Principles of Air Hockey. DIY Cornhole Boards, Bags and Scoreboard (with Pictures) - Instructables. When it comes to playing cornhole, you need three things for the game; cornhole boards, bags and scoreboard.
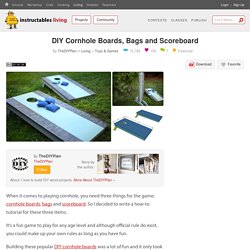
So I decided to write a how-to tutorial for these three items. It’s a fun game to play for any age level and although official rule do exist, you could make up your own rules as long as you have fun. Building these popular DIY cornhole boards was a lot of fun and it only took few hours to make. Staining and painting probably took longer than building it. Our kids love playing it, although they don't necessarily follow the rules and just make up their own.
Most of the cornhole set you buy on Amazon are made from ½” plywood. Supplies: • 4'X8' - 3/4" Plywood (x1) Creating a Transformer With Tinkercad : 15 Steps (with Pictures) - Instructables. Transformers are my favorite toys ever.
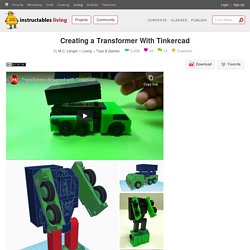
They bring great memories from my childhood, I love to visit toy stores to check for the last generations of this toy, I have a very small collection and even my first experiment with CAD was designing my own transformable robot using the fantastic 123D Design! Nevertheless, I'm not a kid anymore, I look like a creepy old guy when I go alone to toy stores (at least in this country), nobody gave a new Transformer for Christmas to expand my collection, and 123D Design is gone forever, dragging my dear first design to the Desert of the Obsolete Nothingness.
The solution? I created my very own new Transformer, using Tinkercad! This opportunity was not only to test my skills in this design application. This is basically a G1 inspired Decepticon that transforms from robot to a military missile-launching vehicle. This instructable shows how I developed the first and second approaches. Transformers are my favorite toys ever. Magic 8 Ball, Open Source, Customizable, Fun and Easy to Build : 9 Steps (with Pictures) - Instructables. 3D Printed Dice : 10 Steps (with Pictures) - Instructables. In this class, we'll be using TinkerCAD for all the 3D design work.
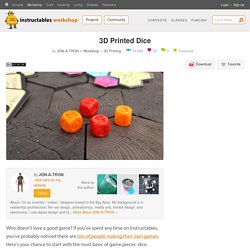
It's free and browser based, so you can use it on any computer or tablet. It's an easy, fun, intuitive 3D modeling program that's great for designing objects for 3D printing. 3D Printed Head Planters : 14 Steps (with Pictures) - Instructables. To get your 3d model ready to export, you will need to do some editing while still in the Skanect program.
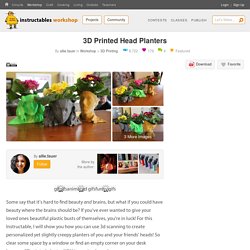
In order to do this, you will have to click on the Process tab found at the top of your window. The model that you currently have on your screen has a few problems that we need to fix. You will probably notice that when you 3D scanned your subject, bits of objects might have gotten picked up and captured on your screen. We need to get rid of those extra parts. Search for 3d printing - Instructables.