

The Ultimate Guide to Setting Gemstones in Metal Clay. Gemstone Firing Tests Several knowledgeable colleagues in this field have performed extensive firing tests of natural and manmade gemstones at typical metal clay firing schedules, both unset and embedded in metal clay.
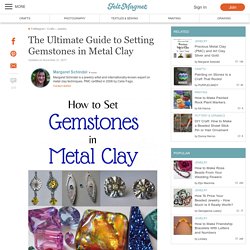
The results of these gemstone firing tests provide a very helpful guide to how risky it is to fire a particular type of stone in place. Not every stone tested produced identical results in the different firing tests. The tests also vary in terms of whether the stones were tested loose or embedded in metal clay, the types of clay in which the stones were embedded and the firing schedules tested. IMPACT Metal Clay Resources. Silver Metal Clay Tips & Techniques Below are tips and tricks about Fine Silver Metal Clay from A to Z.
They have been collected from various people who have been working with Metal Clay. The tips are based on actual experiences. If you have a tip to add, please send your tip, name, and website to us. The Ultimate Silver Metal Clay Firing Guide - Cool Tools. Maximum Firing Temperature The melting point of fine silver is 1761F/961C.

You may find slightly conflicting numbers, but the fact is, at this temperature, give or take a degree, fine silver will be a molten blob. Obviously, in order to transform our carefully crafted treasures into silver works of art, we need to avoid anything close to 1761F or our hard work will be just a forlorn memory. At 1110F fine silver becomes "open" to fusing, but is cool enough to maintain its form. Up to 1650F, fine silver will fuse and still hold it's form, so this is why the range of temperatures for sintering all forms of silver metal clay is between 1110F and 1650F. Digitally controlled kilns will sometimes creep up above their target temperature and a rise of a few degrees above or below your target temperature is nothing to worry about.
The Ultimate Silver Metal Clay Firing Guide - Cool Tools. Jib Bob's Star. How to Make Faux Metal Resin Clay Beads. Making your own clay beads is not new.
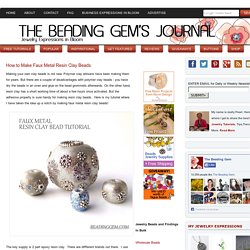
Polymer clay artisans have been making them for years. But there are a couple of disadvantages with polymer clay beads - you have dry the beads in an oven and glue on the bead grommets afterwards. On the other hand, resin clay has a short working time of about a few hours once activated. But the adhesive property is sure handy for making resin clay beads. More Adventures in Goldie Bronze. A few months ago I shared my first foray in to the newest form of Bronze clay called Goldie Bronze.

The firing instructions call for firing only one layer in the kiln at a time on a layer of carbon and then adding carbon then doing a second phase, well when you make as much inventory as I need to make that is not really a good use of my time. I asked some questions on the Goldie Bronze Forum on Facebook and several people suggested firing 4-5 open shelf firings and then consolidating them in one Carbon Firing. So here's what that process looks like. Here is the first layer And 2 more layers for 3 total, I think I might have been able to get a 4th layer in. They are in the kiln right now. The first stage of firing is 660F for 30 minutes.
Typically you do this on carbon and just add carbon to the top and do the second phase. But since I want to do more at one time I'm going to layer all of these in to carbon after the first phase. Removing them after this first stage is making me very nervous, QuikArt Photopolymer Plates and ReVerseArt Film and Developer MADE EASY!
Prometheus Bronze Clay Tutorial. MetalClay Supply - Everything Metal Clay & Much More! Goldie Bronze TM, une pâte de bronze polonaise ! - Formation et cours pâte d argent, de bronze, de cuivre. Le blog de Sabine Alienor. English version by Margaret Schindel, thank you so much Margaret!
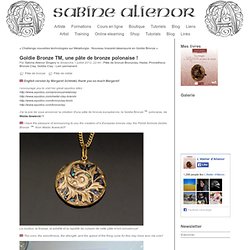
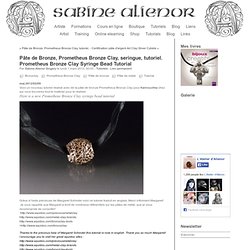
I encourage you to visit her great squidoo sites : J'ai la joie de vous annoncer la création d'une pâte de bronze européenne, la Goldie Bronze ™ polonaise, de Waldo Ilowiecki !!! I have the pleasure of announcing to you the creation of a European bronze clay, the Polish formula Goldie Bronze ™ from Waldo Iłowiecki!!! La couleur, la finesse, la solidité et la rapidité de cuisson de cette pâte m'ont convaincue! The color, the smoothness, the strength, and the speed of the firing cycle for this clay have won me over! Pâte de Bronze, Prometheus Bronze Clay, seringue, tutoriel. Prometheus Bronze Clay Syringe Bead Tutorial - Formation et cours pâte d argent, de bronze, de cuivre. Le blog de Sabine Alienor. Prepare the burnable core for the bead.
Pierce a small cellulose ball (from a party supply store) straight through with a wooden toothpick. Stick the ball into a block of craft foam and draw outlines for the bead holes with a felt-tip pen. N.B. If you can’t find cellulose party balls, make your own burnable core by wetting small pieces of toilet paper in water, pressing them into a ball and then allowing it to dry.