

Papercraft. JEUX DE CUISINE. BRICOLAGE ENFANT : 359 fiches bricolage et activités pour enfants sur Jedessine.com. Framboise en pâte polmyère. Apprenez à créer une jolie framboise gourmande pour vos création de bijoux gourmands grâce à ce tuto Russe très clair.
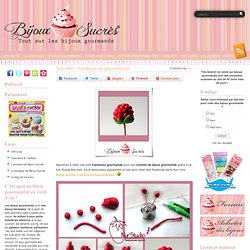
Vous retrouverez également un tuto pour créer des framboise dans mon livre : Bijoux sucrés créations en pâte polymère ! Source : Tags: fimo, framboise, fruit, modelage, pâte polymère. Pastèques. Comme c’est bientôt les beaux jours ( il faut y croire) voici trois tutos pour modeler des pastèques en prévision de l’été, pour vous créer des bijoux fruités aux couleurs de acidulées.
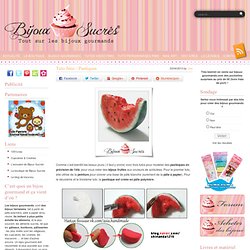
Pour le premier tuto, elle utilise de la peinture pour colorer une base de pâte blanche (surement de la pâte à papier). Pour le deuxième et le troisième tuto, la pastèque est créée en pâte polymère. Source : blog.naver.com/shinanda1219 et lollipop.kiev.ua Tags: fruits, pastèque, pâte à papier, pâte polymère, tuto. Créer un demi citron. Voici un nouveau tuto, que j’ai chiné que le site de Stéphanie Kilgast.
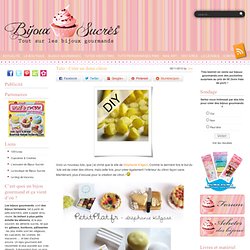
Comme la dernière fois le but du tuto est de créer des citrons, mais cette fois, pour créer également l’intérieur du citron façon cane. Tuto photos : Créer une banane en pâte polymère. Nous avions déjà vu sur le blog comment créer une cane banane grâce à un tuto vidéo mais nous ne savions pas encore comme créer la banane elle même.
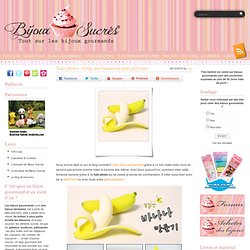
Voici donc aujourd’hui, comment créer cette fameuse banane grâce à ce tuto photo qui se passe je pense de commentaire. A créer aussi bien avec de la pâte Fimo ou avec toute autre pâte polymère. Source : www.mydiyclub.com Voici maintenant, la banane réalisée par Tiphanie Lepage grâce à ce tuto, on dirait une vraie vous trouvez pas ? : Tags: fimo, fruits fimo, pâte fimo, pâte polymère, polymer clay, tuto fimo. Des agrumes en pâte polymère. Trois tutos photos pour faire des agrumes en pâte polymère, dont deux pour faire des canes et un pour faire un agrume coupé en deux.
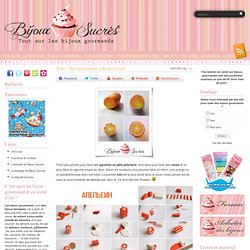
Selon les couleurs, vous pourrez faire un citron, une orange ou un pamplemousse avec ces tutos. Le premier tuto est le plus facile donc si vous n’avez jamais fait de cane je vous conseille de débuter par celui la. Figurine en Fimo. Modelage de lapinous. Voici deux tutos pour créer des petits lapins en pâte polymère.
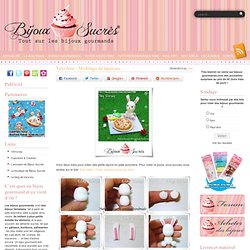
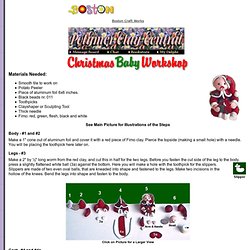
Pour créer la pizza, vous pouvez vous rendre sur le tuto Tuto vidéo : Créer une mini pizza en fimo. Tags: fimo, lapin, modelage, pâques. Tuto PANDA. Untitled Document. Personnage de la crèche en Fimo, Décos Noël à fabriquer. Christmas Baby by Jacqueline van Hesse-Penning. Materials Needed:Smooth tile to work on Potato PeelerPiece of aluminum foil 6x6 inches.Black beads nr. 011ToothpicksClayshaper or Sculpting ToolThick needleFimo: red, green, flesh, black and white See Main Picture for Illustrations of the Steps Body - #1 and #2.
Babou Bricole: la porcelaine froide de Brigida. Tutorial - Armatures. To print these tutorials please "right click" on any set of images and save to your PC.
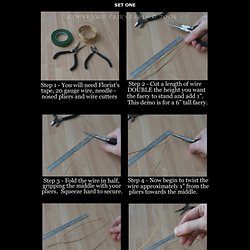
You may then print them out using your preferred software, thanks. Marika's Dolls - Tutorials. 漂亮可爱的米老鼠 -《小女人爱手工》-旺旺@米粒窝. Doll Annex Tutorial Main Page. How to Make a Piñata. 1 of 15 <img src=" alt="materials" /> Materials for the Paper Maché Let’s get started!
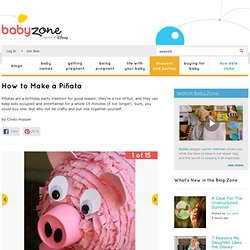
Here’s what you’ll need:-One section of newspaper cut into 1 1/2-inch by 3-inch strips -1 cup flour -Scissors -Water -A blown-up balloon, tied -An empty large coffee can (about 30 ounces) 2 of 15 <img src=" alt="Materials for Decorating" /> Materials for Decorating -Heavy-duty string -Two rolls of crepe paper party streamers -White craft glue -16-ounce Styrofoam cup -Two toilet paper rolls cut in half -Sheet of craft foam in pink -Pink acrylic paint -White paper -Pipe cleaner -Googly eyes 3 of 15 <img src=" alt="Get Started" /> Get Started Make the paper maché by mixing 1 cup flour and 1 cup water. Set the balloon in a large coffee can. <img src=" alt="Cindy Hopper" /> About the Author Cindy Hopper, founder of Skip to My Lou, loves to blog about her unending supply of ideas for gifts, parties, and rainy days.
Narnia and the North! Yesterday I asked the girls what they wanted to do afterlunch and Jenna said, "crafts" (of course).
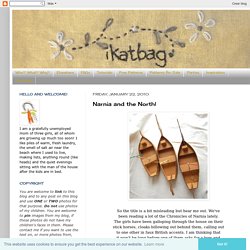
So we cut up acorrugated cardboard box and made ships. Emily's was the Dawntreader, Jenna wanted a princess figurehead and Kate had no opinion so we left the prow of her ship bare. We started out with the basic ship, which was justa flat bottom with two symmetrical sides. These were hot-glued to the bottom, meeting at the bow(front). If anyone is interested, here is the pattern - I thought I'dtrace it out and save it here in case we want to make theseagain - like if we ever did a nautical-themed birthdayparty.
Two strips of cardboard were also glued across themiddle of the boat, each with a hole to support themast and sails. Next we added the figurehead and tail and a command bridge and helm (steering wheelthingy)- made with cardboard and toothpicks. The mast was made from a dowel and a popsicle stick.I'd have liked the masts to be taller but all we had werethese precut foot-long dowels.