

Guest Post on Wig Styling by Cosplay Tutorials. Hello readers, this is Gaby from Cosplay Tutorials to give you some helpful hints and tips to style wigs.
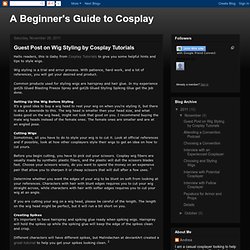
Wig styling is a trial and error process. With patience, hard work, and a lot of references, you will get your desired end product. Common products used for styling wigs are hairspray and hair glue. In my experience got2b Glued Blasting Freeze Spray and got2b Glued Styling Spiking Glue get the job done. Setting Up the Wig Before Styling. Yusei Fudo Wig tutorial v2 by Malindachan on deviantART. Choosing and Styling Wigs.
Hair color and style are elements that can really make or break a cosplay.
If you can dye and cut your hair to fit a character, you can get some amazing results, but for those blue haired or very long (or short) haired characters wigs are often a much better. What to Consider When Choosing a Wig When choosing a wig you will want to keep in mind your desiredHair colorHair styleHair lengthCost Types of Wigs The two main wig types are synthetic and human hair. Human hair wigs are the most natural looking wigs. Synthetic wigs are cheaper than human hair wigs. Because synthetic wigs lend themselves so well to cosplay the follow suggestions will be geared towards the use of synthetic wigs.
Styling a Wig When styling a wig it is very important to remember not to use a blow drier or any heated device, as temperatures above 160 degrees Fahrenheit can melt the wig fibers. Keep references of you character on hand or up on a nearby computer when styling a wig so you can get all of the details. Tutorials & Articles. Contact Lens FAQs. This FAQ is a starting point for those new to contacts or who have questions.
See an eye doctor before considering contact lenses - you are solely responsible for your eyes! If you have questions concerning contact lenses, please post them here as you are likely not the only one with that question! -------------------------Table of Contents1.) Finding Lenses/Where to Buy 2.) Getting Started: Advice & Terms to Know 3.) I’m looking for _______ colored/ designed contacts for [insert character name]!
How are lenses made? Do I need to see an eye doctor to get lenses? Your eye doctor will also show you how to insert, remove, and properly clean and store your lenses and may give you some trial lenses too. Getting fitted for lenses is important! Fairness to Contact Lens Consumers Act + Overseas PurchasingRead more here Can I get lenses without a prescription? My eye doctor asked me to come back after he fitted me with lenses – why? I wear glasses - can't I just use the same prescription? Buying cosplay eye contacts for the first time? Well I've tried many different types of contacts - from regular size to very large circle lenses, In all different colours and patterns.
I've never had to wear glasses or had any problems with sight - and the first contacts I ever bought were from a dodgy little anime store in a shopping mall in central London (so we're not talking the highest quality here), and they were totally fine. The most important thing, I think, is looking after the contacts and your eyes in the best way possible because you CAN get infections and such from poor aftercare. (1) THE MOST IMPORTANT THING: once you buy your contacts (which come in little packets/jars/depending on the brand in a clear fluid) you MUST soak them for at least 6 hours in a fresh saline contact lens solution, which you can purchase from your local drugstore. See, it's not the lenses per-se which can hurt your eyes, but if you get dodgy transit-contact-lens-liquidy-stuff in your eyes it can be dangerous as they can contain parasites. Cosplay 101: Buying and Styling Wigs. Craft Foam Armor Tutorial. I was searching for a cheap, light, but nice-looking material to make armor out of, and I discovered one - craft foam!
This tutorial is designed to show what you can create using only materials that are widely available at general craft stores, with no need for specialty shops or internet orders. I specifically used it for Helm's Deep elf armor, but it could be used for almost any armor that you can break down into fairly flat pieces. The method listed below is what I've come up with, but there really is no one right way to use craft foam; check the end of the tutorial for links to other foam armor sites. For an example of a finished project, here's a picture of my elven armor. Advantages: Light weight Inexpensive materials Widely available materials Easy to make Safe to wear in crowds Most steps are safe for kids to do Flexible - won't break or crack Great 'beginner' armor Disadvantages: The tools you will need are: Scissors Paintbrush Heat source - heat gun or stove burner.