

Develop an application. MiOS plateform. Apps.mios Developer's Guide. Apps.mios.com is the new MiOS plugins marketplace for plugins compatible with UI5.
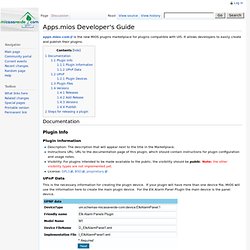
It allows developers to easily create and publish their plugins. Documentation. What is UPnP ? Un article de Wikipédia, l'encyclopédie libre.
Luup Intro. As explained in our earlier Luup launch announcement, Mi Casa Verde is donating cash and hardware to encourage Luup development and would like to encourage makers of UPnP Control Points to add support for Vera's home automation devices.
Luup Plugins. If you didn't already come from the Luup_Intro page, start there to see what Luup Plugins are intended for.
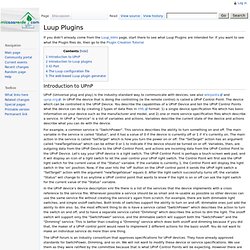
If you want to see what the Plugin files do, then go to the Plugin Creation Tutorial Introduction to UPnP UPnP (Universal plug and play) is the industry-standard way to communicate with devices, see also wikipedia and upnp.org. In UPnP the device that is doing the controlling (ie the remote control) is called a UPnP Control Point. The device which can be controlled is the UPnP Device. For example, a common service is "SwitchPower". In the UPnP device's device description xml file there is a list of the services that the device implements with a cross reference to the service file. The UPnP forum is an industry consortium that approves specifications for UPnP devices. Install LUUP Plugins. HOWTO install LUUP plugins on your Vera.
Prerequisites Vera 1 or 2 hardware. Luup Plugins ByHand. Description of the XML files Because the web generator is not yet operational (as of June 2013) you need to create the XML files by hand.
The easiest way to do this is to start with an existing device as a template that you modify to suit your needs. In Vera's Setup Web UI, choose Devices, Luup plug-ins (in UI5, choose Apps, Develop Apps, Luup Files). There is a list of all the XML files which came with Vera by default. Files that start with D_ are UPnP device specifications. Luup plugins: Static JSON file. Starting in UI4, Luup plugins can specify a static JSON file.
This file describes how the plugin appears in the web interface. The icon used by the plugin in the dashboard. The text that displays in the one-to-two-row status message in the dashboard. Whether the icon changes depending on the value of a variable in the device (for example, a binary light's icon changes from lit to unlit). The tabs that appear in the device's detail dialog (when you click the wrench/spanner). Luup UPNP Files. The following is the contents of the file Constants.h which defines the strings used for file device types, services, actions, variables, etc. /* Copyright (C) 2008 Mi Casa Verde, Inc., a Nevada Corporation All rights reserved.
This software may not be used or distributed without express consent. Luup Debugging. This document assumes you have already read Luup_Intro for a general introduction to Luup, Luup_Plugins to learn what goes into a plugin, and that you are creating the Luup plugin using either the web-based Luup plugin generator (coming soon) or are creating Luup's XML files by hand as described here: Luup_Plugins_ByHand.
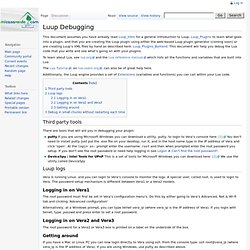
This document will help you debug the Lua code that you write and see what's going on with your plugins. Luup Somfy Walkthrough. This page is for developers wanting to learn how to write a plugin.
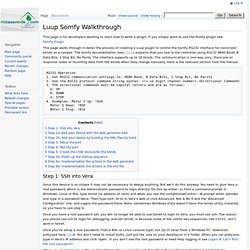
If you simply want to use the Somfy plugin see: Somfy_Plugin This page walks through in detail the process of creating a Luup plugin to control the Somfy RS232 interface for motorized blinds as a sample. The Somfy documentation (see: [1]) explains that you talk to the controller using RS232 9600 Baud, 8 Data Bits, 1 Stop Bit, No Parity. The interface supports up to 16 blinds. The communication is one-way only; there are no response codes or incoming data from the blinds when they change manually. RS232 Operation 1. Rs232-to-rts-compatability. Luup Configuration File. Plugins often need configuration data that is unique to each user. Generally I/O devices will have configuration data, such as the IP address if it's a network device, the baud rate and port number for a serial device, or the IR transmitter to use. This configuration data is never written into your plugin since that would mean having to modify the plugin for each user.
Rather, the plugin defines what type of configuration data it needs, and the Luup user interface lets the user specify this information, which gets saved in the Luup configuration file. You can view your configuration file by opening your web browser and going to the page: where "myip" is the IP address of your Vera. We recommend using the Firefox web browser since it has a built-in XML viewer. Luup Functions. When the Luup engine calls your Lua code it will pass your code some variables relevant to whatever the code is supposed to do.
You can see how your code looks with the full function declarations by bringing up this page in a web browser: Here is a list of the variables that are passed to your Lua code, and also a list of what return values the Lua code should send back. The tag names are explained here: The Luup XML implementation file. Luup Complete API. In addition to the [Lua] commands described in the [Lua reference manual], you can also reference in your Lua code variables and functions from modules which the Luup engine provides as follows: Module: luup These are general purpose functions and variables. Call them by using the luup. module, such as: luup.log('Now running version: ' .. luup.version) MIOS HTTP API. In addition to sending requests using standard UPnP, you can also do most things using a simple HTTP requests. Use the built-in URL data_request, and pass the following on the URL: id the id of the request (prior to 15 Oct 2010 all requests had an lu_ in front, which is now optional), output_format the format in which you want a response as json, xml or text.
Not all requests support all output_format options. Lua Expressions Tutorial. Expressions are evaluated in order to perform calculations which may assign values to variables or pass arguments to functions. Expressions are covered pretty well in section 2.5 of the Reference Manual.[1] Expressions are covered here for completeness and to offer more examples. We'll use the = expression shorthand notation for this page. The values can easily be assigned to a variable, e.g., Luup Scenes Events. Adding Lua code to scenes and events You can add Lua script to scenes and events for simple tasks, like making a scene or event conditional. Luup Variables. The "Variables" for a device tell you it's current state, such as if it's on or off, what temperature it has, and so on. Variables are given a name and a service ID, which is defined by the UPnP forum.
You can use this service ID/variable name pair to get the state of a device in the Luup engine by using the function luup.variable_get, as documented in Luup_Lua_extensions. You can also see the current value of a device's variables by going into Vera's setup page, click 'Devices', click + next to the device, then click 'Advanced'. The name of every variable for the device is shown along with the current value, and if you move your mouse over the variable name, you will the corresponding service ID in a popup window. Les Variables des Modules « Ma Domotique. Les «variables» d’un module vous informent de l’état actuel, par exemple : allumé ou éteint, quelle température, etc …. Luup UPNP - How to get variables.
Luup Lua extensions. How to debug with Luup ? Code repository intro. Lua tips. From MiCasaVerde Lua is a very complete and powerful language, the full reference is at . This page attempts to help with common pitfalls, especially those that are likely to appear on scripting the MIOS system. Get a default. MiOS FAQ. FAQ - How to create a virtual device. Géolocalisation Domotique. Code Sample - Repository Hosting.
MiOS Marketplace. Luup plugins. Exemple : Création d'un device virtuel. Tuto : gestion d’un calendrier. Cela fait quelques temps que je voulais réaliser un plugin pour la Vera qui permette de calculer les jours fériés, à l’image de ce que j’avais fait pour Homeseer. Seulement, je ne maitrise pas encore bien le langage Lua utilisé par la Vera, faute de temps à y consacrer. Par contre, je prend un peu de temps chaque jour pour surveiller le forum officiel de Micasaverde, où une communauté très active nous fait partager ses petits scripts et plugins.
Aujourdhui, je vais donc vous parler non pas d’un script qui calcule les jours fériés, mais d’un script qui se connecte à un calendrier iCalendar (fichier ics) pour les récupérer dans un « device » créé pour l’occasion. Pour commencer, vous aurez besoin des fichiers contenus dans cette archive: Télécharger les fichiers.
Virtual ON/OFF Switches. Gestion chauffage avec un device virtuel. Gérer son chauffage électrique avec une console Vera 2 UI5, des modules Fibaro FGS-211 et un ou plusieurs thermostats everspring ST814. Un premier cahier des charges donnerait : - Chauffage multi-zones ( pièces à vivre, chambres, salle de bains). - Tenir compte de la température intérieure. - S’adapter au mode de vie de la famille (présence, absence, vacances…) Cette première partie va décrire les éléments nécessaires pour mettre en œuvre cette solution Au rez-de-chaussée j’ai quatre radiateurs pour chauffer l’entrée, le séjour et le salon.
L’idée est de créer une scène qui va vérifier la température renvoyée par un thermostat et éteindre ou allumer les radiateurs en fonction des températures souhaitées. J’ai fixé cette durée (onglet Horaires de la scène) à 15 minutes car mes radiateurs ont une inertie assez grande. Combination Virtual switch plugin (UI5) Plugin XBMC pour Vera. Dans mon précédent guide sur l’utilisation d’un Raspberry avec XBMC, je vous ai laissé entendre qu’on pouvait faire beaucoup de choses grâce aux extensions qu’il est possible d’installer dans XBMC. Aujourd’hui je vous présente l’utilisation de l’extension pour la box domotique Vera. Le principe est simple: les différents états de XBMC (le menu où vous vous trouvez, le démarrage d’un film, sa mise en pause, son arrêt, etc…) vont remonter instantanément sur la Vera.
Collecter les données Netatmo depuis une Vera.