
Create a Photo Manipulation of Alice in Wonderland - Photoshop Tutorials. Learn how to this surreal photo manipulation of an Alice in Wonderland on amazing and surreal atmosphere with Photoshop.

In this tutorial, you’ll learn how to create your amazing atmosphere and adventure tales with realistic shadows and lighting, then complete it with a bleak color tone effect. Throughout the tutorial, you’ll learn techniques that will help you create better matte paintings and photo manipulations. Read this tutorial and find out how easy it is! What you’ll be creating To create this image of Alice, we’ll start by creating the atmosphere and the main stage in the form of road maps. Tutorial Resources Step 1 Start by creating! Step 2 Let’s start off adding the sky to our manipulation. Step 3 After addition of the sky, then stretch, as shown in Figure.
Step 4 To the sky was brighter and stood out edges of the clouds, I added an adjustment layer to the sky. Step 5 Then add another layer > New Adjustment Layer > Photo Filter. Step 6 This layer will make the color more vivid sunset. Photo Manipulate a Beautiful Fantasy Nature Scene. Today we have a great new photo manipulation tutorial for you guys.

You’ll learn how to create a beautiful nature scene, featuring some crazy weather, a complex background structure and some lovely touches of detail. With this tutorial we will be covering key topics like: Matte Painting.Digital hair painting.Advanced cutting techniques.Creating water droplets.Effective lighting and shadow techniques. Let’s get started shall we? What You’ll Be Creating: Here’s a look at the outcome you’ll be able to produce by the end of this lesson: Step 1 Create a new canvas in Photoshop and draw a rough sketch of the concept in a new layer.
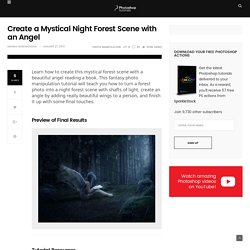
Step 2 In this step we will be creating the BG landscape using multiple images. 1) Import the image of the river on to the canvas and place it on the left side of the scene as shown. 2) Now import another image of the same river and place it on the right side. Create a Mystical Night Forest Scene with an Angel - Photoshop Tutorials. Learn how to create this mystical forest scene with a beautiful angel reading a book.

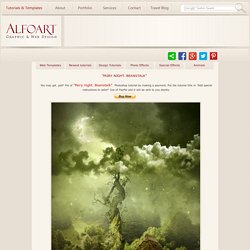
This fantasy photo manipulation tutorial will teach you how to turn a forest photo into a night forest scene with shafts of light, create an angle by adding really beautiful wings to a person, and finish it up with some final touches. Preview of Final Results Tutorial Resources. Fairy night. Beanstalk. Used images: Cloud [link] Landscape [link] Moon [link] Sky [link] Branch [link] Tree [link] Stars [link] Create a new document in Photoshop 1200*1600px.

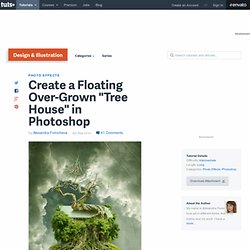
Apply Gradient Overlay effect to the first layer. Use following adjustments: Insert Sky image. Add layer mask. Apply Luminosity Blending Mode to this layer. Snow, Ice and Overpainting. Create a Floating Over-Grown "Tree House" in Photoshop. Photoshop is great because it allows us to create scenes that wouldn't otherwise be possible in real life.

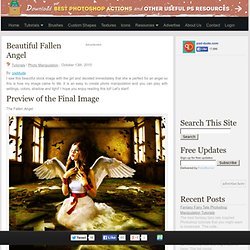
In this tutorial we will combine several stock images to create a floating over-grown tree house in Photoshop. Tutorial Assets The following assets were used during the production of this tutorial. Step 1 Download and open in Photoshop the large sky photo - 2240px * 1680px. Step 2 Then choose Rectangular Marquee Tool , choose Fixed Size with Width = 1104px and Height = 1428px and create selection of the area like on the screen shot. Step 3 Duplicate sky background layer and apply Auto Contrast adjustment to it, Image > Adjustments > Auto Contrast. In the bottom of layers palette. Step 4 Create a new adjustment layer, click small icon in the bottom of layers palette, choose Color Balance from the drop down menu. Step 5 Insert soil sphere, select outside area and remove it. Beautiful Fallen Angel - Photoshop tutorial. The Fallen Angel Open a new photoshop file size 600/600 pixels.

Now open this beautiful photo of an old room Nature's Room by *FaceTaiheiyo. Because it is so beautiful I will not change it to much. Place the image on the right side of the screen. Duplicate this image and Flip it Horizontally, than place it on the left side as shown in the image. I have also deleted some parts from the left side image but it is not so obvious so I will put an image with the left side colored to have an idea: Another thing that I have to do is to fill the empty area from the bottom of the image.
Add the Wallpaper. Resize the image to 50%. Another thing that I have to do is to add a wall texture Pressed Leaves Texture 2 by ^FantasyStock Change the blending mode of this layer to Overlay 100%. Add the Girl. Go to Image – Adjustments – Brightness/Contrast and change the balance to obtain a similar look: 40 Extravagant Surreal and Fantasy Scenes Photoshop Tutorials. I always stated that Photo Effects and Text Effects were the most popular Photoshop topics around.

When I decided to create this list I thought that I’d have a hard time to find tutorials with a reasonable quality. Well, that was not the case. In my way I found Mysterious woods inhabited with magical fairies, dragons and mythical creatures flying on fantasy night skies, magic crystal balls, hats and other objects hidden in strange houses. Making it short, an immense amount of imaginative scenes that filled my senses and made my work not only easier, but enjoyable too! Photoshop Mermaid.