
Better (Free) Graphical IDE Than Arduino...? OK, here's an example I'm currently using on the desktop side of things.

Let's say I want to transmit data from the host to the micro, arranged in packets. Let's say I have the following defined data structures in C: C Programming For Microcontrollers – Quick Start Guide. OneWire. PortManipulation. Reference Language | Libraries | Comparison | Changes Port registers allow for lower-level and faster manipulation of the i/o pins of the microcontroller on an Arduino board.

The chips used on the Arduino board (the ATmega8 and ATmega168) have three ports: B (digital pin 8 to 13) C (analog input pins) D (digital pins 0 to 7) Each port is controlled by three registers, which are also defined variables in the arduino language. The DDR register, determines whether the pin is an INPUT or OUTPUT. DDR and PORT registers may be both written to, and read. PORTD maps to Arduino digital pins 0 to 7 DDRD - The Port D Data Direction Register - read/write PORTD - The Port D Data Register - read/write PIND - The Port D Input Pins Register - read only PORTB maps to Arduino digital pins 8 to 13 The two high bits (6 & 7) map to the crystal pins and are not usable DDRB - The Port B Data Direction Register - read/write PORTB - The Port B Data Register - read/write.
Maximum pin toggle speed. Hmm.

This was asked over on AVRFreaks, and it's FREQUENTLY a Frequently asked question about CPUs/etc, though I don't recall ever seeing it asked here. Since I actually did the experiment, I'll post the answer anyway! While (1) { digitalWrite(3, 1); digitalWrite(3, 0); } produces a 106.8kHz square wave on digital pin 3 in Arduino 0010, 0011, and 0012. Though it would probably be foolish to count on exactly that speed; library functions are subject to change. cli(); while (1) { PORTD |= 0x8; PORTD &= ~0x8; } on the same board runs at 2.667MHz. AttachInterrupt. Reference Language | Libraries | Comparison | Changes Description Specifies a named Interrupt Service Routine (ISR) to call when an interrupt occurs.

Replaces any previous function that was attached to the interrupt. Most Arduino boards have two external interrupts: numbers 0 (on digital pin 2) and 1 (on digital pin 3). The table below shows the available interrupt pins on various boards. The Arduino Due board has powerful interrupt capabilities that allows you to attach an interrupt function on all available pins.
Note Inside the attached function, delay() won't work and the value returned by millis() will not increment. Using Interrupts Interrupts are useful for making things happen automatically in microcontroller programs, and can help solve timing problems. About Interrupt Service Routines ISRs are special kinds of functions that have some unique limitations most other functions do not have. Generally, an ISR should be as short and fast as possible. Syntax Parameters Returns none. Saving settings into eeprom on Arduino Uno (r3). AvailableMemory. Note: For Arduino 1.0, you have to replace#include <WProgram.h>with#include <Arduino.h>.

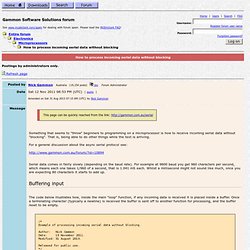
The microcontrollers used on Arduino boards (ATmega8, ATmega168 and ATmega328) have a small amount of RAM. In order to determine the amount of memory currently available the most accurate result can be found by using this MemoryFree library (2.21kb). It is based on code posted in the forum (here), extended to include walking the free list: MemoryFree.h: // MemoryFree library based on code posted // Extended by Matthew Murdoch to include walking of the free list. #ifndef MEMORY_FREE_H#define MEMORY_FREE_H #ifdef __cplusplusextern "C" {#endif int freeMemory(); #ifdef __cplusplus}#endif. Electronics : Microprocessors : How to process incoming serial data without blocking.
How to send and receive numbers To send a number (greater than 0 to 9) from one Arduino to another reliably you need to do a couple of things.

Send some sort of "start number" delimiter (in this example, the "<" character). "Print" the number, which turns it into a string of ASCII characters.Send some sort of "end number" delimiter (in this example, the ">" character). Example sketch, sending 10 random numbers out the serial port: // Example of sending numbers by Serial // Author: Nick Gammon // Date: 31 March 2012 const char startOfNumberDelimiter = '<'; const char endOfNumberDelimiter = '>'; void setup () { srand (42); Serial.begin (115200); } // end of setup void loop () { Serial.println ("Starting ... "); for (int i = 0; i < 10; i++) { Serial.print (startOfNumberDelimiter); Serial.print (rand ()); // send the number Serial.print (endOfNumberDelimiter); Serial.println (); } // end of for delay (5000); } // end of loop.
Arduino cgi library. Introducing the Webduino web server library.