

Codebender. Minimal Atmega328 without Arduino Board. Bootload an ATmega328. Construire un Arduino. Bootloader. (redirected from Main.Bootloader) Learning Examples | Foundations | Hacking | Links What's a bootloader?
See this page for an explanation of what a bootloader is and why we're using one. Not using a bootloader If you want to use the full program space (flash) of the chip or avoid the bootloader delay, you can burn your sketches using an external programmer. ATmega328P vs Arduino pin mapping. Burning the Arduino Uno Bootloader Using Atmel Studio and the AVRISP mkII. Arduino facile. ArduBlock. Instructables share what you make. Arduino. Naissance d’un mythe de la bidouille. Arduino. Google chooses Arduino as a development platform for Android. At the conference Google I/O 2011, held on 10 and 11 May 2011 at the Moscone Center in San Francisco, Google announced a new development platform for Android based on Arduino.

Google, Android and Arduino Google I/O is an event able to attract thousands of developers from around the world, who meet in order to learn the new technologies developed by the Mountain View's company with applications in the web, mobile, and enterprise fields; technologies including, among others: Android, Google Chrome, Google APIs, Google Web Toolkit, and App Engine. The new version of the Android platform, 3.1, introduces among the new features an unusual and important feature, called Android Open Accessory, available through the Android Open Accessory Development Kit (ADK).
Which is the main innovation introduced by ADK? Google wants a hardware based on Arduino. Tutos. Connect an iPhone, iPad, or iPod touch to Arduino with the Redpark Serial Cable. Step #1: Wire up the RS232 adapter to the Arduino PrevNext Connect the RS232 adapter's power and ground to the Arduino's 5V and GND pins, respectively.Connect the RS232 adapter's TX to the Arduino's RX, and the RS232 adapter's RX to the Arduino's TX.
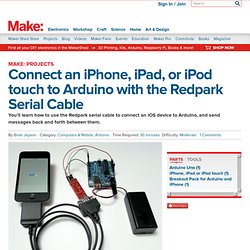
Step #2: Make sure you're set up for iOS development To develop apps for the iPhone, iPad, or iPod touch, you'll need to register as an iOS developer. Serial Cable - Redpack. These Redpark serial cables connect 30-pin iOS devices to RS-232 serial devices.
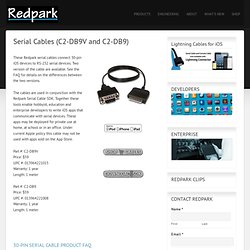
Two version of the cable are available. See the FAQ for details on the differences between the two versions. The cables are used in conjunction with the Redpark Serial Cable SDK. Together these tools enable hobbyist, education and enterprise developers to write iOS apps that communicate with serial devices. These apps may be deployed for private use at home, at school or in an office. Part #: C2-DB9V Price: $59 UPC #: 013964221015 Warranty: 1 year Length: 1 meter. µLCD-32PTU - 4D Intelligent Display Modules. 3.2" TFT Intelligent Display (Double Click to Add Contents) The uLCD-32PTU is a compact and cost effective Intelligent Display Module packed with plenty of features, ready to become the GUI for your target application, and capable of being an interface controller for a number of applications.
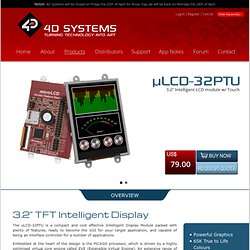
Embedded at the heart of the design is the PICASO processor, which is driven by a highly optimised virtual core engine called EVE (Extensible Virtual Engine). An extensive range of hardware and software peripherals have been integrated into the design, to give the user freedom to adapt the module to suit almost any application. The uLCD-32PTU is an elegant combination of a 3.2" (240x320) LCD Screen, audio amplifier and speaker, micro-SD card connector, Lithium Battery Support, along with a group of general purpose input/output pins (GPIO's), including I2C and serial COMMS. Afficheur TFT couleur "uLCD-32PT" (SGC) Ce petit module est un écran TFTcouleur 3,2" 240 x 320 pixels avec dalle tactile, lequel est conçu pour être facilement piloté par l'intermédiaire de la plupart des microcontrôleurs dotés d'une liaison série (PIC©, AVR©, MSP430, 68HCS12, ARM™, etc...) ou par un module PICBASIC, un module CUBLOC, un module Arduino™... sa mise en oeuvre est très simple et ne requiert qu'une alimentation +5 V.
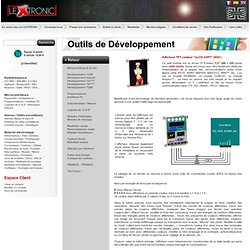
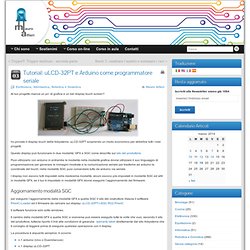
L'interface se fait au moyen d'une communication série (TX / RX / Reset / +5Vcc / Masse). Arduino + uLCD-32PT + DS1631. Tutorial: uLCD-32PT e Arduino come programmatore seriale - Mauro Alfieri Elettronica, Informatica, Robotica e Domotica. #if defined (__AVR_ATmega328P__) || defined (__AVR_ATmega2560__) // Arduino specific #include "WProgram.h" // — for Arduino 0023 #elif defined(__32MX320F128H__) || defined(__32MX795F512L__) // chipKIT specific #include "WProgram.h" #elif defined(__AVR_ATmega644P__) // Wiring specific #include "Wiring.h" #elif defined(__MSP430G2452__) || defined(__MSP430G2553__) || defined(__MSP430G2231__) // LaunchPad specific #include "Energia.h" #endif #include "Wire.h" #include "proxySerial.h" #include "Serial_LCD.h"
Montage accelero + ecran 128*64 + ARDUINO. Arduino TFT LCD Screen : Une écran officiel Arduino pour l’Espora et autre cartes Arduino. Arduino a annoncé également la sortie de sa carte support écran, l’Arduino TFT LCD Screen.
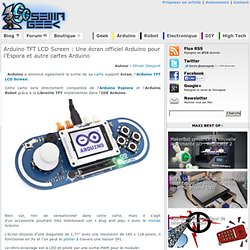
Cette carte sera directement compatible de l’Arduino Esplora et l’Arduino Robot grâce à la Librairie TFT implémentée dans l‘IDE Arduino. Bien sûr, rien de sensationnel dans cette carte, mais il s’agit d’un accessoire pourtant très intéressant car « plug and play » avec le monde Arduino. L’écran dispose d’une diagonale de 1,77″ avec une résolution de 160 x 128 pixels, il fonctionne en 5V et l’on peut le piloter à travers une liaison SPI. Le rétro-éclairage est à LED et piloté par une sortie PWM pour le moduler. A l’arrière de la carte, on retrouve un Slot micro-SD qui est accessible avec la librairie SD Card.
On niveau du tarif, il faudra compter environ 22,7€ TTC pour ce module. Did It Move? Detecting Motion with PIR. If anyone is having troubles with a PIR sensor you got from SparkFun please keep in mind: “The colors of the wires can vary greatly.

Looking at the unit from the top, the middle wire is ground, the left-most wire is the alarm, and the right-most is the power.” Proximity. PIR Motion Sensor. Description: This is a simple to use motion sensor.
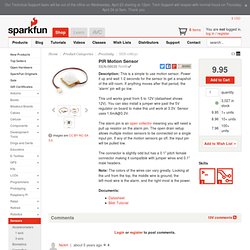
Power it up and wait 1-2 seconds for the sensor to get a snapshot of the still room. If anything moves after that period, the 'alarm' pin will go low. This unit works great from 5 to 12V (datasheet shows 12V). You can also install a jumper wire past the 5V regulator on board to make this unit work at 3.3V. Solaire pour Arduino. Gp2y0a21yk-library - Arduino library for the Sharp GP2Y0A21YK IR Distance sensor. Overview This project is a free initiative to create an Arduino library for the Sharp GP2Y0A21YK IR distance sensor. The main goal is to provide a library that simplifies the usage of this particular sensor in Arduino projects. Range: approx. 5 to 80 cm. GP2Y0A21YK Proximity sensor + LEDs. This sketch shows how to control Sharp GP2D12 and GP2Y0A21YK Distance sensors and use the detection range to switch on a series of 8 LED.
This is one of the most inexpensive ways to detect: presence of a person/object in the environment, continuously updateddistance of the person/object from the sensor Sharp produces a wide range of sensors detecting different ranges. You can find a list here. Arduino Yùn : Arduino, WIFI et Linux. SmARtDUINO – Do it yellow… - Wireless modules. PanStamps AVR are small wireless modules programmable from the Arduino IDE. Each module contains an Atmega328p MCU and a Texas Instruments CC1101 RF interface, providing the necessary connectivity and processing power to create autonomous low-power wireless motes.
Everything contained into a compact DIP-24 module. Figure 1: panStamps: miniaturized wireless modules Programming panStamps is a very simple task. BoardMini. Overview The Arduino Mini is a small microcontroller board originally based on the ATmega168, but now supplied with the 328. (datasheet), intended for use on breadboards and when space is at a premium. It has 14 digital input/output pins (of which 6 can be used as PWM outputs), 8 analog inputs, and a 16 MHz crystal oscillator. It can be programmed with the USB Serial adapter or other USB or RS232 to TTL serial adapter. Programmeur Arduino mini.
To get started with the Arduino Mini, follow the directions for the regular Arduino on your operating system (Windows, Mac OS X, Linux), with the following modifications: Connecting the Arduino Mini is a bit more complicated than a regular Arduino board (see below for instructions and photos). You need to select Arduino Mini from the Tools | Board menu of the Arduino environment. To upload a new sketch to the Arduino Mini, you need to press the reset button on the board immediately before pressing the upload button in the Arduino environment. Information about the Arduino Mini The microcontroller (an ATmega328) on the Arduino Mini is a physically smaller version of the chip on the USB Arduino boards, with the following small difference:
Module convertisseur USB. Module "Arduino Mini" (version 05) Le module "Arduino Mini" V05 bénéficie d'une refonte totale de son implantation et de la présence d'un circuit de RESET (avec un bouton-poussoir subminiature). Ce dernier est très apprécié de part ses faibles dimensions assosicées à ses nombreuses possibilités. Il est architecturée autour d'un microcontrôleur ATmega328 cadensé à 16 MHz.
Ses entrées/sorties sont accessibles sur 2 rangées de 12 connecteurs mâles au pas de 2,54 mm. Le module pourra s'interfacer avec votre ordinateur au moyen d'un convertisseur "USB <> Série" optionel (via des connexions prévues à cet effet - Voir modèle en option en bas de page). ATtiny85 Trinket. Trinket may be small, but do not be fooled by its size! It's a tiny microcontroller board, built around the Atmel ATtiny85, a little chip with a lot of power. We wanted to design a microcontroller board that was small enough to fit into any project, and low cost enough to use without hesitation. Perfect for when you don't want to give up your expensive dev-board and you aren't willing to take apart the project you worked so hard to design.
It's our lowest-cost arduino-IDE programmable board! The Attiny85 is a fun processor because despite being so small, it has 8K of flash, and 5 I/O pins, including analog inputs and PWM 'analog' outputs. ATtiny85 sans boatloader. eLua - eluaproject. Boards - eLua Wiki. eLua was designed to be embedded in industrial equipment and custom designed products, bringing the full features of the Lua language to the embedded development world. Often, the best way to develop such products is to prototype on off-the-shelf development kits, based on the chosen MCU and with the on board features you expect to have on your final applications.
You can thus develop the software, while the hardware team designs, builds and test the hardware platform. Kits are also a great way to learn and teach embedded software techniques and can sometimes be used in final applications, like many of the applications found in our Projects page. As a result of the easy, modular and highly portable architecture of eLua and the community-collaborative nature of our development, we have a fast growing list of supported development boards. Specific platform-dependent instructions on how to use eLua on each of them is included on the links below. Mbed LPC1768. Éditions D-BookeR. STM32 Discovery. Proj-2011-2012-elua-arduino. Bluno - BLE with Arduino Uno. Hacking d’un diffuseur de parfum Air Wick avec un kit Arduino UNO. Pilotez les rideaux d'une maison avec Arduino. Surveiller sa boite aux lettres avec une Arduino. Blog réalisations Arduino. Send Raspberry Pi Data to COSM.
Self-Watering Plant. Voltage Regulator - 5V. Industrialiser Arduino. Projects With Ryan Slaugh: Custom Proto Shield. The Ultimate Protoshield for Arduino and Netduino -The MakerShield! Projects with Ryan Slaugh: Making Your Own Proto Shield. Atmega Programming with USBtinyISP and Arduino. How to program a AVR (arduino) with another arduino. 18 : Construire une sonde de température radio pour 7€