
6-Pocket Mini Pocketbook I’m sure that many of you, like me, are on an eternal quest for organization. I know I’m not alone in finding the Container Store’s promise of a perfect, organized life utterly seductive. But here’s the thing…I don’t really like purging, I love my stuff. Therefore I also love pretty things in which to stash my stuff, so I get to enjoy my fantasy of being organized and contained. This tutorial is about helping you stay organized, in a quick, easy, and super-cute way. the pattern …is only four rectangles. the body is 7.25″ tall.the large pocket is 5.5″ tallthe medium pocket is 4.25″ tallthe small pocket is 3″ tall materials needed I chose a vintage cotton canvas for the body in a bright retro floral, and quilting weight cotton in a matching color for the interior. You’ll also need a button and a bit of elastic for the closure, and a bit of ribbon for the pen. I used two layers of mid-weight interfacing on the body to give it some heft. start with the pockets 1. 2. the closure 3. 4. 6. 7.
Dragon dress: Garden Part 3 PLUS TUTE! Finally. My Dragon dress!!!! I can't say how much I love this dress. I saw the fabric at the fabric store and knew I had to make a dress. I love the shape of the skirt I wore it to a friends memorial because it reminded me of him and it was a huge hit. Tute:Fabric: I used three yards and had some left over...I'm 6'0 so most people will need a bit less.Zipper: Whatever length you feel comfortable with. *To start measure from your waist (bellybutton or smallest part of your torso) to about how long you want the skirt of your dress to be and add an inch. Fold in half and snip the parts that are a little uneven so you have a nice looking slope. This is the basic shape you want to cut out for the dress top. Measure the widest part of your bust and cut your piece that long. Here are the first set of darts. Close up. The second set of darts. This is around what the new shape should look like after both sets of darts on either side. Find the center of the skirt and the top and the back. Sew across.
Receipt/ Coupon Organizer Tutorial My sister asked for a small pocket organizer to keep receipts in for Christmas. I knew I could get a basic one from an office supply store, but all that boring black plastic seemed like it needed some fancifying. After checking out some examples on the internet, this seemed like something I could handle. I think you could too, if this is something that would help keep your life both fancy and organized, so here’s how I did it. Materials: A piece of fabric cut to cover the outside of your organizer – mine was a legal size, so it was 10.5″ by 18 3/4″ (you only need to add seam allowance to the bottom edget of the fabric i.e. make your fabric piece about 1/2 inch longer than it needs to be) Wide bias tape long enough to go around the outside edges – mine was about 60″. First, turn under and sew a seam across the bottom edge of your fabric piece. Using a heavy needle on your sewing machine, stitch the bias tape to the organizer. Then, when you’re done, this is what you’ll have.
The Spiky Hedgehog Purse I really am in “spiky” fever these few days after making the Triangle Fold Coaster. I transformed those “spikies” into 2 hedgehog purses, which I have named Bluno and Reddy. They measure only about 10cm x 9cm. Bluno is a male hedgehog and Reddy is a female. Photographing them was not an easy task as compared with my previous crafts. . ? that we watch in National Geography. I downloaded the hedgehog pattern from LollyChops (I am a big fan of Lolly) a few months ago and kept in my craft “library” since I know that it will inspire me to come up with something that is my own…. More to come???? Well…. am I going to continue with the unfinished story of them….. shhhh it is a secret!!!! Special thanks to Sumay who assisted me in narrating the story. Get all updates via email: Highlights from Our Partners
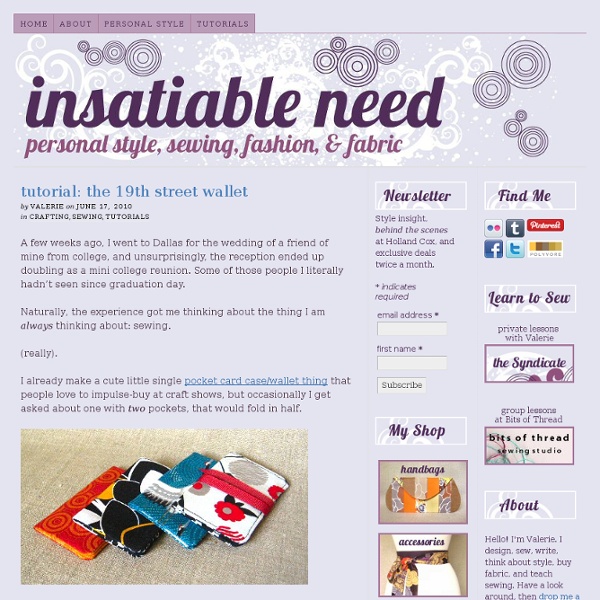
Sew a simple backpack Click here for a larger photo of the finished backpack. Cut pieces of cotton fabric as per diagram, below. Measurements are in cm, 1cm seam allowances included. Pin and stitch flaps together, curving stitching at lower edge, and trim. Turn right side out and press. Press down 1cm on to wrong side on long edges of loop and straps. Pin and stitch bag at side edges, leaving a 3cm gap in stitching 5cm below top edge. Stitch base to bottom of bag, trimming ends of base into curves to fit bag. Cotton fabric from Cath Kidston (0845 026 2440). You might also like... Find more bags to sew for every occasion - from shopping to nights out Find all of our fabulous fashion makes here See all of our free sewing projects here Zipper Card Pouch Have you ever had too many cards that your wallet can handle? Be selective and get only those cards that you might be using in a particular shopping mall but end up they were the wrong one? Or, may be just forgot to “update” the cards in the wallet on your next trip? Can’t find the cards you thought you have already put into your wallet? Sounds familiar….. If you are nodding your head now, you need a pouch for the cards just like me. I am not a big fan of big wallet, with the increasing numbers of cards that I have, my decent size wallet is no longer able to buckle up. This zipper pouch can hold up to 30 plastic cards (similar to credit cards), and more for thinner cards, business calling card for example. Get the pattern and tutorial to sew one yourself after the jump and don’t have to struggle with the cards anymore. {Get pattern and tutorial on next page.} Pages: 1 2 Get all updates via email: Highlights from Our Partners
Purse Organizer Insert With Adjustable Dividers This is a last minute sewing project just before my departure to Taiwan, a purse organizer insert with adjustable divider for my camera and belongings during the traveling. Actually, I can just buy a ready-made camera bag from the store, but I find them a little bulky. Well, because they give better protection with all the padded sponge which is good, the drawback of being excessively padded is that it can only offer limited storage space with it size. If I am going to put my camera, lenses & accessories, maps, passport, water tumbler, purse, scarf, cardigan and other necessities for a day-trip out, I will need quite a big camera bag to cater. After thinking thoroughly, I need to design something good for a bag to keep everything in place, organized, yet light-weight and with some degree of protection during the traveling. Due to the photography equipment I need to carry through-out my 6-day trip, a lighter bag is a must so that it won’t add more burden to my shoulder. Pages: 1 2
Quick fix grocery bag We had grapes this weekend. So? They were really good. Seedless white grapes and they came in one of those plastic bags, with cuts all over to make it stretchy. Hours after we had the grapes, while in the kitchen, my eye fell upon the plastic bag again. I found a shirt - an old favorite but hopelessly stained one (bleach* near the bottom hem). In case you want to give this super fast and easy grocery bag a try as well, keep on reading as I wrote down some instructions for you. What you need: - an old T-shirt- scissors- matching thread- a button- a piece of ribbon- sewing machine Instructions: 1. 2. 3. 4. 5. 6. 7. 8. 9. 10. Take one sleeve and cut to size, such that the folded bag fits inside the sleeve (make sure to add seam allowance). As with all of my tutorials, please note, this tutorial is intended for personal use only. * the bleach stains ended up the in hem and one of the boxed corners!!
Little Betty Bag: Free Pattern & Tutorial I am so excited with how this little bag turned out! I have made five now, each time being able to prefect the pattern a little more, and it’s finally ready to release for your sewing pleasure. The style is a cross body, which is a personal favorite of mine. It’s fun to sew, and the possibilities for variation are endless. There are many variations that can be made to this bag, but I will let you use your imagination for those, and just go over the steps for the bag I made. Save on ink when printing! If you are new to sewing I have a Sewing Tips Directory that might come in handy. Fabric requirements: A half a yard total is more than enough to make the bag body. A heavier fabric works best, like a canvas, twill, or anything that has a sturdy weight. Supplies: all your sewing stuffchain for strap – I like to use chain found in the jewelry making supplies at my craft store – they are more comfortableD-rings or something similar. Preparing the Pattern and Fabric Cuts: Bag Assembly: