
Chain or Coptic Stitch Bookbinding Tutorial Here’s another method of binding your book with an open spine…a chain stitch or also called coptic stitch binding. This is a great method for when you have book covers that are individual boards instead of completely wrapped around the entire journal. You are basically binding all the signatures and covers together with a connected stitch that holds everything together tightly, but with super flexibility. The pages will open up completely flat and that’s a big reason why this method is so popular. From a materials standpoint, you’ll need your cover boards and paper signatures to go inside. The first thing I do is to cover my cover boards with the decorative paper. Then I stuck them on the boards, cutting the corners at a diagonal so that it’ll fold over nicely without too much bulk on the corners. You just smooth down one corner and make sure everything is flat without bubbles and continuing securing the other sides. Then I use the cover as my guide to punch holes in all my signatures.
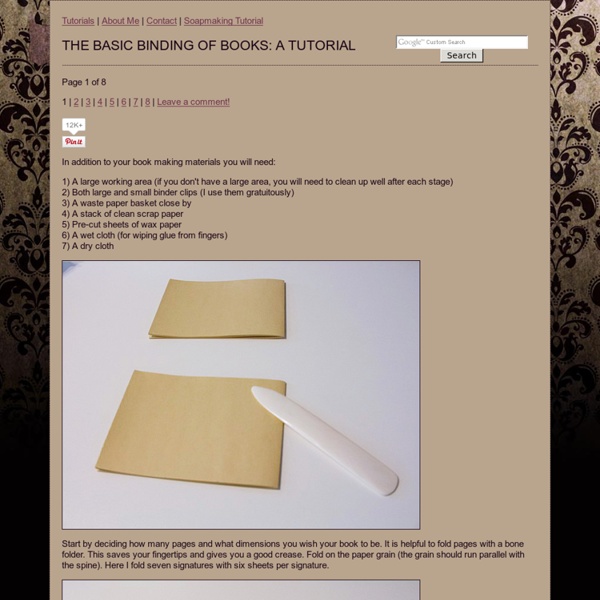
journals | curiously crafty. welcome to the wonderful world of journalling! i promise, if i can make one then you can too. the following instructions will make a journal that is 5 3/4″ x 4 1/2″. (view more journals here) Materials: 60 – 70lb. paper (i use 20 sheets per journal) one sheet of white paper for the cover guide, cut to 5 3/4″ x 9 1/2″ decorative paper for end papers (I used scrapbook paper: you will need 2 papers that measure 5 1/2″ x 8 1/2″ each)cardboard covers are 5 3/4″ x 4 1/4″ eachspine is 5 3/4″ x (width of pages; to be discussed later)fabric (1/2″ wider than cover guide on all edges)pencilscissorsgluewax paperclothespins/paperclipsrulersewing needlestrong thread (you can buy bookmaking thread, or just use hand-quilting thread)bone folder (*optional)awl (*optional) Part 1: Sewing the pages Cut pages in half, leaving you with 40 – 8 1/2″ x 5 1/2″ papers. 2. Each group becomes a signature. 3. You can now cut the spine cover at this width. 4. 5. 6. 7. 8. Allow this to dry for at least 1/2 hour. 7. tada!
10 Awesome Free Tools To Make Infographics Advertisement Who can resist a colourful, thoughtful venn diagram anyway? In terms of blogging success, infographics are far more likely to be shared than your average blog post. This means more eyeballs on your important information, more people rallying for your cause, more backlinks and more visits to your blog. In short, a quality infographic done well could be what your blog needs right now. Designing An Infographic Some great tips for designing infographics: Keep it simple! Ideas for infographic formats include: Timelines;Flow charts;Annotated maps;Graphs;Venn diagrams;Size comparisons;Showing familiar objects or similar size or value. Here are some great tutorials on infographic creation: Creating Your Infographic Plan and research.If required, use free software to create simple graphs and visualisations of data.Use vector graphic software to bring these visualisations into the one graphic. Free Online Tools For Creating Infographics Stat Planet Hohli Creately New York Times Many Eyes Wordle
Tacket binding - CaiLun.info - Artist Books Paper & Bookbinding Blog - Cai Lun - Dennis Yuen I have always loved tacket binding, because its sasuage-like packing on the spine is so cute. I have just finished one for my co-worker's boyfriend, Todd, and I think I might have perfected my tacket binding skill so it's about time to share it as much as possible. I have been devising my own tacket binding method, as I haven't actually seen one physically to deconstruct and examine its construction. Pierce 4 holes for every single tacket pattern. Each section is stitched individually with 1 single thread. Pull the thread out from A2 to the outside and you're ready to create the tacket pattern on the top "backbone". Pull the thread out from B2 to the outside to beging packing the lower pattern. A few tips on wrapping: At the end I attached a bright red ribbon to finish the book, however, it didn't work for me so I decided against it and switched to another one, which I will post next.
Cool Infographics - Blog Longstitch Bookbinding Tutorial for a Leather Journal The most common type of sewn bookbinding that I often default to, falls into the category of longstitch binding. It’s really a general categorization for many different methods of sewn binding. People have invented their own patterns and techniques and have probably called it something else as well. Suffice to say, it’s a general way to denote sewing your paper to the cover of your book. I’m sure you’ve noticed journals out there with exposed sewing in the binding in a variety of patterns and designs. The materials for this project include leather, paper, thread, needle, an awl and cutting device of some sort. Regarding the thread, I’m using a natural linen thread in this example, but you can also use waxed thread sold specifically for bookbinding to prevent knotting up when sewing. Regarding my little awl, I use it to punch holes in the paper. Let me first explain how I made my leather cover, although you can do this with any other type of material. Pretty cool, huh? Related Posts:
Linear Perspective: Filippo Brunelleschi's Experiment An introduction to Filippo Brunelleschi's experiment regarding linear perspective, c. 1420, in front of the Baptistry in Florence Speakers: Dr. Beth Harris and Dr. Steven Zucker Brunelleschi and the Rediscovery of Linear Perspective Before looking at painting in the Early Renaissance, we need to learn about the discovery or rediscovery of linear perspective sometime close to 1420 by Filippo Brunelleschi (rediscovery, because the ancient Greeks and Romans may have understood linear perspective too, but if so, knowledge of it was lost during the Middle Ages). Linear perspective is a way of creating a convincing, perfect illusion of space on a flat or two-dimensional surface. Diagram of the main elements of linear perspective—horizon line, vanishing point, and orthogonals.
A Beautiful Mess: SCRAPBOOK I always stumble upon beautiful handkerchiefs at antique malls, but with no practical use for them I usually pass them by. But today I will be sharing how to turn those pretty hankies into a photo-a-day journal. This is a great project to commemorate the last of your summer days! You could an instant camera or print off Instagram photos! You'll Need: Vintage handkerchief, sewing machine, book pages or other paper, embroidery thread, letter stickers, Instant photos or other printed photographs. 1. Now fill up your pages with a photo-a-day project. I decided to keep my book simple and date each photo with a White Dymo pen underneath each photo. Museum Box Homepage
composition book cover to make this cover you will need:*strips of varying widths with at least 16 inches in length.*2 rectangles of muslin cut out to 5 1/4 by 11inches*one long rectangle with the measurement of 25 by 11 inches*one button*one elastic hair band. first get you a boring looking composition book measure your composition book. mine was 10 in length and when i measured from one end of the cover to the other end, it turned out to be 15 inches in width. cut strips with at least 16 inches in length and i varied my widths because i wanted it to look a little wonky...you will want to make your strips come out to at least the width of 11 inches total when sewed together. sew your strips and press them flat with an iron. trim sown your middle section to 15 1/2 by 11 inches next i used one of my daughters hair ties. and placed it in the middle just like the picture above (on the left side, because this will be your back side) pin it down. sew to the left and right of your strips the muslin blocks.
21st Century Literacies: Tools for Reading the World In Intelligence Reframed Howard Gardner contends that "literacies, skills, and disciplines ought to be pursued as tools that allow us to enhance our understanding of important questions, topics, and themes." Today's readers become literate by learning to read the words and symbols in today's world and its antecedents. They analyze, compare, evaluate and interpret multiple representations from a variety of disciplines and subjects, including texts, photographs, artwork, and data. Basic Language Literacy Visual Literacy Spatial Literacy Three Information Literacy Questions to Ask About a Map: Handout Historical Literacy Cultural Literacy Information Literacy Political Literacy and News Media Literacy Scientific Literacy Mathematical Literacy
WOPE – HTML5 Multi Screen Framework – Enterprise Edition